
Recent weeks and months have seen more than a smattering of forum comments across the web that Canon’s Digital Photo Professional software does a better job than Adobe Lightroom when converting RAW files. Not being one to take these things at face value I decided to test this for myself (FOMO) and put the latest version of Adobe Lightroom Classic (LRC) version 10.3 head-to-head against Canons latest DPP software (DPP), version 4.15. As you will read below, the results were quite enlightening.
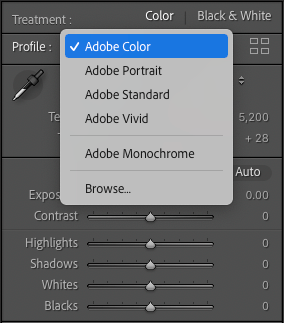
Camera Profiles and Picture Styles: All of my testing was done with Canon EOS 1DX MK3 files (since that is my primary camera that I shoot the majority of my photographs with). Results will vary from camera model to camera model; so I suggest you test this yourself if you are shooting something other than a 1DX MK3. Before we go any further though, it is important to understand that RAW files in Adobe Lightroom Classic have a camera profile attached to them that determines how the colours are rendered and thus how they look on screen. The profile you select has a significant impact on the colour rendering you will see. You can test this easily yourself in the Develop module by selecting different profiles and watching the colour rendering change as you shift between profiles. Adobe provides quite a few different profiles to choose from and you can of course make your own. The profiles Adobe provides are created by its engineers using sample cameras supplied to them by the camera manufacturers. If you have an X-Rite colour checker passport and the time and patience then you can create camera profiles for your specific camera in different lighting situations, import them into Lightroom and have something custom to your camera and lighting conditions. Honestly, I almost never bother to create my own profile as I am constantly photographing outdoors in different lighting conditions and it just isn’t necessary or meaningful. What is necessary though in a comparison between LRC and DPP is transparency on what profile was used in LRC and for all these tests I used ‘Adobe Color’ (which is the default) profile.
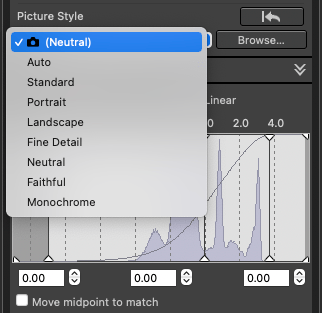
In Canon’s Digital Photo Professional software camera profiles are not used and instead DPP applies what Canon call ‘Picture Styles’. Picture Styles have a very similar effect on colour as Adobes camera profiles and shifting between Picture Styles significantly alters the colour rendering on screen (hue, luminance and saturation are all affected). For all these tests I used the Neutral Picture style; since this is the same picture style I apply to my RAW files in the 1DX MK3 camera. My choice of Neutral provides the most accurate histogram on the back of the camera; hence it is my preference.
White Balance: White balance is also a big factor in the colour rendering in both LRC and DPP. I like to shoot in Auto white balance and then tweak it later in post production, so for this test I left the setting to ‘as-shot’ in both LRC and DPP. Just as an aside, I find the Auto white balance setting in the 1DX MK3 to be about as good as I have ever seen in a camera. I rarely need to do more than tweak the white balance and gently season to taste.
Default Values: The next caveat to note is that both LRC and DPP have certain default values that they apply to the RAW file. In LRC Adobe set a default sharpening value of 40 with a Radius of 1 and a Detail of 25. LRC applies no Luminance noise reduction by default, but does apply 25 points of colour noise reduction. By comparison DPP sets no default sharpening, but does automatically apply a varying level of noise reduction that is ISO dependant. In order to make the playing field as level as possible when comparing RAW file renderings it is necessary to manually set all these values to zero. I have seen many forum comments that LRC RAW conversions are far noisier than DPP and the above explains why. DPP is applying ISO specific noise reduction by default, where as LRC is applying no luminance noise reduction and only a small amount (25) of colour noise reduction. Of course, in LRC you can set up an ISO specific noise reduction pre-set for your specific camera if you wish to take the time to do so. This is not something I have done to date, but I am considering taking the time to create a series of pre-sets for this specific to the 1DX MK3.
Colour Space and a Level Playing Field: By now you should be getting the distinct impression that it is quite difficult to level the playing field when making direct comparisons between LRC and DPP. Even with all of the above checked and set things are not wholly equal as LRC and DPP effectively operate in different colour spaces. LRC effectively operates in the Pro Photo Colour Space and DPP uses Wide Gamut RGB. These colour spaces are similar but are not the same. Wide Gamut RGB is slightly smaller than Pro Photo; although it is unlikely you would ever see any differences in real world applications when switching between the two. Nevertheless, there is a distinction and it is important to note that the playing field is not entirely level. Yes, it would be possible to set DPP to Adobe RGB and to output Adobe RGB from LRC but since I like to operate in the largest colour space possible it seems counter productive to use a smaller space.
Once all of the default settings in LRC and DPP have been neutralised and returned to zero a comparison can be made between the RAW renderings. To do this I exported a 16 Bit 300 DPI Tiff file from both LRC and DPP and then opened them up side-by-side in Adobe Photoshop to visually compare them. The LRC Tiff was exported in Pro Photo Colour Space and the DPP Tiff in Wide Gamut RGB. Of course, I checked my working space in Adobe Photoshop to ensure no contamination or profile conversion.
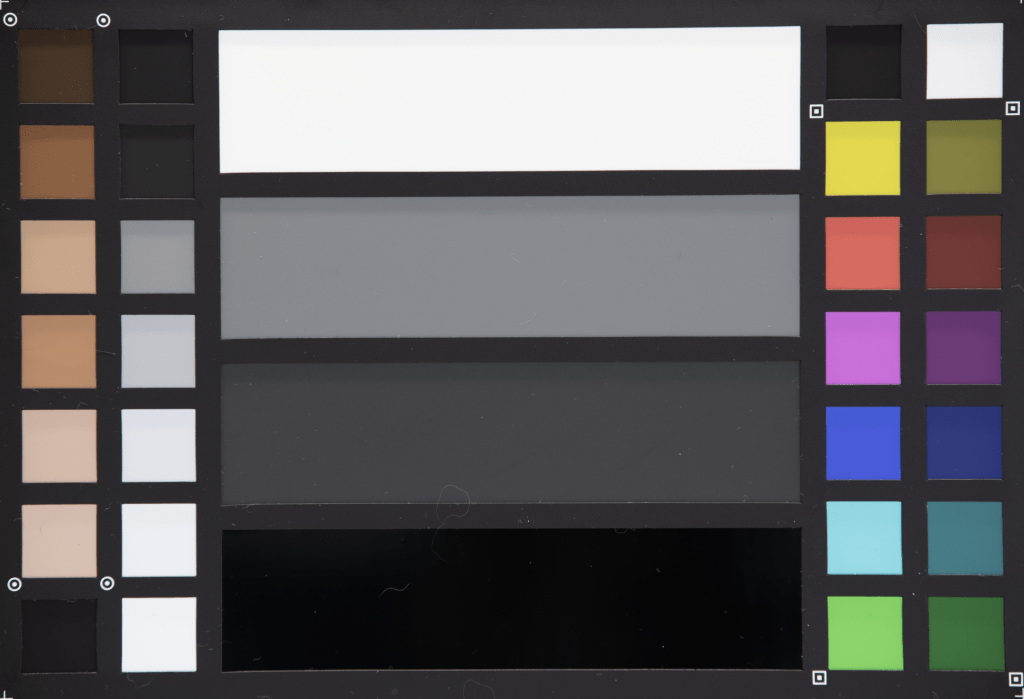
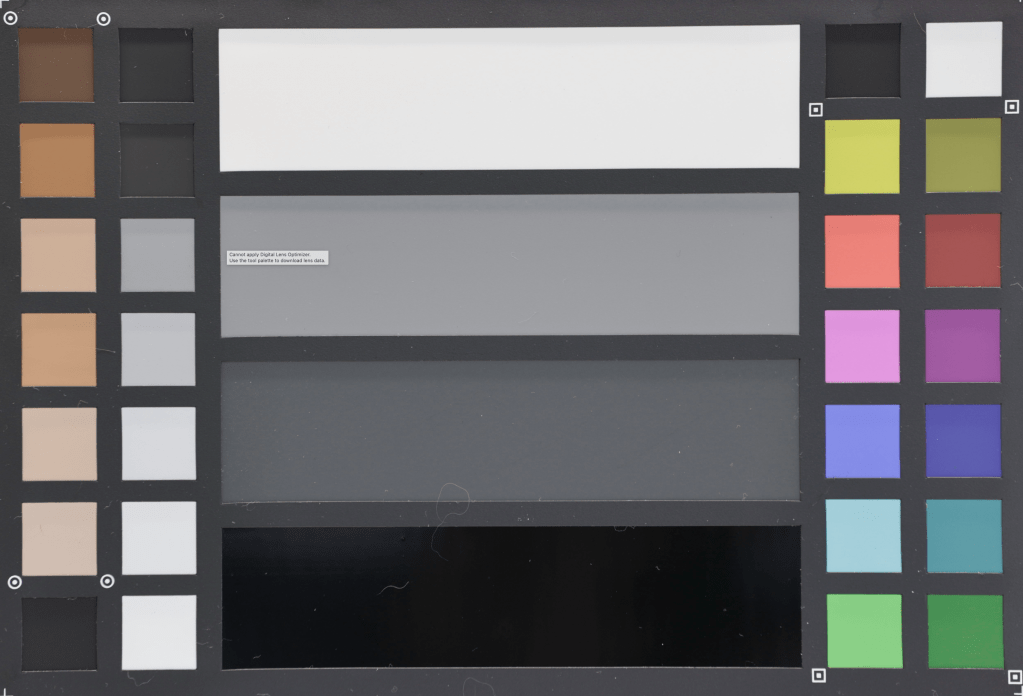
Colour Renderings: The first thing to note is that there are significant differences in colour between the RAW renderings. These differences can be directly attributed to the camera profile in LRC and the picture style in DPP. Wether one is better than another is totally subjective, but what is important is that they are different and can be altered simply through the selection of a different camera profile or picture style. If you don’t like one result, simply change the profile or picture style and you will have a different rendering. Trying to judge if one rendering is better is simply impossible because you can always change the profile or picture style for a different result. In blind tests its absolutely impossible to pick which is which without knowing which colour profile or picture style was applied.
Even the jpeg screen shots below show the clear differences in colour renderings between LRC and DPP with Adobe Color profile and DPP Neutral Picture Style. Changing the LRC Profile or the DPP Picture Style will vary the results again.
Sharpness and Noise: Since comparing colour renderings is a waste of time the only thing left to compare between the LRC and DPP RAW renderings is noise and sharpness. Before we make those comparisons though it should be noted that both Noise Reduction and Sharpening are interlinked and affect each other (thats why they appear together in the Detail panel of LRC). In the digital arena noise reduction works by effectively softening the image. By contrast, sharpening works by darkening the dark side of an edge and lightening the light side. The radius determines how many pixels either side of that edge get darkened or lightened and the combination of amount and radius increases the perceived sharpness. Sharpening an image therefore adds noise to a photograph where as applying noise reduction effectively softens it. This is why a photograph that has had meaningful noise reduction applied to it will need more sharpening than one that did not require noise reduction.
Just as an aside, if you are wondering what the Detail slider does in LRC then you are probably not alone as its one of the most miss-understood tools in the Develop module. Effectively the detail slider in LRC is both a halo suppression tool and a sort of deconvolution sharpening. At its default setting of 25 it is acting as halo suppression. Halos are the white jaggies you see on edges from over sharpening. However, as you ramp up the slider it starts to act more as a form of deconvolution sharpening much like the de-blur tool in Adobe Photoshop.
Before I talk about the results it should be noted that there is no point trying to show the results visually in this post as any resizing of the photographs and conversion to jpeg reduces noise and thus visually distorts the results. If you want to see the results yourself you will have to take the time to test it yourself. Otherwise read on for a discussion of the results.
Rendering out an ISO12800 file from DPP without resetting the noise reduction to zero shows a marked difference in noise compared to the rendered LRC file. The DPP file looks a lot better! Keep in mind though, DPP is applying ISO specific noise reduction and LRC is applying no luminance noise reduction by default (only 25 points of colour noise reduction). Once you reset both the the DPP Noise values to zero and the LRC values to zero the differences between the two rendered files are negligible. It is necessary to go to 200% magnification to see any differences and even then any difference is a quibble at best. Leaving the DPP ISO specific noise reduction at its default and applying appropriate noise reduction to the LRC rendering results in a very similar result. Depending on how much noise reduction you apply you can actually make the two look virtually identical (even at 200% magnification).
Conclusion: The take-away and conclusion from the comparison between LRC and DPP is that at default (without changing anything) DPP does a much better job than LRC on noisy RAW files because it applies significant ISO specific noise reduction. However, once you level the playing field and re-set DPP’s ISO specific noise reduction to zero (or apply appropriate noise reduction in LRC) then there is no meaningful difference between the two RAW converters. In other words, it doesn’t make any difference which RAW converter you choose to use, provided you understand when and how to set the knobs and dials. And in fact, once you start to twist those knobs and dials all bets are off as either RAW converter can be made to look better than the other.
Workflow: So which should you use; LRC or DPP? Quite honestly, it took me less than a minute in DPP to realise that the clunky workflow it offers compared to LRC simply does not work for me. I also found DPP much slower than LRC which quite surprised me. Adobe has worked wonders with the speed of LRC in recent updates and although it still is not as fast as the industry reference Photo Mechanic, it is now certainly fast enough. Ultimately, which RAW converter you choose to use should come down to your workflow preference for managing, cataloging and processing your RAW files. Whichever one you choose you absolutely must make sure you learn how to set your noise reduction and sharpness settings optimally and that is the key take away from this comparison – educating yourself on how best to apply noise reduction and sharpening will yield you far better results than worrying wether one RAW converter is better than another. Likewise, understanding that camera profiles and picture styles are the fundamental factor in colour rendering is far more important than worrying wether you should process your RAW file in LRC or DPP.

Josh, presently there are no Canon R5 profiles in Lightroom and Canon R5 files display in Lightroom unusably noisy, except for very low ISOs. The only recourse, other than DPP, is initial processing with DxO PureRaw, On1 NoNoise, or Topaz Denoise AI. The good news is the results at high ISOs are stunning.
LikeLike
Dan, do you want to drop box me a R5 file and I will do some testing?
LikeLike
Josh, that would be great. I’ll send now.
Dan
LikeLike
I have spent some time this morning comparing the RAW renderings from LR and DPP for the Canon R5. I think the reason you feel the DPP renderings are better is that DPP is applying several settings by default including the following:
Sharpness Unsharp Mask 5.0, Finess 2.0, Threshold 3.0 as well as Noise Reduction Luminance Noise 5.3 and Colour Noise 5.3. This makes a very big difference. Lens corrections are also being applied automatically by DPP and this is also a huge factor. Once these are reset to zero – the DPP rendering is basically identical to the LR rendering. Alternatively, if I set all these things optimally in LR it looks the same as DPP by default.
Additionally, camera profiles for the R5 are available in the latest version of LR Classic. You can choose from Adobe Colour, Adobe Portrait, Adobe Standard etc.
Hope that helps.. reach out if any queries at all.
LikeLike
Josh, thanks very much for this further detail. I’ll try your findings on my end.
About profiles, I was referring to .CR3 camera matching profiles, which as far as I know are not yet available from Adobe (https://feedback.photoshop.com/conversations/camera-raw-and-dng/camera-rawlightroom-classic-support-for-cr3-cameramatching-profiles/5f5f46284b561a3d4276dc71).
That is why have started preprocessing the .CR3 files to .DNG with DxO PureRAW or ON1 NoNoise in Lightroom or (and) using Capture One, which does have R5-optimized profiles.
LikeLike
Hi Dan, yes you are correct on camera matching profiles. It would appear Adobe has abandoned these. But you can make your own if required.
LikeLike