
In the later half of last year I reviewed Eizo’s brand new, superb CG-318 4k Resolution Graphics Display for Photographers and Graphic Design Professionals and gave it my highest recommendation. The Eizo represents the state of the art in graphics display for working professionals but comes with a fairly significant price barrier to entry. So what are your options if you are in the market for a high quality Adobe RGB monitor on a more family friendly budget?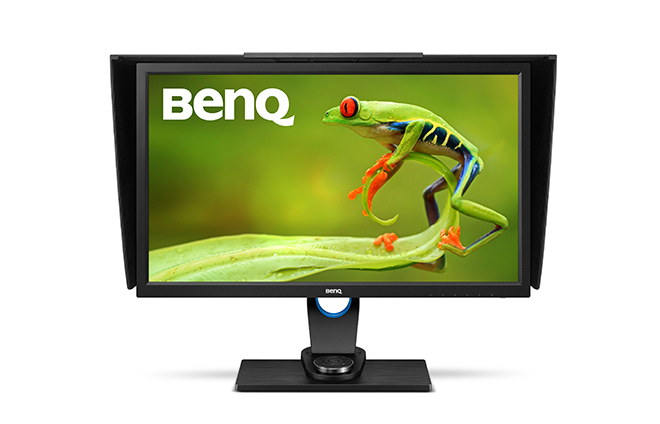 Enter, BenQ who now have a solution for photographers on more modest budgets in the form of the SW2700PT 27″ Adobe RGB Monitor. The monitor has an MSRP of just $690 USD (about $900 AUD in Australia if you shop around) which for the sake of a price only comparison is close to ten times cheaper than the Eizo CG-318. Realistically however, there is no direct comparison between these two displays – the Eizo is a bespoke Ferrari and by comparison the BenQ a modest family car. Any direct comparisons are therefore irrelevant outside of the exceptional performance of the Eizo and the exceptional value for money of the BenQ. I will however make a number of references to the differences throughout this review. Be aware however, that these are vastly different monitors at very different price points. I suspect the decision of which one to choose may well be heavily dependant on your budget and needs (probably in that order).
The BenQ SW2700PT is a 27″ monitor with a QHD native resolution of 2560 x 1440 pixels (that resolution in a 27″ monitor equates to 109 pixels per inch). It is a true 10 bit display producing more than one billion colors, with a 16:9 aspect ratio and covers an impressive 99% of the Adobe RGB Color Space. The benefits of a 10 bit display are often misunderstood, but in short a 10 bit display enables smooth shading and color transitions and very smooth tonal gradations.  Key Features
- 27”W 2560×1440 QHD Resolution
- 99% Adobe RGB with IPS technology
- Hardware Calibration with accuracy color
- Palette Master Element color calibration software
- Black-and-White photo mode
- Shading Hood / OSD controller
I have been working with the new BenQ SW2700PT over the last couple of weeks as the primary Graphics display for processing and printing my photographs. The BenQ monitor is supplied well packed and out of the box requires some assembly of the stand and connection of the display to the stand. Assembly is easy and only takes a few minutes (no tools required). The instructions are clear and easy to follow, although I do recommend you assemble the display on a flat clean table using a blanket or something soft to prevent any scratches. The back of the monitor also has a VESA standard mount with 100mm pattern, allowing the installation of a wall mount bracket if required. I was also pleased to see the addition of a carry handle for moving the monitor around. There is also some minimal cable management in the form of a hole to thread cable through the stand.
As well as the monitor and stand BenQ also provide an individual calibration certificate that shows how the display tested before it left the factory. This certificate is not as detailed as that supplied with the more expensive Eizo CG-318 (nor is it hand signed), but it has all of the information one is likely to want or need. Personally, I like to receive a certificate like this that my monitor has been personally checked by a real person and not just a machine. I was pleased to see the BenQ also includes a hood shade in the box. The hood shade requires assembly and is simply clipped together in a few moments. A nice addition is a small hatch in the hood to enable the calibration device cable to be fed through for easy calibration of the screen without having to remove the hood. The supplied display hood is a nice addition that helps keep stray light from falling on the screen. Whilst the screen itself exhibits quite low reflectance. Once assembled, the monitor is plug and play and requires no software for immediate use (you do need software to access the hardware calibration features). I plugged it into my 2013 MacBook Pro via the display port and was up and running in just a few minutes. A DVI-DL/miniDP to DP/USB 3.0(1.8m) cable is also included in the box.
The BenQ has a good range of connectivity options that should fit most users requirements. It is nice to see that USB3 is supported as well as HDMI. There is also an inbuilt SD Card reader. I personally don’t find much use for an inbuilt SD card reader, but your mileage may vary depending on your workflow. Likewise, the headphone jack seems a bit superfluous to me on a monitor designed for graphics professionals, but it could serve a purpose in open plan work areas.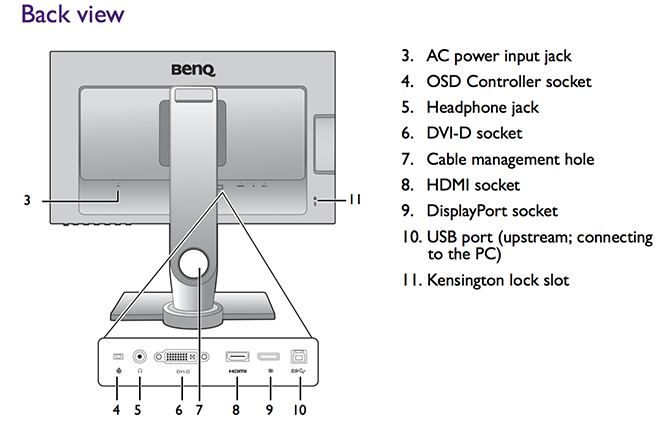 Like the Eizo, the BenQ SW2700PT is a hardware calibration equiped monitor. Hardware calibration allows you to adjust the monitor’s image processing chip without changing graphics card output data. Calibration keeps images consistent with originals without being affected by graphic card settings. Two monitor preset modes allow calibration results to be saved directly into the monitor. As discussed in the review on the Eizo CG-318, this is a significant advantage over software only calibration solutions and should be one of the primary considerations when purchasing a display for high end graphics applications.
Wide gamut displays such as the BenQ SW2700PT have the capability of displaying a much wider range of colour than the vast majority of computer displays. Most consumer displays will display colours close to that approximating the SRGB colour space. SRGB is a very small colour space and the default colour space of the internet. It is for all intent and purpose the lowest common denominator in the colour space world. Wide Gamut monitors have the capability of displaying a much wider range of colour (more saturated colours) and typically come close to approximating the Adobe RGB colour space. What this all means in real world terms is the reproduction of much deeper more saturated colours. This enables better rendition of colour tones and better gradation in colour. For image processing and printing this is a key advantage and for photographers is critical to achieving the best possible results. Here in my own studio my wide format Canon printers are capable of producing colours that greatly exceed the SRGB Colour Space (and in some areas even the Adobe RGB Colour Space). The BenQ is capable of rendering these colours on screen and thus I can ensure my images are optimally processed for final print without guess work or test prints.
The BenQ is equiped with a 14-bit 3D Look Up Table (LUT) which improves RGB color blending accuracy for color reproduction. It is also equiped with an “OSD Controller”. The OSD controller is a remote controller that comes with three preset buttons each set up with a customized display setting such as Adobe RGB, sRGB and Black and White mode. This enables easy switching between presets without going through complicated settings. The OSD Controller also comes with a button for quick OSD navigation and settings. My initial impressions of this OSD controller were a bit gimmicky. However, in practical use I actually found this quite useful for soft proofing images for the web in SRGB. Black and white photographers will likely also love this capability with the dedicated Black and White mode. With a simple click of a button, you can preview color photos in black-and-white before adding effects or having to do any post production work.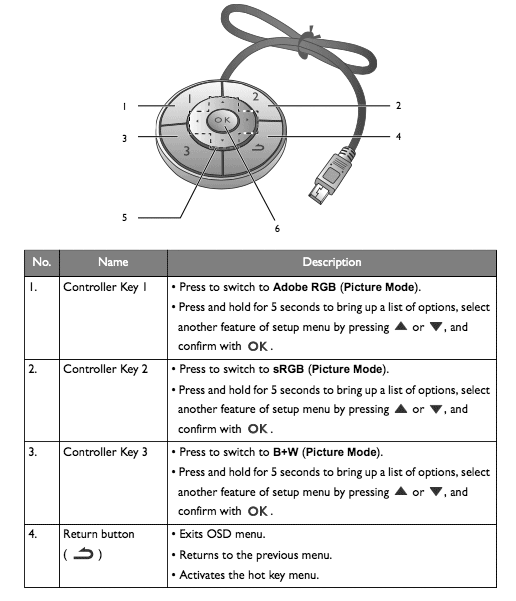 In terms of both sheer colour range and accuracy of colour reproduction, the BenQ’s performance is excellent. Testing shows superb SRGB performance and approximately 99% of the Adobe RGB gamut range is successfully displayed. The much larger Adobe RGB space is much harder to reproduce and most monitors don’t reach even 80% of it. At this price point the BenQ sets a new standard in my experience.
Being able to produce all of those colours is not very useful unless a monitor can do it accurately – and here the BenQ also offers very good performance. The measurement of accuracy is referred to as the ‘Delta-E’. In short, the bigger the number, the more inaccurate the monitor is. My own testing shows the BenQ’s average Delta-E to be a very respectable 0.75 and the maximum was 1.59. Whilst not as incredible as the Eizo CG-318 this is nonetheless excellent performance in a display at this price point and considerably better than many other consumer displays (including Apple’s iMacs).
The colour gamut advantage of displays such as the BenQ are the most commonly known advantage over more typical computer displays for graphics professionals. However, there is another key advantage worth mentioning; which is uniformity. Uniformity refers to the displays ability to maintain even brightness and contrast from one side of the panel to another. The more uniform the brightness the more ‘paper-like’ the appearance of the screen, the easier it is on the eyes and from a photography perspective the easier it is to judge tone and contrast in a given area of an image. Uniformity is extremely important in the reproduction of fine art prints since it ensures an even contrast ratio across the monitor.
Even uniformity is difficult to achieve in back-lit monitors and is often one of the first things you notice in a poor quality display. Monitors that are brightest in the middle and fall off in the corners are common place and are a very poor choice for creative professionals working with digital images. Uniformity can easily be measured and in my own tests I find just under a stop of difference across the face of the display from corner to corner when calibrated to 80 Candelas in my studio. Again, this is excellent performance in a monitor at this price point. It is worth noting that out of the box the default settings for the monitor are set to ‘retina burn-in mode’. I suggest calibrating the brightness setting to something more realistic for your environment.
PALETTE MASTER ELEMENT SOFTWARE
To really get the best from this monitor you need to take some time to properly calibrate and profile the display. The best way to do this is to use the supplied Palette Master Element software which can be download directly from BenQ’s website. A clear how to users guide is also available for download.
The supplied software offers options for both a basic and advanced calibration depending on your needs. Either option is quite intuitive and users should have no problem successfully calibrating their display by following the on screen prompts. Once calibrated and validated the software presents the user with a validation report on the calibration.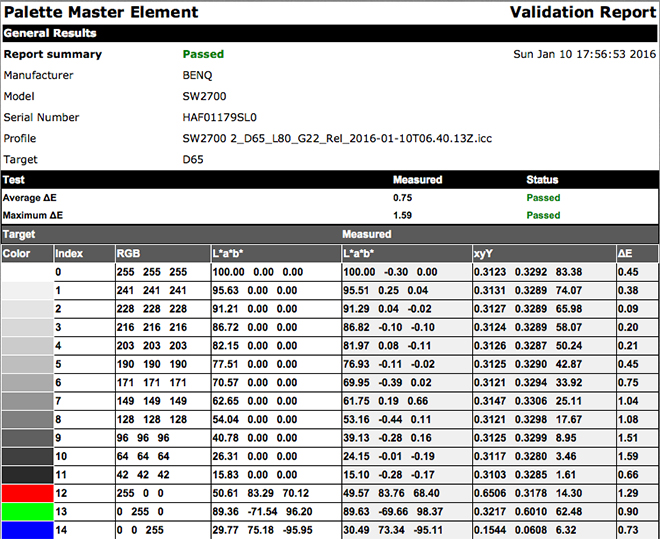
Unlike the Eizo CG318 the BenQ SW2700PT does not include an inbuilt calibration device and requires an external instrument to calibrate the display. For the purpose of this review I used the X-Rite i1 Display colorimeter to calibrate the display (although the Spyder model 5 colorimeters are also supported). A colorimeter is an additional piece of equipment at additional cost, but really is necessary if you are going to get this display to perform at its best. To be honest, I am somewhat spoilt these days with the inbuilt calibration of the Eizo and I find it a bit of a hassle to dig out the colorimeter on a regular basis.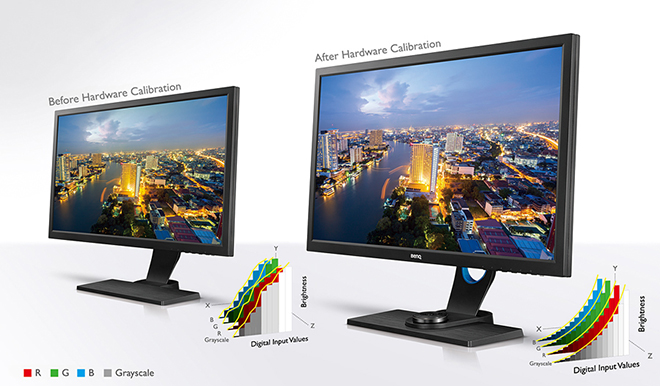 REAL WORLD USE
In my review of the Eizo I wrote about the incredible resolution of a true 4K DCI compliant display and those conclusions still hold for me in my studio. Whilst the BenQ SW2700PT cannot compete in the resolution stakes with the CG-318 it does offer text of a more legible size which will I feel appeal to a great many photographers who will likely also use this monitor for email and web browsing as well as image processing. The BenQ also looks a little soft by comparison to the Eizo in side by side comparisons and clearly suffers from its lower resolution in this regard. A fairer comparison would be to compare the BenQ to my previous NEC monitor of the same resolution and in this instance the BenQ offers superb performance.
My daily use for a monitor such as the BenQ involves the editing, post production and printing of digital files in Adobe Lightroom and Adobe Photoshop Creative Cloud. I also use applications such as in-Design, Premiere Pro and other image related programs and plug ins. On the whole most of my time is in the majority spent in Lightroom and Photoshop and thus this is the area that my comments are most related.
Images in Lightroom (and Photoshop) are well rendered on the BenQ. Clarity and resolution are truly excellent in a monitor of this price point. The colour rendition is excellent and when combined with the very good uniformity the BenQ offers it is extremely easy to judge tone and contrast when processing RAW files. For soft proofing images for print the BenQ again offers excellent performance at this price point.
BenQ’s Palette Master Element Software is easy to set up, install and use and is strongly recommended to get the very best from this display.
CONCLUSION
The BenQ is a well built, high quality display that is easy to assemble, install and use via its display connectivity options. The quality of the image is excellent with very good uniformity and color accuracy that falls short of the much more expensive Eizo CG318; but far exceeds the average display. It needs to be said that the performance offered by the BenQ at this price point is nothing short of exceptional and that you are unlikely to notice the color accuracy and uniformity differences between these displays in all but the most demanding of workflows. Like the Eizo, I would have preferred the HDMI connection on the BenQ to be V.2 rather than 1.4 for future connectivity, but I suspect most users will opt for the display port in any case so this is a minor nit pick.
At an MSRP of $690 USD the BenQ should be number one on your list if you are after a high quality AdobeRGB monitor on a budget. The monitor offers exceptional performance for its price and all will likely meet your needs for a high resolution Adobe RGB display. The monitor comes with a limited three year warranty. Highly Recommended.
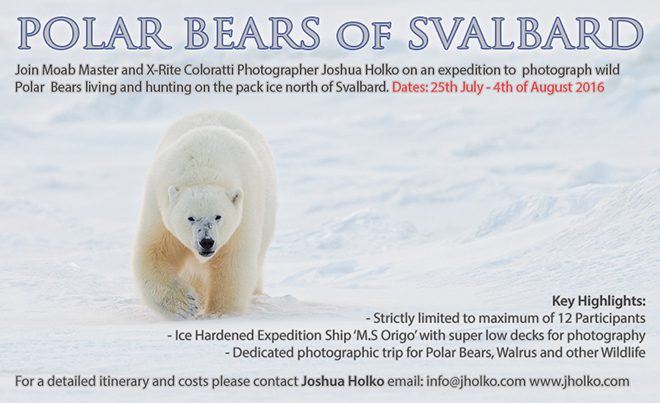 This expedition has been designed from the ground up to provide the very best possible opportunities to Photograph Polar Bears in their natural environment. With the reduction in Arctic sea ice the Polar Bears in Svalbard are dwindling in number and the number of years left to photograph them is unfortunately now extremely limited. Late July and August are the ideal times to photograph Polar Bears north of Svalbard due to the dwindling ice around the archipelago. On this expedition we will be carrying a naturalist/biologist who specialises in locating Polar Bears and an expedition leader and captain who have years of experience in placing us in the ideal position to make the best photographs. Their expertise will allow us to approach the king of the Arctic as closely and safely as possible and make incredible photographs under the spectacular midnight sun.
 Our intention is to sail directly north from the small town of Longyearbyen in Svalbard to approximately 80 degrees North to the very edge of the permanent pack ice. At our northerly most point we will likely be less than 600 miles from the North Pole.
 We will be using the ice hardened expedition ship M.S Origo which will enable us to skirt the edge of the pack ice searching for and photographing Polar Bears. M.S Origo is widely regarded as the best ship in the Arctic for Polar Bear Photography and has been my ship of choice for this expedition for the past three years. With its super low decks we can photograph at eye level with wild Polar Bears. Our expedition ship is also equipped with sufficient zodiacs and crew for all photographers to be shooting simultaneously with plenty of room to spare for camera equipment – So bring what you need! On this expedition we will also likely photograph Walrus, Seals, Whales, Arctic Foxes and the many Arctic sea birds including the rare and angelic Ivory Gull. To get an idea of the sort of wildlife photographs you can take on this expedition please visit the

 I also gave away more than a dozen fine art prints over the course of the year that have gone around the world and that have found their way onto the walls of homes and offices. The chance to give something back in 2015 has been something I have very much enjoyed and the feedback I have received from those who have won a print throughout the year has been incredibly fulfilling. I would very much like to continue this series going forward, but due to a very heavy travel schedule next year I will just not have time to regularly make and send out the prints. I will return to this print giveaway at a future date however.
 After Yellowstone Daniel Bergmann and I ran our annual Winter Iceland workshop (
 After Iceland I travelled to Svalbard where I participated in a small group snow mobile expedition for Polar bears and other wildlife in the winter landscape of Svalbard. This exploratory expedition resulted in some remarkable photographs and is something I hope to repeat early in 2017. I will also have a new offering in 2017 to photograph from small ship in the middle of winter – Details to come soon.
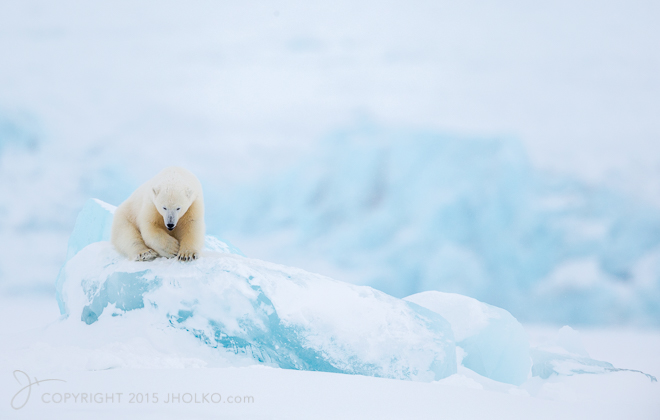 After Svalbard I returned to Iceland and continued work on my Arctic Fox Project. I am getting close to completing the project now and hope to finish the project in 2016.
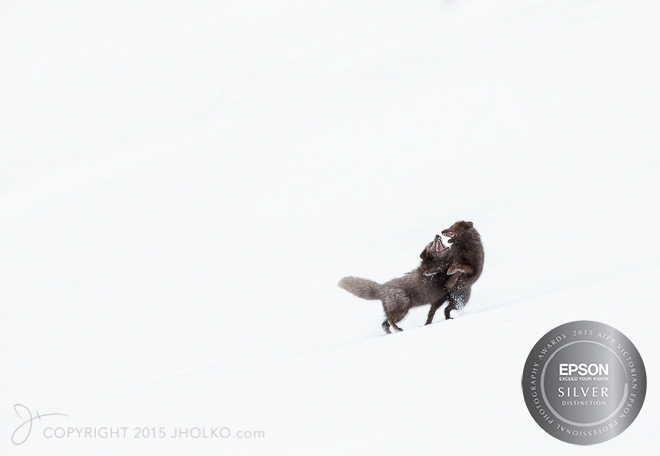 After Iceland, I ran my annual two week New Zealand South Island workshop which saw us circumnavigate the South Island via private 4-wheel drives and that included significant helicopter time over the spectacular southern Alps as well as the Teanu region. We visited Milford Sound, Queenstown, Fox Glacier, Mount Cook and a great many other off the beaten track locations during the workshop. We also visited the now very popular Moraki boulders area where I was able to make this image that for me really captures the essence of these amazing rocks. (
 After a short break, I then travelled back to Svalbard for my Wild Polar Bears expedition (
 After the Falklands I travelled to Punta Arenas in Chile where I boarded a Soviet Ilyushin jet (The Russian equivalent of an American Hercules) and flew down to Union Glacier in Antarctica where we landed on a naturally occurring blue ice runway just 500 nautical miles from the South Pole. The purpose of this scouting trip was in preparation for the Emperor Penguin expedition next year. This was a truly remarkable experience and I will have a lot more to say about this experience in future posts.
 I then lead one final expedition to the Antarctic peninsula to finish up the 2015 year before arriving home two days before Christmas. All up I led a total of ten separate international workshops and expeditions in 2015 spread across the globe (not including some local private workshops to the Great Ocean Road as well as one-on-one Print workshops). A brief count tallies up more than thirty five international plane rides and well over thirty thousand exposures (wish they were all keepers!) and a lot more than thirty hours of lost sleep. It was a fantastic year and I just want to thank all of you who I was fortunate to meet, travel and photograph with throughout the year. It was real privilege to share in such remarkable destinations with so many fantastic photographers – thank you.
 After the Weddell Sea I will travel directly to Iceland where I will spend ten days in the remote north working on my project on the Arctic Fox. This will be my third year working on this project and I hope to gather the final images from this trip and complete the project in 2016. A portfolio of prints celebrating this remarkable animal will be available early in the new year, followed up by a book in the later part of 2016.
 After I finish in the north of Iceland I will lead my annual
  After Iceland I will travel to Lofoten in Norway where I will lead a brand new workshop for winter landscapes in this spectacular part of Norway. The Lofoten Islands have long been on my wish list to visit and photograph and I am very excited to be travelling to these spectacular islands in winter with a small group of photographers.
 After Lofoten I am heading straight to Namibia in Africa for a private small group overland safari. We are planning to visit a number of different areas for landscape photography including the ghost town of Kolmonskop as well as the incredible sand dunes of Sossusvlei and the salt pan of Dead Vlei. This safari has long been sold out, but due to a recent cancellation there is now one single place available. Please drop me an
  In May I am going to make the short hop across to the South Island of New Zealand to co-lead a
 In November 2016 I will travel deep into the interior of Antarctica where I will lead a small group on a dedicated expedition for photography of Emperor Penguins (Sold Out). This expedition has been several years in the planning and I am extremely excited to be taking a small group of passionate and dedicated photographers on this trip. The opportunities for photography in this incredibly remote part of Antarctica are nothing short of breath taking.
 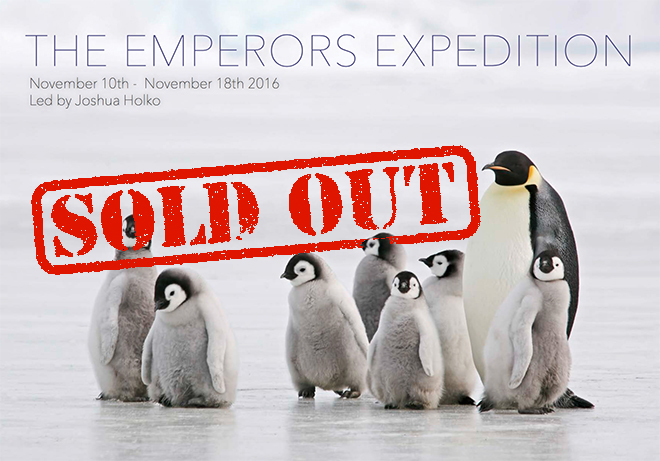 In late November I will travel to the Falkland Islands (our departure point) for a photographic expedition to South Georgia Island and Antarctica. Unlike the expedition I led in 2015; which visited only South Georgia, this expedition will also take us down to Antarctica. Its going to be a very busy and hectic year and I am keen to make a start in Antarctica in the Weddell Sea in just a few weeks time.