Tomorrow I will be presenting a one hour online webinar on behalf of BenQ monitors on how to shoot the best wildlife photographs. The webinar is completely FREE and will include topics such as how to photograph Wildlife, best practice, the importance of colour calibration and even a little information on soft proofing for print. There will also be a Q&A session at the end of the presentation. The webinar will run February 17th 6:30pm Melbourne Australia time.
Join us with Joshua Holko on this live webinar where he shares his knowledge and experience on how to shoot the best wildlife photography, soft proofing for print, why calibration and colour accuracy matters, there’s also a chance for you to ask him any questions you may have at the end! Looking forward to everyone’s attendance!
A significant revelation in wildlife photography came to me back in the film days when I was shooting 35mm transparency (Fujifilm Velvia and Provia). I was photographing Australian wildlife in a Nature reserve in Healesville, Victoria for the second time in consecutive weeks. My first outing to the park had yielded just a handful of mediocre photographs that I was mostly very dissatisfied with. Many of my exposures were off, the lighting was harsh and the animals were just too stagnant in the frame. Importantly the images that were well exposed were cluttered and busy and not at all like I had envisaged. Of course, in my minds eye, every photograph as I clicked the shutter was going to be perfect. Well exposed, with a beautiful soft, clean background that leant itself to the sort of thing I was used to seeing grace the cover of many photography magazines. And then, as I was taking a much needed coffee break, I had a revelation. In fact, I had several revelations.
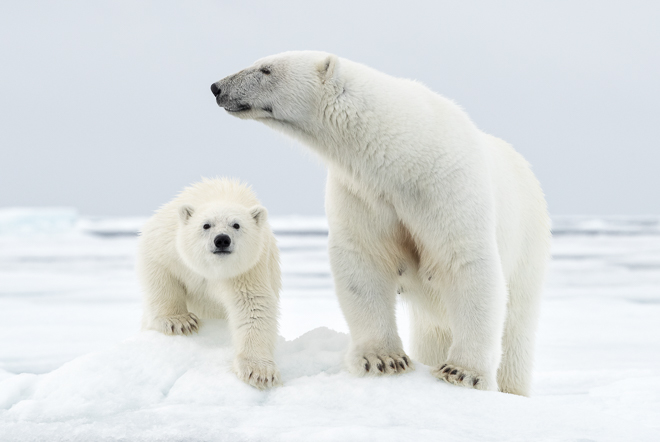
The first of these was that I realised the subject (animal) needed to be doing something interesting in the frame. A stagnant shot of a Koala just sitting in a tree was frankly, utterly banal. It is as boring as a Polar Bear standing still on the ice. It did not matter what focal length was used and it didn’t matter where the animal was positioned in the frame or how perfect the exposure and composition were. What mattered was that the animal was doing something that peaked the viewers interest. Many years later this became what I now describe as the three ‘F’s of wildlife photography. Make sure the animal is Feeding, Fighting or Fornicating.
The second revelation was understanding the importance of depth of field in relation to the subject. Typically, I was shooting with the lens significantly stopped down to ensure adequate depth of field. I was massively over shooting my numbers though and whilst I was guaranteeing myself of a sharp subject, I was also guaranteeing everything else in the background was pin sharp and failing to give myself any chance of isolating my subject from its background. Hence, many of my images were of subjects against highly cluttered busy backgrounds. These days, I tend to do the exact opposite and shoot my lenses either at their widest aperture, or very close to it. I also spend a lot of time actually choosing the background I am going to shoot against.
Both of these might seem quite obvious to the seasoned wildlife photographer (and both are second nature to me these days), but both remain areas I see a great many people making the same mistakes. Usually, in the excitement of the moment when the wildlife is located many photographers simply forget to consider these critical elements whey they are composing and preparing to press the shutter. In their eagerness to make sure they don’t miss a shot they end missing any chance of actually capturing a decent photograph.
My final revelation and the one I want to place the most emphasis on in this article was understanding the importance of background in relation to the subject. On many occasions just stepping a foot or two to one side of the initially chosen location will yield a far better photograph. In fact, these days I will often choose my background first and then wait for the wildlife to come into the frame. In the final result the background is as important as the subject. Without a suitable background the subject will become lost in the frame.
There are a lot of elements that need to come together to capture a great wildlife photograph. You need an evocative subject. To boot, the subject needs to be doing something interesting in good light. You also need to be in the right position to ensure the background is ideal and you need to ensure you are as close as possible to eye level with the subject. You have to put all that together in a cohesive manner to capture the critter in the context of its environment in such a way that you convey a sense of place in which the animal lives. Then on top of all that you need to ensure you have the technical aspects set appropriately. You need the ideal f-stop for the perfect depth of field in combination with an appropriate shutter speed. Of course, the ISO can be used as a third variable to help achieve both these numbers, but these decisions all need to happen in a split second before the action is missed. And they need to happen through muscle memory. The moment you have to switch your brain from being an artist to being a technician the moment is lost. Im short, there is a lot of artistic and technical elements that need to come together to ensure a fantastic photograph results.
Once the RAW photograph has been successfully captured and you are back in the studio then the final phase of a successful wildlife photograph begins – the post production. In general, if its a great wildlife photograph (capture) then generally there is very little required in the way of post production. A small tweak to exposure, white and black point, a correction to white balance and some capture sharpening are usually all that is required if the original capture was optimal. What counts in the post production is a colour critical monitor so that you can actually gauge the colours on screen. To this end, I am using a BenQ Sw321C 4k monitor in my studio that has been correctly calibrated. The monitor provides a huge Adobe RGB colour gamut and ensures the colour I am seeing on screen accurately reflect the colours captured in the original file.
One of the biggest mistakes I see from photographers once they are back in the studio occurs during the post production of their files and is almost always the result of working on a non calibrated display with a poor colour gamut. Irrespective of the brand of monitor you are using, you must calibrate the display to a known standard if you want to have any chance of setting the white balance accurately. Calibration is easy, and only takes a few moments, but is mission critical to the final result. The quality of the display does make a difference and is as important as the choice of camera and lens.
Over the last couple of weeks there have been several requests for my photograph of the Pallas Cat in Reeds from Mongolia in winter and I am pleased to say this has now beed added to my online store and can be ordered HERE. Limited to just 25 Prints in total and supplied with Certificate of Authenticity with security hologram.
Printed on the finest 100% cotton Canon Premium Fine Art Smooth Paper, each print is hand signed. Print is supplied unframed. Please contact me if you would like to know which print is next in the edition.
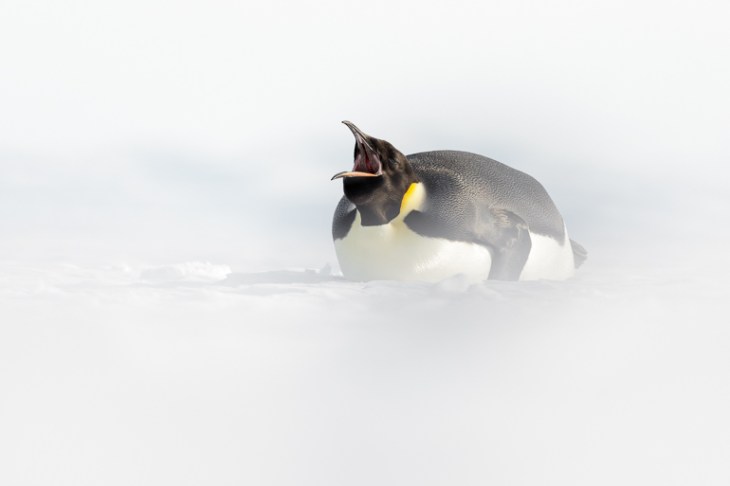
The photograph of the month for February 2021 comes from my last Emperor Penguin expedition to Gould Bay in Antarctica (I am really looking forward to returning in late 2022). One of the challenges with Emperor Penguin photography is being able to effectively isolate one or two penguins from the main colony (often easier said than done). As I have often quipped, Penguins have little respect for composition.
In this photograph, an isolated adult was in the process of feeding its young after returning from a fishing expedition. This was one of the photographs I was really hoping to capture during my last expedition. This is a moment that only lasts a few seconds and was something I made a very concerted effort to capture. Typically, one of the adults walks miles across the sea ice before spending its time fishing and subsequently returning to feed its chick. The actual feeding process lasts just a second or two before the other parent takes their turn to take the long walk across the sea ice to go fishing.