New Zealand South Island Summer Workshop Report

Late last week I returned home from a brand new Summer workshop to the South Island of New Zealand with my good friend Phillip Bartlett. Our workshop took us on a photographic journey into ‘Middle Earth’ – The spectacular South Island of New Zealand. In case you have not seen the Lord of the Rings movies, the South Island of New Zealand is home to some of the most spectacular scenery and landscapes in the world. It is no co-incidence that Peter Jackson chose the South Island of New Zealand to film the Hobbit and the Lord of the Rings movies. Perhaps nowhere else in the world can one see and photograph precipitous alpine mountains plunging into temperate rain forest and wild ocean beaches in so short a space. New Zealand is home to an incredibly diverse range of subject matter in a small island. Glaciers, waterfalls, spectacular valleys, imposing mountain ranges and black pebble beaches. It is an island of ever changing weather and spectacular light conditions. It is a country made for photography.

Our workshop took us on an eleven night / twelve day odyssey around the South Island to many of its iconic locations and some of its lesser known gems. During our travels we experienced some incredible weather and light as well as some fantastic landscape and wildlife photography opportunities. Two of the main highlights of this workshop included a privately chartered helicopter flight with the doors removed for photography over Fox and Franz Josef Glaciers and the awe inspiring Southern Alps and a privately chartered boat in Kaikoura to photograph Albatross and playful Dusky Dolphins. Both of these experiences were regarded by all on this trip as once in a lifetime and not to be missed. Included below is a brief summary of our travel and photography during our time in the South Island.

Day One – We began our workshop in Christchurch in two large 4-wheel drive vehicles that were to be our transport around the island for the next twelve days. One of the real benefits of travelling by 4-wheel drive instead of bus is the ability to get off the beaten path and into more remote locations and we certainly took advtange of this ability during our travels. Our first stop was Mount Cook on the East side of the Island where we photographed New Zealand’s tallest mountain against a sunset backdrop and some dramatic evening light and cloud.

Day Two – We rose early for Sunrise in the Tasman Valley  where we had wonderful views looking back up the river to Mount Cook. Sunrise in the Tasman Valley can be an incredible experience if the weather is co-operating and we were fortunate to have some beautiful pre-dawn light during our morning shoot. After our morning session and breakfast we took advantage of our 4-wheel drives off road capability and went off roading up to the terminal face of the Tasman Glaicer where we scaled one of the large lateral moraines for spectacular views across the glacier. We returned in the evening and photographed sunset at the edge of the lake at Tasman Glacier.

Day Three – Day three saw us depart Mount Cook before dawn and head south toward Queenstown. Along the way we stopped to photograph sunrise at Lake Pukaiki with some incredibly spectacular light – quite literally one of the most breathtaking sunrises I have ever exeperienced. The southern shore of Lake Pukaiki is a fantastic location for photography as the waterline is dotted with giant boulders that lie partially submerged and make for wonderful foreground subject. In the distance Mount Cook can be seen illuminated with Alpine Glow. We spent several hours in this location basking in the incredible light and conditions.

After breakfast we also stopped to photograph dramatic storm clouds at Ahuriri on our way to Queenstown. My thanks to my co-leader Phillip for spotting the clouds in his rear vision mirror! This area of New Zealand offers a myriad of photographic opportunities with dramatic cloud cover and we spent an hour photographing the racing clouds in this location. Midday is often a time for driving between locations and usually not the ideal time for landscape photography. Every once in a while however the clouds and light combine to provide fantastic midday landscape opportunities.

After our midday shooting session we continued to Queenstown where we photographed Lake Wakatipu against the backdrop of the spectacular Remarkables mountain range. Queenstown was also a chance to stock up on snacks and souvenirs for those who wished to take home some nick-nacks.

Day Four – We rose again well before sunrise and travelled south to Glenorchy for sunrise at the edge of Lake Wakatipu. This part of Lake Wakitpu is home to some small Willow trees set against the mountains and makes for a great location for landscape photography. After breakfast we headed off road again up to the Routeburn where we photographed the forest, waterfalls and mountains in misty cloud by the shore of the river. New Zealand’s rivers are spectacularly pure and clean and I spotted several wild trout swimming slowly against the current whilst photographing in this area. At sunset we photographed in Queenstown at the shore of Lake Wakatipu with the Remarkabes mountain range as our backdrop.

Day Five – We again headed off road in our 4-wheel drives to a high vantage point for sunrise known as Skipper’s Canyon. Skippers Canyon looks down a valley into rural farmland and is an opportunity to capture long shadows and low hanging cloud and fog in the valley below. We were fortunate to have a perfect morning for this type of landscape photography with low cloud and fog hugging the trees in the valley below us. After breakfast We travelled to Milford Sound, one of the icons of the South Island, and photographed the mountains at sunset by the shoreline in misty conditions.

Day Six – We photographed Milford Sound at Dawn and then took a boat cruise up the Sound where we photographed cloud swirling around the mountains and the waterfalls cascading down into the sound. Milford Sound is truly an amazing location with dramatic peaks that plunge for hundreds of metres into the water below. This entire area was once glaciated and the Sound is what now remains as a result of the glacier carving its way through the mountains. Milford sound has a great deal to offer in the way of Wildlife photography as well as landscape and I took this photograph of a white Heron whilst ankle deep in the inky black water near the shoreline (I did have to fight with the local and rather irritating sand flies to make this photograph!). After our cruise up Milford Sound we drove to Wanaka where we photographed another iconic New Zealand location – the Lone Willow tree.

Day Seven – Sunrise we photographed at lake Wanaka amongst the boulders in soft pastel light before driving to Fox Glacier. Fox Glacier is one of my favourite locations in the South Island. This small town boasts easy access to Fox Glacier and is the main hub for helicopter flights over the glaciers and alps. It also provides easy access to Gillespie’s beach where we had drizzly rain combined with dramatic cloud at sunset. The west coast beaches of New Zealand can be notoriously wild with their steep pebble beaches and large breaking waves. In this instance we were fortunate to have little in the way of wind and some dark brooding clouds that made for some very moody images.

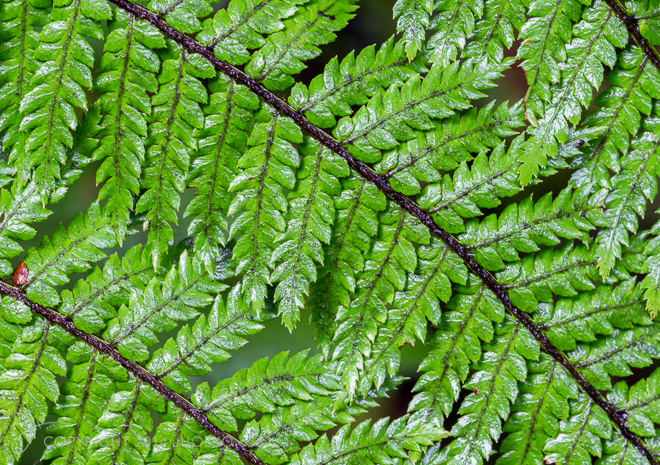
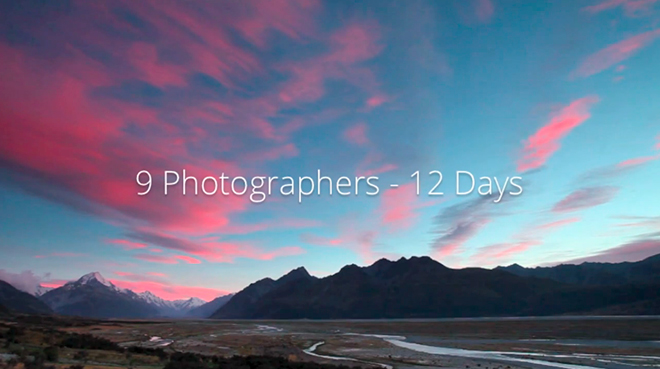
Day Eight – We took a pre-dawn hike to Lake Matheson for a viewpoint looking up to the Southern Alps. On a clear morning the southern alps can be seen reflected in the dark water of Lake Matheson and the well known viewpoint makes for an iconic photograph when conditions are right. After breakfast we photographed in the Goblin forest at the base of Fox Glacier. The forest at the base of the southern Alps is akin to a scene straight from the Lord of the Rings. The forest is full of old gnarled trees draped with vines and wonderful foliage. We took the opportunity to do some macro work for several hours under the dense canopy in misty rain. These sort of conditions are ideal for forest photography with the cloud over head acting as a giant softbox and the rain ensuring the greens of the forest are very saturated.Day Nine – We rose early and took a chartered helicopter flight with the doors removed for photography over the Southern Alps in spectacular conditions. We photographed Fox Glacier, Franz Josef Glacier, Mount Cook and Mount Tasman in fantastic conditions. We were blessed with swirling moody cloud and breaking light dancing amongst the ice formations and mountains.  Click on the image below to be taken to the RAW HD video footage from our aerial photography flight over the Southern Alps.
After our helicopter flight we drove north along the spectacular west coast to Punakaiki and photographed Pancake Rocks at Sunset. This location is one of the more easily accessed in the South Island and comprises of unusual layered pancake like rock formations that feature several blow holes. Large rolling swells crash against the rocks and throw spray high into the air that often catches the last golden rays of sunset.

Day Ten – We photographed sunrise at nearby Truman Beach in soft dawn pastel light before packing up and driving to the seaside town of Kaikoura on the East coast. We photographed at sunset on the rocks in the bay.

Day Eleven – Day eleven proved one of the real highlights of the trip as we took a private boat charter out to photograph Albatross and playful Dusky Dolphins at sunrise. We also discovered a sperm whale at first light and a few of us captured this magical moment before the whale sounded and was gone. Having our own private boat meant we had plenty of space for photography and we were able to move and follow the Albatross and Dolphins as we wished.After breakfast we spent time photographing Sea Lions and sea Lion pups on the rocks north of Kaikoura. These Sea Lions (often incorrectly referred to as seals) are quite approachable and as long as you don’t get closer than about fifteen feet they are quite comfortable to pose for photographs as they bask on the rocks in the sun. January and February are great times for photographing the sea lions as the more aggressive bull males have moved on and the pups are curious for all things and often approach quite closely to investigate.

Day Twelve – Saw us travelling from Kaikoura to Christchurch and completing our twelve day odyssey around the South Island.

The photographs above are just a very small sampling of the more than one thousand images I made during this workshop. As yet, I have not had time to sort, edit and process the vast majority and as I am leaving for Iceland in a few days for my annual winter workshop I will not have time to really devote to them until later this year. This was a very successful workshop and some fabulous photography resulted from all who participated. Our days were very long as we rose well before sunrise each morning and shot until after sunset each evening but we certainly made the most of all the locations we visited and opportunities that presented themselves to us.

Phillip and I will be leading another workshop to the South Island of New Zealand in May next year – May 2nd to May 13th 2015. This workshop will include even more aerial photography in privately chartered helicopters at areas including Milford Sound, Fjordlands and Fox Glacier and the Southern Alps. We will even be using helicopters to land us high in the Alps amongst the glacial seracs for a chance to set up our tripods and photograph these incredible formations as well as visiting and photographing areas inaccessible by 4-wheel drive. We will be limiting this workshop to just six photographers and It is going to be a very exciting trip. Look for details here on my blog and on my website in the coming months.

I will also be opening bookings in the next few days for my annual Winter Aurora workshop to Iceland with Daniel Bergmann in late February / early March next year. Our 2014 Winter workshop sold out in just a few days this year so if you would like to reserve a place or have any question about the trip please drop me an email at info@jholko.com.
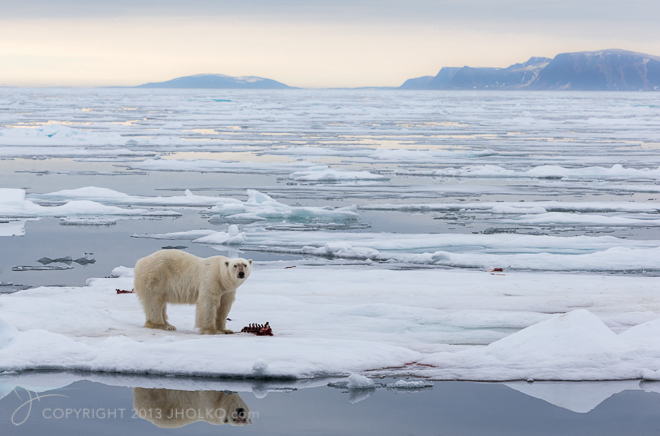
International Polar Bear Day

I just returned home two days ago from an incredible expedition workshop to the South Island of New Zealand and am still catching up on email and office work as well as drafting a blog post on our experiences in the South Island. However, I wanted to quickly acknowledge that today is actually International Polar Bear Day and that we all need to do our bit to reduce greenhouse emissions to help protect and preserve the environment for the world’s largest land carnivore – The miraculous Polar Bear. On International Polar Bear Day—or starting any day you choose—adjust your thermostat a few degrees (up or down, depending on where you live or the season) to show your commitment to greenhouse gas reductions. Make every day a Polar Bear Day by keeping your thermostat adjusted, insulating your home, or taking other steps to save energy. And if you need an added incentive then remember its cheaper to put on a sweater than crank up the heating. 

New Zealand South Island Experience and Victoria’s Great Ocean Road

In a few short days I am heading back to New Zealand for a workshop tour of the magnificent South Island with my friend Phillip Bartlett and our group of participants. The South Island of New Zealand is an incredible part of the world and boasts spectacular mountain alps which run down the spine of this amazing country. These mountains plunge almost straight into the sea on both sides of the country. It is the only place in the world I know of where alpine mountains plunge straight into temperate forest that directly hugs such a rugged and wild coastline. I was in the South Island of New Zealand only a few weeks ago completing a week long commercial assignment and I very pleased to be returning again so soon. On this trip we will be circumnavigating the South Island and taking in the best of its many iconic locations as well as visiting some of its hidden treasures and lesser known areas. We will be chartering a helicopter with doors removed for photography over the alps and enjoying a private boat charter for playful Dusky Dolphins and Sea Lions off the coast of Kaikoura. If you want to get an idea of what this tour is going to be like be sure to watch the short tester video below.

Packing for this trip is somewhat of a challenge for me as I am quite keen to take my newly acquired Canon 600mm F4L IS MKII Lens (why own it if you don’t intend to carry it) as well as the 200-400mm F4L Lens – for both Sea Lions, Dusky Dolphins and Albatross in and around Kaikoura. I plan to carry these two lenses to both Iceland and Namibia in March this year so this trip to New Zealand is an ideal opportunity to see how they travel together on international flights. These two lenses add up to a not insignificant amount of weight, but perhaps of more immediate concern is the sheer bulk and space they require inside the camera bag. With both of these lenses in my Gura Gear camera bags there is little room for much else. Nevertheless it never ceases to amaze me just how much gear can be squeezed into the Bataflae 32L bag. So, after some trial packing I will be carrying the following on this trip: (I know this is a ridiculous amount of equipment but I am a person who prefers to carry it and not need it rather than need it and not have it.) Just as a side addendum to this; I used to think I carried a lot of equipment, but then I worked with a video guy last year in the Arctic who redefined what it meant to carry a lot of gear!)

Gura Gear Bataflae 32L Camera Bag

  • Canon EOS 1DX
  • Canon EOS 1DS MKIII
  • Canon 600mm F4L IS MKII (Lens hood goes in the checked luggage bag)
  • Canon 70-200mm F2.8L IS MKII
  • Canon 24-70mm F2.8L MKII
  • Canon 24mm F3.5L TSE MKII
  • Canon 17mm F4L TSE
  • Canon 1.4 TC MKIII
  • LEE Filter System including Graduated ND filters and Polariser
  • Cable Release and other accessories

Gura Gear Chobe Camera Bag

  • 15″ MacBook Pro, back-up hard drive, card reader and accessories
  • Canon 200-400mm F4L IS with inbuilt 1.4 TC (incredibly this does fit in the Chobe!)

North Face Rolling Thunder Duffle *

  • Clothes and Personal Items
  • Really Right Stuff Tripod, BallHead and Jobu Gimbal Mount

* I really like the North Face Rolling Thunder Duffle as a travel bag. It is extraordinarily tough and copes very well with the rigours and violence that checked luggage is exposed to (I really have no idea what baggage handlers do behind the scenes but I am sure it involves some sort of contact sport with people’s luggage). The only downside to this bag is it weighs eleven pounds or five kilograms empty. On flights with a 20 kilogram luggage limit that is one quarter of the limit before you start putting things like clothes in it. Thankfully many of the airlines I travel with these days have more reasonable 25 to 30 kilogram luggage limits and I can usually get close enough to these limits to avoid excess luggage charges.

Victoria – The Great Ocean Road

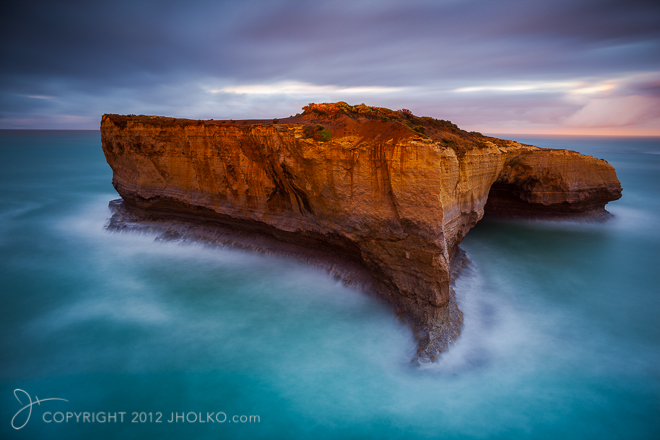
Just before I depart for New Zealand later this week I will be leading a private three day trip down Victoria’s spectacular Great Ocean Road. The Great Ocean Road is home to some iconic Victorian scenery including the Twelve Apostles, London Bridge, The Wreck Coast and more. It has been nearly a year since I last photographed this part of Victoria and I am looking forward to spending a few days in the field in my home state and sharing these amazing locations with my first time visitors. I am offering further one-on-one private workshops here in Victoria by appointment and based around my existing travel schedule both this year and next for anyone who would like to experience the best of this part of Victoria. Please contact me to discuss timing, cost and availability if you are coming to Australia in the near future.

A Polar Photography Experience Video Interview and Outtakes

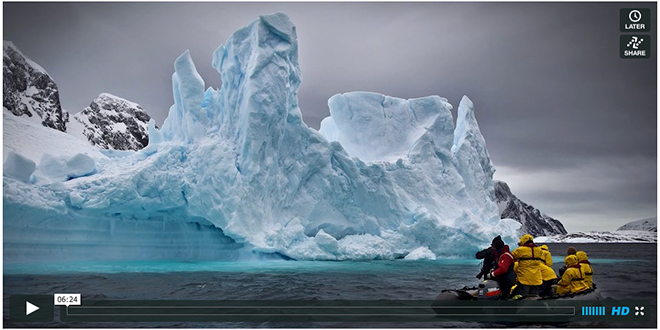
Late last year I released a short movie I produced in conjunction with Untitled Film Works in the Arctic on what it was like to travel on a dedicated photographic expedition to the Polar regions – A Joshua Holko Photography Polar Experience Video. This video was a huge amount of fun to produce and work on with the crew from Untitled Film works. During the filming we were fortunate to experience and capture some truly spectacular sights including an incredible free standing iceberg collapse amongst some incredible landscape and wildlife experiences. The video was shot on a combination of a RED Epic Cinema Camera and a couple of Canon 1DC 4K Cinema Cameras. Audio for the film was recorded separately by a dedicated sound person. The entire movie was shot over a two week period in the Arctic using our ship ‘Polar Pioneer’ as a base of operations. We departed from Iceland in August and sailed across the Denmark Strait to Greenland where we explored the many fjords before we sailed across to Svalbard and docked in Longyearbyen. If you have not seen the movie click on the image below to watch it in full high definition.

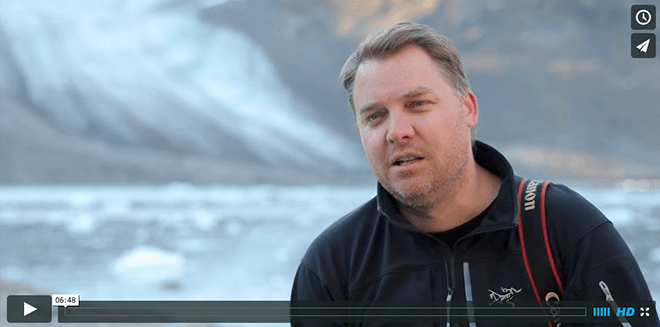
One of the really enjoyable things for me during the production was the video interview we shot high in the Arctic near the calving face of one of Svalbard’s glaciers. The full interview includes all of the final cut footage included in the film as well as all of the outtakes, stumbles and slips that are a part of video production and interviews. The full unedited interview is included below. Enjoy – And remember its outtakes as well!Equipment for this Project

Since the release of this video I have had a few emails asking me specifically what equipment was used to produce this film. So I am including below a list of hardware we took to the Arctic and utilised for the production of this movie.  All of the editing and post production work was completed by Untitled Film Works at their studio in Sydney and a number of different software programs were used depending on wether the footage in question was shot with the RED Epic or the Canon 1DC cameras.  The RED Epic RAW footage requires different grading to the motion jpeg produced in the Canon 1DC cameras and so it was necessary to process them separately before combing the footage in the final edit. The entire project was however shot in 4K resolution and much of it was also shot in very high frame rate on the RED Epic.

Camera for this project included:

  • Red Epic 5K Cinema Camera for high frame rate slow motion footage in 4k resolution
  • Canon 1DC 4K Cinema Cameras x 2
  • Canon 1DX Camera (behind the scenes)
  • Canon 5D MK3 Cameras x 2 (behind the scenes)
  • Several Go Pro Cameras were also used for filming but none of the footage was included in the final cut

Lenses for this project included:

  • Sigma 15mm Fisheye
  • Canon 17mm F4L TSE
  • Canon 24mm F3.5L TSE
  • Canon 24-70mm F2.8L MKII
  • Canon 70-200mm F.27L IS MKII
  • Canon 200-400mm F4L IS with inbuilt 1.4 TC
  • Canon 2X Teleconverter

Other Equipment included:

  • Really Right Stuff TVC-24L 4 Section Tripod x 2
  • Really Right Stuff BH-55 Ballhead x 2
  • Really Right Stuff Levelling Plate x 2
  • Really Right Stuff L Mount Camera Brackets for Canon 1DC, 1DX and 5D MK3 cameras
  • Really Right Stuff Lens Plates for 70-200 and 200-400mm lenses
  • Really Right Stuff MonoPod with RRS Ballhead
  • Miscellaneous Really Right Stuff Accessories including Multi-tool and universal clamps
  • Glide Cam
  • Miller Video Tripod and Fluid Head
  • Various Rode shotgun and lapel microphones
  • Audio Recording Devices
  • 15 Terrabytes of Hard Drives and numerous laptops and associated accessories.

Purchasing the Canon 600mm F4L IS Mark II Lens

Recently I decided to take the plunge, make the investment, and purchase Canon’s super telephoto 600mm F4L IS Mark II lens. I had been toying with the idea of purchasing this lens for almost six months and finally decided it was a necessary piece of equipment for several projects I am currently working on. Normally, I would not procrastinate for so long on the purchase of a new lens (who really needs a reason to purchase a wonderful lens anyway); but given the significant cost of ownership I needed to really map out my intended use to ensure I get the most from this expensive optic. I am not going to write an extensive review of this lens as quite frankly there are already many excellent reviews online. Suffice to say, the image quality from this lens is absolutely second to none in this class of telephoto. The MTF graphs alone tell the try story of just how sharp this lens really is. If you need to know anything particular about this lens then Google will certainly find it for you. Instead, I want to just briefly share my thought process on choosing this lens; what the alternatives were and why I decided it was worth jumping the cost barrier to entry.

Those of you familiar with my current shooting equipment might be asking yourself why I would purchase such an expensive lens when I already own the Canon 200-400mm F4L IS lens with inbuilt 1.4 teleconverter. The answer is really very simple – I simply want and need more reach. Although the 200-400 can reach 560mm on a  full frame camera such as the Canon 1DX with the 1.4 Teleconverter engaged; the 600mm is faster (F4 instead of F5.6) at the 560mm end of the 200-400 with 1.4 teleconverter, but more importantly, the 600mm F4 will reach in excess of 800mm with the addition of a 1.4 teleconverter for a max aperture of F5.6 (max focal length with 1.4TC on full frame is 840mm). This provides significantly more reach than the 200-400 lens. Thus the 600mm becomes a very good supplemental lens for subjects that are too far away for the 200-400.

At this extreme end of the telephoto range there are really three lenses to choose from in the Canon line-up if you want long reach and a fast aperture. The 500mm F4L IS MKII, the 600mm F4L IS MKII or the 800mm F5.6L IS lens. I do not include the rare Canon 1200mm F5.6 lens as this lens is no longer available new from Canon and it commands ridiculous amounts of money on the second hand market (in excess of $100,000 USD). It is also the size of a bazooka, has no Image Stabilisation, is extremely heavy and thus completely impractical for travel. There are also numerous 400mm options to choose from but none of these provide the reach I require. The 500mm falls well within the focal range of the 200-400 with inbuilt 1.4 teleconverter so was not really the ideal choice to supplement this lens; in effect it’s just doubling up on a focal length I already own. The 600mm F4L IS MKII lens offers more reach at a faster aperture than the 200-400 with its 1.4 teleconverter engaged. The 600mm F4 can equal the 800mm’s F5.6 aperture at 840mm with the addition of a 1.4 Teleconverter. The 600mm combined with the 1.4 and 2X teleconverters gives me options from 600mm, 840mm and 1200mm – more than enough for my intended use. In short, this makes the 600mm F4 the more versatile lens and a better choice for my intended use. If I were photographing small birds I may well have opted for the 800mm for the extra reach to get as many pixels on target as possible. Just an aside: Canon’s new MKIII 1.4 and 2X teleconverters are truly outstanding and I would have no hesitation using either of these with any of the Canon L series lenses. In fact the 1.4TC on Canon’s 70-200mm F2.8L IS MKII makes an excellent light weight ‘Birds in Flight’ lens for handheld shooting from ships.

One of the major considerations for me in purchasing the 600mm F4L lens (other than the cost) was how I am going to travel with it from my home base in Australia to Iceland, the Arctic and other polar destinations. Truthfully, I have not yet fully decided on wether I am going to schlep this lens through airports or pack it in a Pelican case and FEDEX it to my destination. At this point in time, I am leaning toward carrying it in my carry on luggage – although the bulky lens hood will ride in my checked luggage. It is going to be  tight squeeze with a 200-400 and 600mm f4 lens in my camera bag with camera bodies and supplemental lenses and equipment and I am expecting some spill over into a second bag (my Gura Gear Chobe bag). The addition of the 600m is going to put me way over the normal carry on luggage allowance; which is a bit of a worry and honestly I may yet opt for the FEDEX option. To date, however, I have not had issues (touch wood) with carry on camera equipment on any airline except Jet Star (with whom I will never fly again after they stranded me for 10 hours in Tasmania and refused me carry on in New Zealand back in 2008). In that vain, I did enjoy this image that incidentally turned up on Facebook a couple of days ago.Purchasing a lens like the Canon 600mm F4L IS is a significant financial investment and therefore it warrants serious consideration on its intended use before such a commitment. In my case, I plan to use this lens for a project I am working on to photograph Arctic Foxes in Iceland this winter (I expect this project to be ongoing over the next few years). This project will have it’s own dedicated micro-site that I am currently working on as well as the backing from the Arctic Fox Station, and several other sponsor parties. I will also take the lens to the Arctic with me (in addition to the 200-400) to photograph Polar Bears and Walrus on the Jewels of the Arctic trips in August this year. The first of these two expeditions is sold out and there are only three places remaining now on the second trip before it will also be sold out. If you want to get an idea of what this expedition entails be sure to watch the Polar Experience Video I produced late last year. I also intend to use this lens in the Arctic in 2015 on a dedicated expedition I am leading to photograph Polar Bears. I hope to officially open this trip for bookings in the next few weeks.

For the dedicated wildlife photographer the 600mm F4L IS Lens has long been the hoy grail of optics for capturing wildlife and I am looking forward to shooting with this lens over the coming years.