One of the more obscure camera questions I occasionally field on my workshops from participants who shoot Canon is ‘what is Canons Auto Lighting Optimiser and should I be using it?’ I received this exact question this morning via email from a Canon user who just received their new camera and wanted to understand how this feature works.
First, some history on the Auto Lighting Optimiser (ALO). ALO was originally introduced as a feature on the EOS 450D DSLR in 2008. It has since found its way onto all current Canon EOS DSLR cameras, from Canon’s most basic entry-level DSLR to the professional EOS-1D X MKII (it was never included in the 1DS MKIII).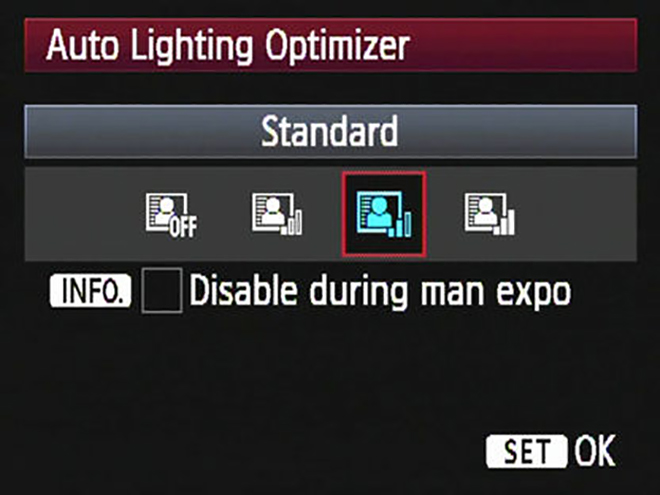 ALO is designed to even out contrast by selectively adjusting areas of the image. It is by definition most useful when using flash or with backlit subjects as it can detect faces in the frame and brighten those areas to achieve a better result. In a nutshell, the aim of ALO is to provide in-camera processing that will improve the look of your images. Those of you paying attention will have already figured out that it applies to jpeg files because it is working on in camera processing.
ALO analyses contrast in captured images and modifies both shadows and highlights via tone curve adjustments to minimise loss of detail in high contrast light conditions. There are three levels of setting strength in the current EOS 1DX MKII (low, medium and high) as well as the ability to turn the setting off. The levels can be used at any ISO speed setting.
The first thing you should know about ALO is where it is located in your cameras menu. ALO is found in the jpeg quality menu. This tells us that this setting applies to jpegs (not RAW files). If you shoot RAW then you can pretty much ignore ALO; with the caveat that it can be applied in post-production if you implement Canon’s Digital Photo Professional Software. If you are using Canon’s Digital Photo Professional workflow software (I honestly don’t know anyone who does), ALO can be applied to RAW images taken on compatible cameras during the post-processing workflow. This cannot be accomplished in Adobe Lightroom. Is this worth doing? Personally, I don’t think the benefit is worth the extra step (I would rather use a filter to tame the scene contrast in camera), but your mileage might vary.
When you select a Quality setting that results in a JPEG image file (have I mentioned you really should be shooting RAW?), ALO tries to enhance your photo while it’s processing the picture in camera. Unlike Highlight Tone Priority, which concentrates on preserving highlight detail only, Auto Lighting Optimizer adjusts both shadows and highlights to try and improve the final image tonality. This ‘could’ be useful if you are shooting jpegs in high contrast lighting and have no intention of doing post production work at a later date.
To sum up: If you shoot RAW (as I do) then you can ignore the ALO setting and just leave it off. If you insist on shooting jpeg then you should experiment with ALO to see what benefit it can yield to your jpeg files in certain high contrast lighting situations.
 This workshop was a for a small group of just six experienced landscape and nature photographers. We based ourselves primarily in the small town of Reine and made daily excursions to various locations around the Island for photography. Lofoten has become quite the hot spot for photography in the last few years (some are calling Lofoten the new Iceland) and although we did encounter a few other photographers during one of of our early morning sessions near town (where the above photograph was taken), we primarily had the place to to ourselves. It has been my experience in ‘hot spot’ locations such as Iceland and Lofoten that it is not too difficult to get away from other groups if you travel with someone who knows the terrain and have an experienced guide with you. Both Iceland and Lofoten have a number of iconic locations that everyone visits and photographs. However, both also have a vast number of excellent off the beaten track locations that are rarely visited and even less rarely photographed. On the whole, we preferred to spend the majority of our time in these less visited areas as the opportunity for unique photographs is greatly improved and you don’t have to fight for tripod space.
 Like much of the Arctic, photography in Lofoten in winter is heavily weather dependant. It is entirely possible to be socked in for days with heavy cloud and bad weather in this part of the world (a risk you have to be prepared to accept when you venture so far north in winter). Its common on this sort of trip to loose at least one or two days to bad weather – its par for the course. Fortunately, we had very good weather and light for most of our trip with only a little rain on a couple of occasions. Being so mountainous and surrounded by ocean Lofoten is prone to highly variable weather; which can be both a boon and bane for photographers. The ideal scenario is a dusting of fresh snow with cold temperatures and golden light. We were fortunate to experience this on several occasions. We also had some really lovely cloud during the workshop that made for some wonderfully moody and evocative images.
 During our workshop we also experienced and photographed the Aurora Borealis (northern lights). Lofoten is blessed with fantastic mountains that rise almost vertically straight out of the ocean and that make for a superb back drop for the Aurora. As is always the case with Aurora photography the real key to getting interesting photographs is to try and include some sort of foreground and background elements (in this case I chose a small section of partially submerged rocks as my foreground). There is a temptation to focus entirely on the Aurora itself when photographing the northern lights and it is easy to be seduced by the color and activity alone. The solution is to try and photograph the lights in the context of the environment around you. Much like wildlife, where the key is to place the animal in context; you need to put the Aurora into context with its surroundings.
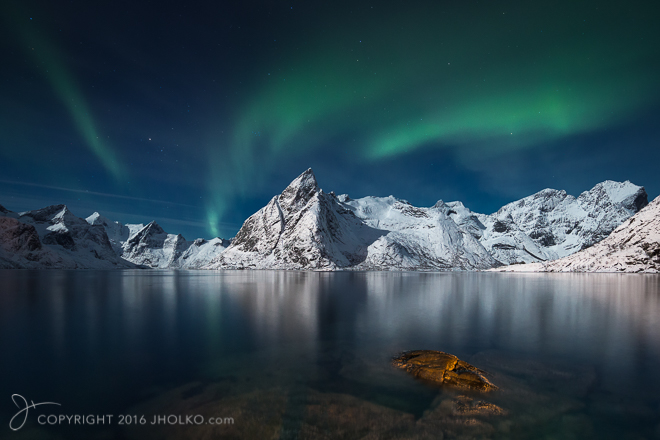 Being surrounded by water Lofoten offers great opportunities for seascape photography at just about every turn and we took advantage of this by visiting and photographing many different beaches and areas of coastline. Much of the coastline is rocky or dotted with large boulders (JCB’s – Otherwise known as Joe Cornish Boulders) which provides limitless opportunities for foreground interest. Many of the beaches are also very accessible and only a short walk from car parks or pull off areas. We spent quite a lot time exploring and photographing various areas of coastline and some really interesting photographs resulted. In the right conditions, Lofoten in winter also has the added benefit of snow down to sea level for even more interest.
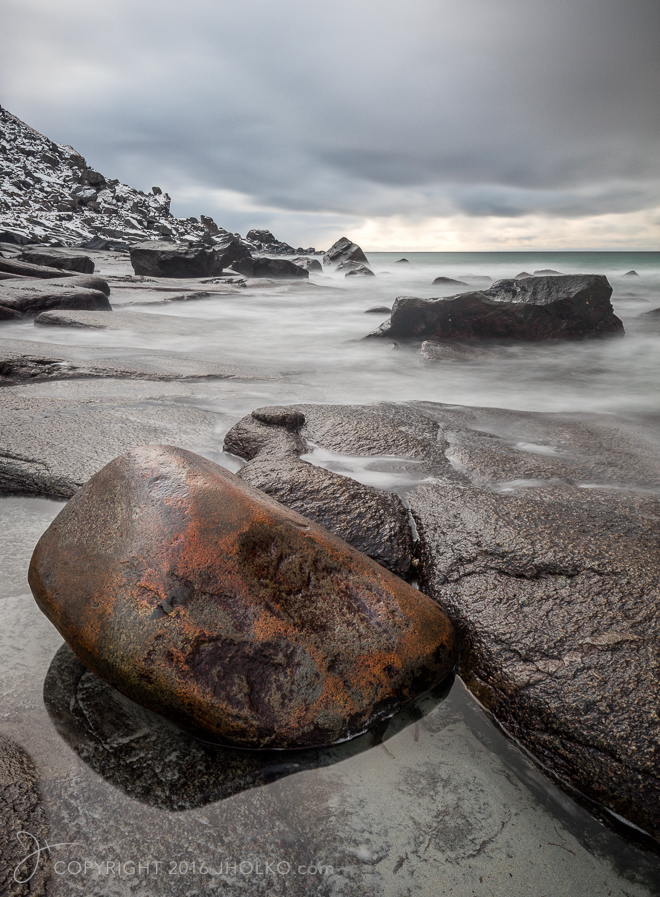 It is worth noting that Lofoten isn’t just about landscape photography. On our last day we made the decision to mix things up and took a private charter boat out to photograph White-Tailed Sea Eagles fishing off the coastline. This proved a worthwhile gamble with a couple of hours of really wonderful eagle photography in occasional light snowfall. Photographing fishing sea eagles from boat in winter in the Arctic is a lot of fun. We were able to get quite close to some of the eagles (so close my 300mm F2.8L IS MKII was occasionally too much lens and I had to switch out to the 70-200mm F2.8L IS MKII. I did not yet have a production version of the new Canon EOS 1DX MKII so all photographs were taken on the original Canon EOS 1DX. I have subsequently sold both my original Canon EOS 1DX bodies and migrated completely to the newer MKII.
 Edit: As a side note: I have now spent three weeks in the field with the new Canon EOS 1DX MKII in the South Island of New Zealand. In my experience to date I have already found the auto focus on the new MKII to be a significant improvement over the original (and thats a significant statement) – particularly in back light and low light situations. I was photographing the rare and endangered Yellow-eyed penguins in the South Island in very difficult back light and found the camera continually nailed focus in this situation. Back lit subjects are one of the hardest tests for any auto focus system. The system also performed flawlessly for Bullers Mollymawk Albatross in Miflord Sound. More to come on the new EOS 1DX MKII in a future post including my thoughts on the high ISO capabilities.
 DT: What is your relationship to the art and practice of photography?
 DT: Why did you select Digital Transitions to make your foray into medium format digital?
 DT: We especially enjoyed “Long Stretch of Black Sand Beach.” Can you step us through your mindset and process in creating this image?
 Daniel Bergmann and I will be running our annual winter trip again in 2017 and bookings are now open and places are limited. Just drop me an
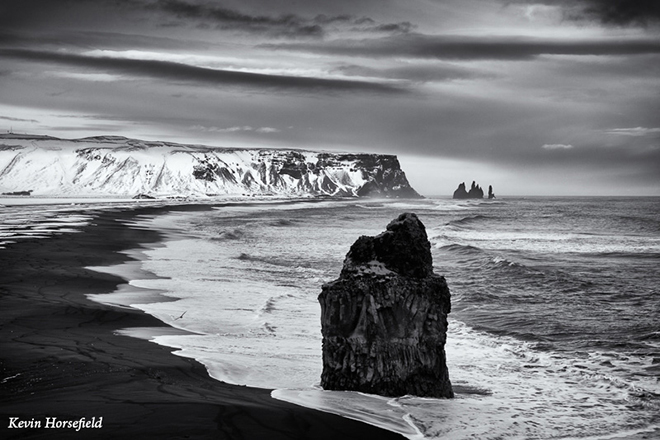
  I am also looking forward to putting the new Canon EOS 1DX MKII cameras through their paces during this workshop. Over the last year I have been photographing with the Canon EOS 1DX and the EOS 5DSR 50 mega pixel camera. My experience with the 5DSR has been somewhat of a mixed bag and I have to say that on the whole I generally prefer the files from the original EOS 1DX (especially above the 5DSR’s base ISO of 100). Quite honestly, 50 mega pixels is just a whole lot more than I need for the vast majority of my photography and so I find myself reaching less and less for the 5DSR. The initial testing I have done with the new EOS 1DX MKII shows the files are considerably improved from the original 1DX; which in conjunction with the other improvements has me very excited about this new camera. I will have more to say about my thoughts on the new Canon EOS 1DX MKII in a future post as well as my thoughts on the current state of equipment in the industry.

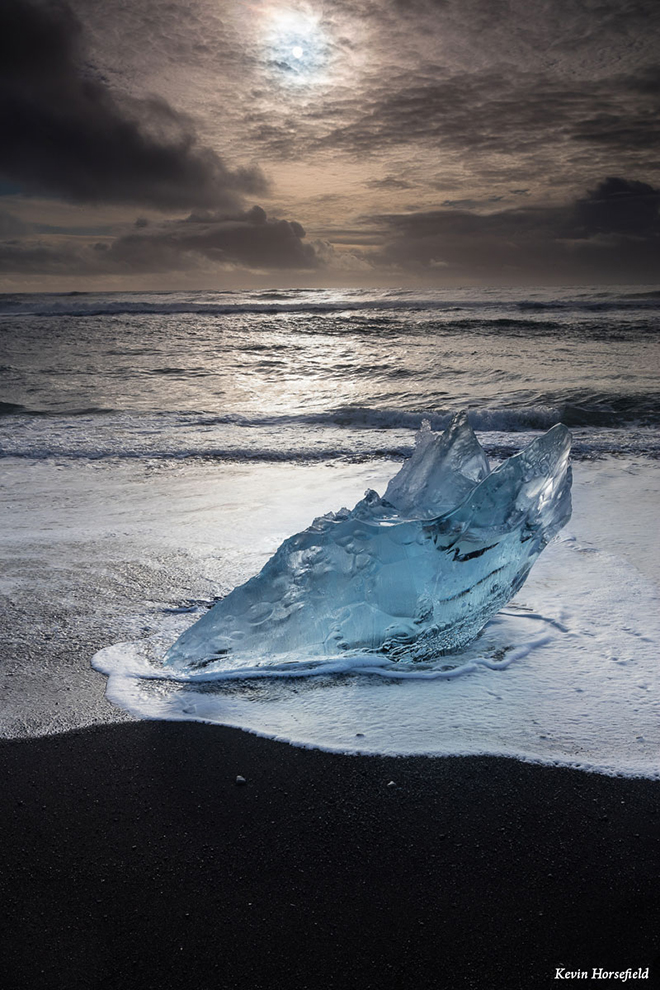
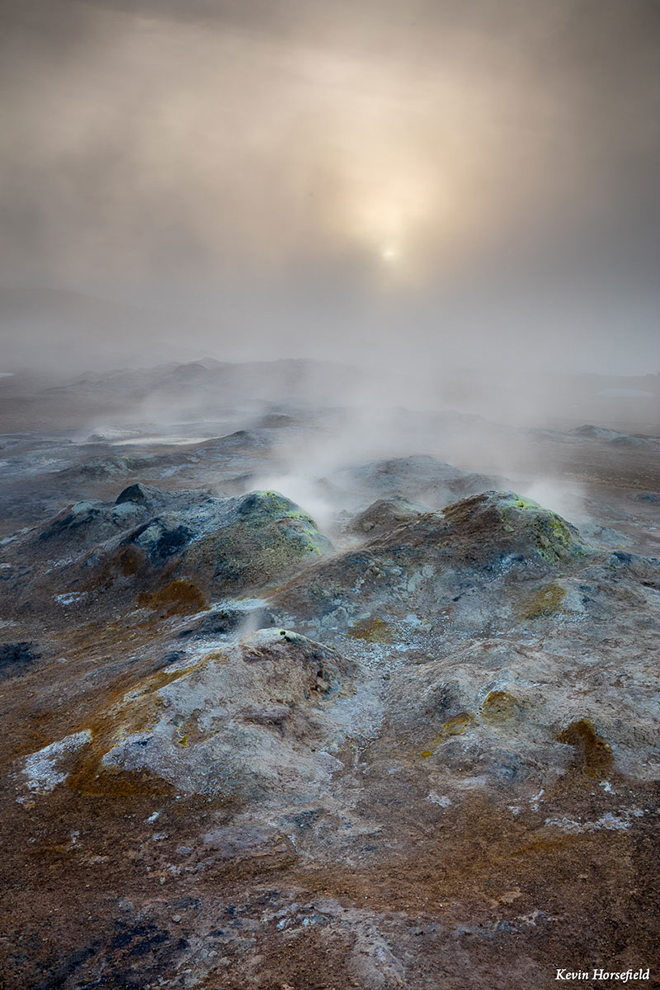 Backlighting also works well at Iceland’s famous black sand beach with the sun illuminating its translucent icebergs.