Over the last few years, I have created ISO-specific and Adaptive Noise Reduction presets for the Canon EOS R1, Canon EOS 1DX MK3, Canon EOS R3, and Canon EOS R5 MKII using the traditional legacy Noise Reduction sliders in Lightroom. These time-saving, optimised presets have since been downloaded, tested and adopted by many other Canon users as their working defaults. With the introduction of Lightroom’s new A.I Noise Reduction (and the capability to apply this without creating a new DNG file), the game has significantly changed.
Before we get into the significant advantage Lightroom’s A.I Noise Reduction brings to the table, I just want to apologise for the length of this post. There is a lot to cover, and it is essential to detail the methodology for these presets as well as explain what is actually happening ‘under the hood’ in Lightroom so that you know how to best take advantage of this hard work. Of course, there is nothing to stop you from creating your own presets based on this information. I encourage you to do so if that floats your boat. If you have neither the time nor the patience, then read on…

Since the release of the original legacy presets, Adobe has made a significant and important update to Lightroom, which means the newer and more powerful A.I Noise Reduction algorithm no longer requires the creation of a separate DNG file. This change means I could create a new set of updated presets to take full advantage of the A.I Noise Reduction algorithm without every file needing the creation of a new DNG. After spending a full week locked in my studio, staring at my computer screens and analysing test files in great detail, I have now created optimised A.I noise presets for the Canon EOS R1 using the new A.I Noise Reduction algorithm. These new presets are significantly different to the legacy presets previously released and offer an improved result that takes full advantage of the new A.I algorithm. If you would like to take advantage of these finished and optimised presets (including the test RAW files), you can purchase them through my store, Melrakki Publishing, HERE, for $50 AUD. These presets represent days of work to complete, so I ask that you please support this work by purchasing them if you want to take advantage of them. If you have previously purchased our legacy Canon EOS R1 Noise Reduction presets, you can continue to use these without issue.
Please note: The new A.I Presets do not stack with the original legacy presets, but replace them for those looking for the best possible result. If you were a previous purchaser of our Canon EOS R1 Noise Reduction presets, I am offering a 50% discount on the new A.I presets. Please contact me to receive your discount code before placing an order.
PURCHASE CANON EOS R1 LIGHTROOM NOISE REDUCTION PRESETS HERE
History: I previously included some critical history in the creation of the legacy presets in a detailed and long post HERE. (recommended reading) However, it is very important to note that the new A.I Noise Reduction algorithm significantly changes the game when it comes to Noise Reduction. Most obviously, there is only one Noise Reduction slider to adjust instead of six (more on this below). Whilst this significantly simplifies things, it does mean returning to the very beginning of testing for every single ISO and camera. Hence, we are starting with the Canon EOS R1 (my preferred camera). If time permits, I will get to the Canon EOS R5 MKII and others.
A.I Noise Reduction: A few important notes about how the new Adobe Lightroom A.I Noise Reduction actually functions: A.I Denoise does not include any aspect of sharpening (under the hood). Even as you adjust the slider to the right to perform stronger denoising, the A.I is not actually trying to perform sharpening (but it is trying to preserve RAW details – Adobe’s terminology). It does try to retain the sharpness of the original content as much as possible, and in some cases, this may perceptually appear to be increasing sharpness (because it can be harder to judge the sharpness of the original content with all the noise present, and also because the default legacy NR setting of Colour 25 tends to smear some colours).
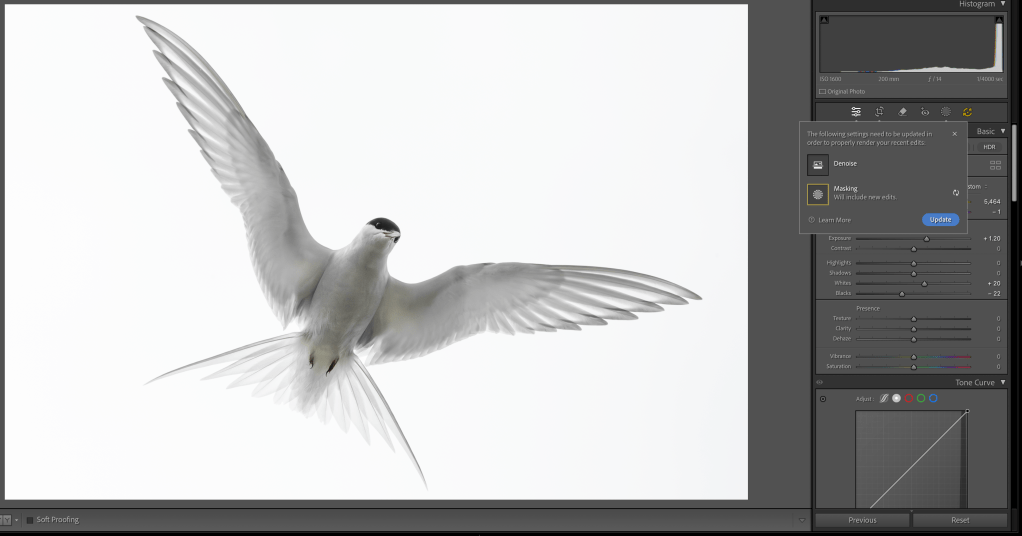
Turning on A.I Denoise via the checkbox will automatically turn off the legacy Noise Reduction controls. This is to prevent unwanted ‘stacking’ of A.I and Traditional Noise Reduction. If you are applying Denoise via the new preset, the legacy Noise Reduction is also turned off for you. If you wish, you can always add additional legacy noise reduction on top (although I would advise against this).
Turning on A.I Denoise: When AI Denoise is on, there are two components of AI-based noise reduction happening: luminance and colour. This is similar to the legacy noise reduction with its Luminance and Colour sliders, except that the AI-based one should generally be a lot better (and it is on the Canon EOS R1). The single slider underneath the Denoise checkbox controls only the luminance component of the AI-based noise reduction. The colour component of the AI-based noise reduction is always applied automatically when Denoise is checked, and there are currently no controls for it.
Adobe designed it this way because they found in practice that the AI-based colour aspect of noise reduction worked really well and didn’t need adjustment (I agree with them after significant testing). In contrast, the luminance aspect of noise reduction is always a matter of taste, and a tradeoff between noise and original scene detail (like fur and texture).
A setting of 1 in A.I Noise Reduction does not mean entirely off. Instead, it means that the “luminance” component of Denoise is off completely, but there is still the chroma/colour component of Denoise applied. You can test this for yourself by taking a very high ISO image (at least ISO 102,400 on the EOS R1). Then, manually set the legacy Luminance and Colour NR sliders both to zero, so the image at 1:1 should look nasty with lots of luminance and colour noise visible everywhere. Then turn on (AI) Denoise and set Amount to 1. Then toggle on/off the Denoise checkbox. What you should see is that with the box off, you see both lots of colour and luminance noise on the photo. But with the box checked (and the slider set to 1), the colour noise goes away, and you just have luminance noise left. So, if you want to turn off A.I Denoise completely, just uncheck the box.
It is therefore essential to note that when you set the Denoise slider to its minimum value of 1, it’s basically doing the minimum amount of “luminance” AI-based noise reduction, but a full/automatic dose of “colour” AI-based noise reduction. It is not doing the legacy Colour noise reduction under-the-hood with a default value of 25. It may look like that, visually, for some files, especially at low ISO. But at higher ISO settings you will likely find that the AI-based colour denoise works a lot better at preserving small colour details, like the colours of small flowers, or colours in the eyes of small subjects (think a bird or fox that is smaller in the frame).
Also, while in general I recommend turning off legacy Noise Reduction when using A.I Denoise, there may be some cases where it can be helpful to use a bit of legacy Colour NR in addition to Denoise. This is mostly for very high ISO images, where there may be a bit of residual colour noise left after A.I Denoise (not the case for Canon EOS R1 files at any ISO – your mileage may vary with other cameras). Sometimes this is seen as a low frequency colour mottling (colour blobs that are subtle but visible in what should be smooth areas like solid colored backgrounds. Think out of focus sky or green grass etc). Using legacy Colour Noise Reduction with Colour Smoothness at a high setting can be very effective at taming this residual colour noise. Just be careful with the amount because it can lead to smearing of small colour details.
Canon R1 Performance: If you are only interested in how the Canon EOS R1 stacks up and performs, here is the conclusion: The EOS R1 significantly ups the game with performance that demonstrably exceeds the EOS R3 and EOS 1DX MK3. When comparing EOS R1 high ISO files against either the EOS 1DX MK3 or the EOS R3, it is clear that Canon has made forward strides in high-ISO sensor development. Directly comparing ISO 12,800, 25,600, 51,200 and 102,400 on the EOS R1 to either the EOS R3 or EOS 1DX MK3 shows that the sensor in the EOS R1 retains more fine-textural detail at these high ISO settings. Fine hairs and ultra-fine detail are clearer and more accurately rendered by the EOS R1. The grain structure is also more organic and ‘film-like’, and it appears less ‘digital’ than previously tested cameras. In addition, the EOS R1 files are more malleable and more resilient to abuse of the traditional Lightroom Noise Reduction sliders while producing a more natural result. Extreme settings of these sliders render more pleasing and preferred results than either the EOS R3 or EOS 1DX MK3 sensors. The EOS R1 is also the first sensor tested to facilitate a workable, high ISO of 25,600 without losing detail in real-world RAW files. Based on my testing experience, the EOS R1 represents the very pinnacle of Canon’s digital sensors, with high ISO performance that outperforms any other sensor tested to date. I have no hesitation in personally shooting the EOS R1 at ISO settings up to and including ISO 25,600. As long as your files are well exposed, the EOS R1 can render superb results that retain ultra-fine detail even at this extreme ISO.
Methodology: Over the last week, I have done extensive testing and analysis in creating these A.I ISO-specific noise reduction presets for the Canon EOS R1. To make them, I photographed a large X-Rite Color Checker (A4 video version) in a D6500 light-controlled graphic light workstation with the Canon EOS R1 and an RF 85mm f1.2 L series lens at f5.6 at every single ISO stop from 50 to 102,400. Technically, you can push the EOS R1 to H1 ISO 204,800, and the ultra-extreme H2 to ISO 409,600, but RAW files at these extreme ISO settings break down so badly that it is little more than a marketing gimmick. Thankfully, this extreme ISO range is disabled by default in the EOS R1, and that is how I suggest you leave it – permanently. For the curious amongst you, there is no saving ISO 409,600. Even ISO 102,400 should be used as an absolute last resort. Whilst ISO 50 is an option on the Canon EOS R1 and has no noise of consequence, it does have a more limited dynamic range (approximately one stop less) than ISO100 and, as such, is not recommended. You are better off using a Neutral Density filter if you need to shoot at ISO lower than 100. All of that said, the presets do include Noise Reduction for the full ISO range from ISO 50 all the way to ISO 409,600.
1/3rd stops are ‘push’ or ‘pull’ ISO stops that use in-camera software ‘under the hood’ to adjust the exposure +/- 1/3rd of a stop accordingly. As such, I never use 1/3rd stop ISO increments and have my EOS R1 cameras set to full stop ISO only. I also find that when I am shooting in the field, I prefer one click to go from ISO 400 to 800, for example, instead of having to make multiple clicks to gain a stop of light. Noise Reduction presets are included for 1/3rd stop increments for those who like to shoot this way or who prefer to shoot Auto ISO.
Aperture priority was used meter as read (no exposure compensation), and only the ISO and shutter speed were varied. The X-Rite Colour Checker was used as it enabled me to carefully monitor and check for noise in the shadows, and because I wanted to be able to check for individual colour shifts, mottling, speckling and bleeding at each specific ISO in very specific colours. It should be said that any differences in colour shift would, in all likelihood, not be visible in normal photographic scenes, but using the X-Rite Colour Checker makes it far easier to visually detect shifts or bleed in colour and thus makes it far easier to apply optimal noise reduction in Lightroom.

The RAW files were imported into Lightroom with the Adobe Colour Profile and carefully analysed at 100%, 200% 400% and 800% magnification. Unlike sharpening, which must be gauged at 1:1 100% magnification, Noise Reduction requires additional zooming. I spent the better part of the week just staring at these RAW files at different magnifications and visually comparing them side by side as I tweaked the A.I Noise Reduction Slider for each ISO. The goal was never to make ISO 102,400 look as good as ISO 100 (that is not possible – but we can get close with the new A.I NR!); instead, ISO 100 was used as a reference point for all other ISO RAW files to be compared. Then, the sliders were adjusted for each full stop of ISO difference. In other words, the goal was to make ISO 200 look as close as possible to ISO100, ISO 400 as close as possible to ISO200, etc., all the way up to making ISO102,400 look as close as possible to ISO 51,200. Once this was done and checked I then went back and compared the results two full ISO stops difference and then three full stops difference and tweaked further. Finally, I rechecked my settings and results over a period of days to satisfy myself that I could not optimise them further. It is worth noting that ISO 102,400 and above are the most difficult ISO ranges to make look ‘good’. Hence, they have the highest amount of A.I Noise Reduction in the preset. Even with this optimised pre-set for ISO 102,400, I strongly encourage you to avoid this ISO and the ultra-extreme H1 and H2 ISO settings at all costs. In real, practical terms, I recommend setting a virtual ceiling of ISO 25,600. Exceed 25,600, and fine details begin to get lost. At ISO 51,200, fine detail and texture continue to disappear, although it’s arguable if this will be visible in well-exposed real-world captures. In actual, practical, day use, I try not to exceed ISO 12,800 with the EOS R1 and prefer to shoot at ISO 400 as my baseline. I will happily go to ISO 25,600 before I start worrying too much about noise, with ISO 51,200 being my absolute ceiling. It is worth noting that all of the above is contingent upon a well-exposed RAW file. If you underexpose your file the results will likely be quite different.
I used two high-end displays to visually analyze the RAW files: the BenQ SW272U, which I reviewed HERE, and an Eizo Colour Edge CG2700X. Both displays are high-end Adobe RGB, 4K, and were optimally calibrated to D6500K with a setting of 80 candelas, which is appropriate for the light levels in my viewing studio. I utilised two different monitors as I discovered that different displays render slightly differently, and it was necessary to optimise and average across the different monitors. It should be noted that if you are using a laptop screen, you are at a very significant disadvantage in rendering colour and analysing noise. In fact, making any sort of colour-critical decisions on a laptop display is a terrible idea. If you do not own a high-quality photographic display and care about your images, this should be your next purchase.
Noise Reduction and ETTR: When setting the A.I Noise Reduction Slider I deliberately erred on the side of caution and was very intentionally cautious and judicious in the amount being applied. The primary reason for this is I did not want overly aggressive noise reduction in these pre-sets. Since exposing to the right (ETTR) is optimal in the field (without clipping the highlights), tweaking the exposure down in Lightroom during post-production results in lower levels of noise than under-exposing or even exposing ‘meter as read’. In other words, the presets are optimised for RAW files that were optimally exposed in the field. If you are applying these presets to an under-exposed photograph that you are ‘brightening’ considerably in Lightroom, you may well need to apply additional noise reduction. Thus, the presets will work optimally when you have exposed optimally in the field.
Camera Profiles: Adobe encountered difficulties building camera-specific profiles for Canon models (including the EOS 1DX MK3 and R series cameras) due to the switch to the new CR3 file format. Adobe has since resolved this issue and resumed offering camera-specific profiles. For these presets for the Canon EOS R1, I used the standard default Adobe Colour profile. I recommend not getting too hung up on Camera profiles, as changing profiles may improve the look of specific files in certain situations, but once you start adjusting the processing dials in Lightroom, all bets are off as to which may give a better result. Since ‘Adobe Colour’ is the default, it made sense to use this as the baseline for the Noise Reduction presets.
Sharpening Amount: Unlike the legacy Noise Reduction presets, NONE of the A.I NR presets include any Sharpening above the default setting of 40. Historically, it was necessary to add sharpening to counter the digital smoothing of the legacy NR sliders. This is because sharpening and noise reduction are interactive and affect each other (that is why they appear together in the Detail panel of Lightroom). In testing the new A.I NR I found that there is no longer a need to apply any sharpening to counter the digital smoothing caused by the A.I NR. The ‘RAW Details’ preservation, which is selected by default, performs sufficiently well. Note: You will still need to add additional capture sharpening to your file. The amount of capture sharpening you will need to apply will vary depending on the quality of your lens, the sharpness of the capture and the atmospheric conditions at the time of capture.
Canon EOS R1 Comments: With the ISO-specific Adaptive A.I noise reduction pre-sets applied between ISO 100 and ISO 3200, there is no appreciable difference in noise in real-world RAW files – they are close enough to be considered identical at 100% magnification. By ISO 6400, only the tiniest minute surface texture, discernible at 400% or more magnification, is just starting to disappear (You would never ever notice this in real-world captures and have to really look for it at extreme magnification). At 100% there is no discernible difference between ISO 3200 and ISO 6400. By ISO 12,800, ultra-fine surface textures are just starting to disappear from the RAW file when viewed at 200% or more on-screen (again, you will never notice this in real-world captures). At ISO 25,600, the finest surface textures disappear, and ultra-minute fine detail also starts to disappear. Fine hairs are still visible and look good, but the finest ultra-minute detail is now obscured. Again, you will not notice this in real-world RAW captures (You really have to look for it in a test image at 200% or more magnification). Nevertheless, my recommendation is that ISO 25,600 is a realistic, workable limit. Above ISO 25,600, both texture and fine detail continue to disappear as the ISO increases. ISO 51,200 has a noticeable loss in ultra-fine detail compared to ISO 25,600. At ISO 51,200 the finest surface textures are gone. The smallest fine hairs are no longer visible and are lost in the increased grain structure (which remains organic). Toward the top end at ISO 102,400 we have lost most surface texture and most fine hair detail. ISO 102,400 is an absolute last resort and is to be avoided at all costs. I strongly recommend you leave ISO 102,400 disabled and set your absolute ceiling at ISO 51,200 with a realistic limit of ISO 25,600. The presets do their best to make ISO 102,400 look as good as possible, but in reality, there is no helping ISO 102,400 and above.
Lightroom A.I Noise Reduction Note: The AI NR in Lightroom does a significantly better job than the traditional manual legacy sliders. Whilst the manual legacy sliders provide a great starting point from which to assess a file, the correct application of the A.I NR does improve things considerably. You can see this in the screenshot below, where colour bleeding is evident in this extremely high ISO file with the legacy sliders, but the comparison image shows almost no colour bleeding whatsoever with the A.I NR applied.
Observations with A.I Noise Reduction and EOS R1: When adjusting the A.I NR slider, it is easiest to see apparent noise in the most saturated reds, purples and blues in the X-Rite colour checker chart. Generally, the darker colours show more obvious luminance noise compared to the lighter colours. The cyans, greens and yellows, for example, typically show less noise for the same given ISO. Thus optimally setting the A.I NR slider is a bit of a balancing act, depending on colour preference or bias. For these presets, I have optimised across an average without giving preference to one colour over another. These differences would never be seen in a real-world RAW file and are only apparent on close observation of the colour checker at magnification of 100% or greater.
Raw Details: It is also worth noting that Lightroom A.I NR does an outstanding job of preserving fine textural details. It actually does a much better job than the legacy NR sliders because it attempts to preserve ‘RAW Details’. By default, ‘RAW Details’ is ticked when you apply A.I NR and cannot be unticked. The A.I NR cannot recover details it doesn’t see however and small fine details that are lost in the noise before applying A.I NR will not be restored (and no amount of sharpening will recover them). However, the good news is that the A.I NR does a truly exceptional job of preserving the details it can see.
Demonstrable Visual Results: In case you are wondering why I have not dotted this long post with visual examples comparing various ISO’s pre and post-ISO specific noise preset, it is because the images, once converted to jpeg and resized for the web, are not representative of the RAW file results. Conversion to jpeg and downsizing to something suitable for the web has a very significant effect on the visual noise in an image. Downsizing removes visible noise, which significantly distorts the visual results. However, I have included a copy of all the RAW files I photographed of the X-Rite Colour Checker in the creation of these presets from ISO 50 to ISO 409,600 so you can visually see the differences yourself. Just import the RAW files into Lightroom, apply the presets and do a before/after comparison. You may need to zoom in to 200%, 400% or even 800% to see differences. For those who still want to see a visual example: The below screen grab shows an indicative before and after left/right comparison of ISO 25,600 at 100% with the new A.I Noise Reduction preset applied. Just note: the results are distorted by the downsizing and conversion to JPEG.

Conclusion: Creating these A.I ISO-specific noise reduction presets for the Canon EOS R1 was a worthwhile investment in time and energy. It has been very educational (although time-consuming), and It should considerably speed up any workflow for someone that is shooting with this camera, as the presets can be applied on import (see warning below). As they are ISO specific, Lightroom will then apply them correctly to each different ISO file you import. Since significant time and effort went into optimising these presets, you will not have to worry about whether you are setting your noise reduction optimally. Just make sure you expose optimally in the field, apply the preset on import into Lightroom, and you can then focus on processing your photograph. Just remember, you still need to apply an appropriate level of capture sharpening for your RAW file. Happy processing!
PURCHASE THE OPTIMISED CANON EOS R1 NOISE REDUCTION PRESETS
Warning: A warning if you are going to apply these new presets on import: A.I Denoise is extremely processor-intensive. Even on a very fast computer, it can take upward of five seconds per image. If you are importing from a big shoot of say 4000 photographs, for example, this will send your computer’s CPU into overdrive (as well as your power bill) and could take a very long time to process! In this example, that’s 20,000 seconds or 333.333 minutes or 5.55 hours! Instead of applying to all your photographs on import, I suggest you apply the preset only to those photographs you wish to process after import. If you are a user of our legacy NR presets then you can continue to apply these on import as a ‘starting point’ and then apply the new A.I Preset to any photograph you actually want to process. When you do this, the old legacy NR will be turned off automatically for you.