Since 2019, I have been travelling to Eastern Mongolia to photograph the little-known Pallas Cat. I was the very first photographer to subsequently guide a workshop to this region in Winter to find and photograph this elusive wildcat. Since then, many others have emulated my efforts and travelled to this region to photograph this beautiful cat (both in Summer and Winter). Some have travelled solo, while other industry colleagues have guided their own trips based on my research and local contacts. I have always preferred to look forward and innovate, and let others who wish choose to follow. Nearly seven years on from my first trip to photograph this wonderful cat, I still feel the same way about its wild nature and incredible ability to survive and thrive in the harsh winter of Eastern Mongolia. Every trip to Mongolia has proved not just a photographic adventure, but a growth opportunity to learn more about the Pallas cat.
Next January 2027, I am returning to the Steppe region of Mongolia to guide a small group of photographers to photograph the Pallas Cat. This experience is best undertaken in small groups, so I will be taking just five photographers with me. Several places are already spoken for, and only two remain. If you are considering a trip to Mongolia to photograph this wonderful cat, be sure to check on the maximum group size, as it makes a big difference to the overall experience and opportunities.
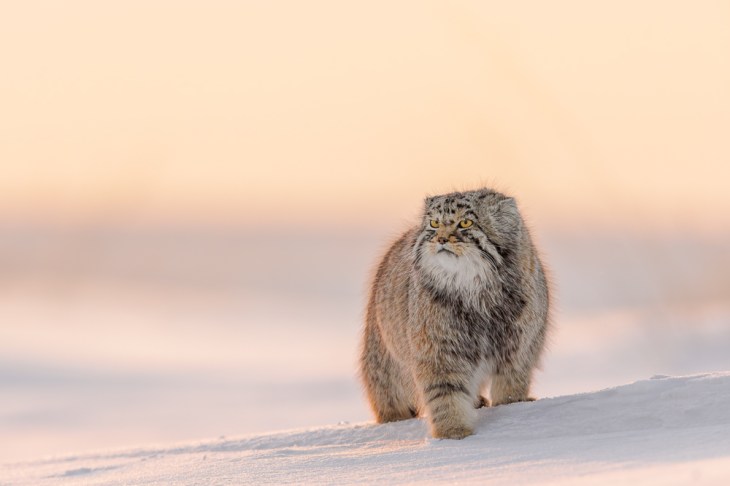
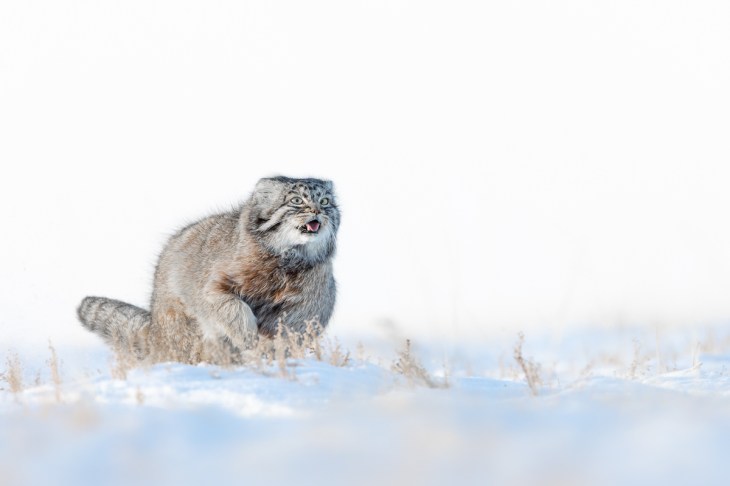
Photographing the Pallas’s cat in winter is not just about capturing an image of one of the world’s most elusive wild cats; it is about immersing yourself in the harsh, minimalist landscape of the Steppe region of Mongolia, where patience, fieldcraft, and creative discipline converge. For any serious wildlife photographer, it is an experience that offers an opportunity to refine both your technical ability and your emotional connection to the wild. Your first Pallas cat sighting is an experience that stays with you for life.
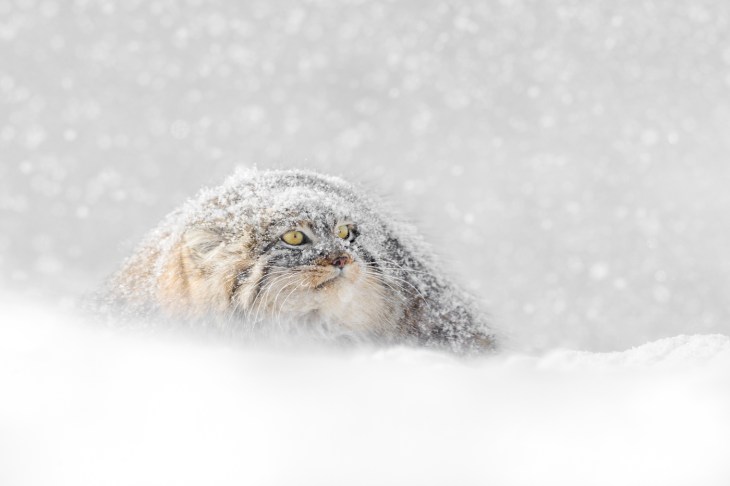
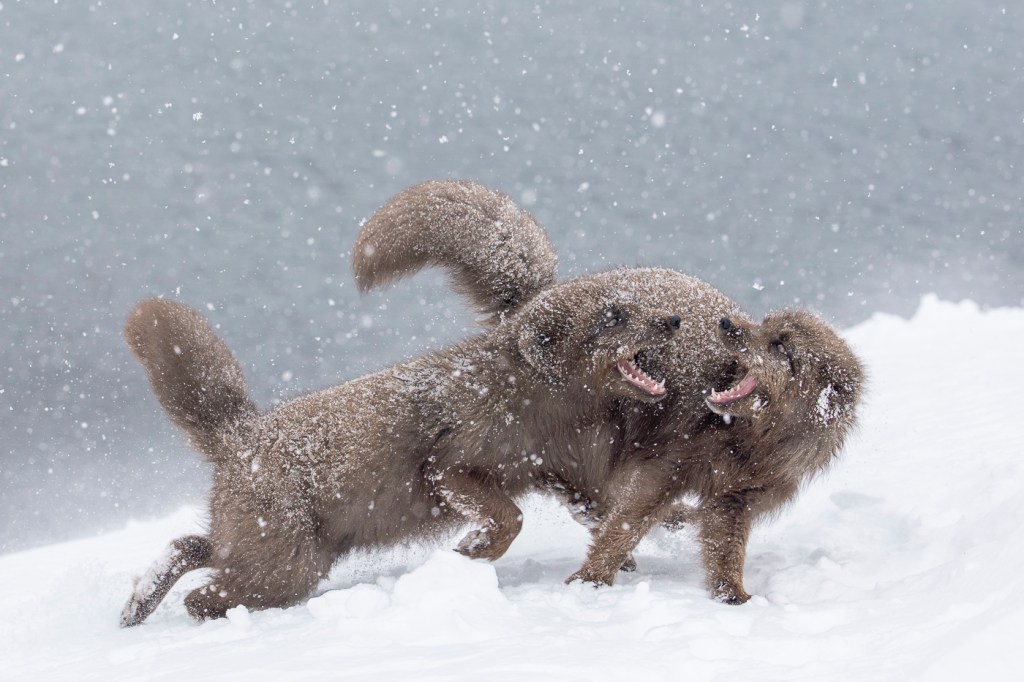
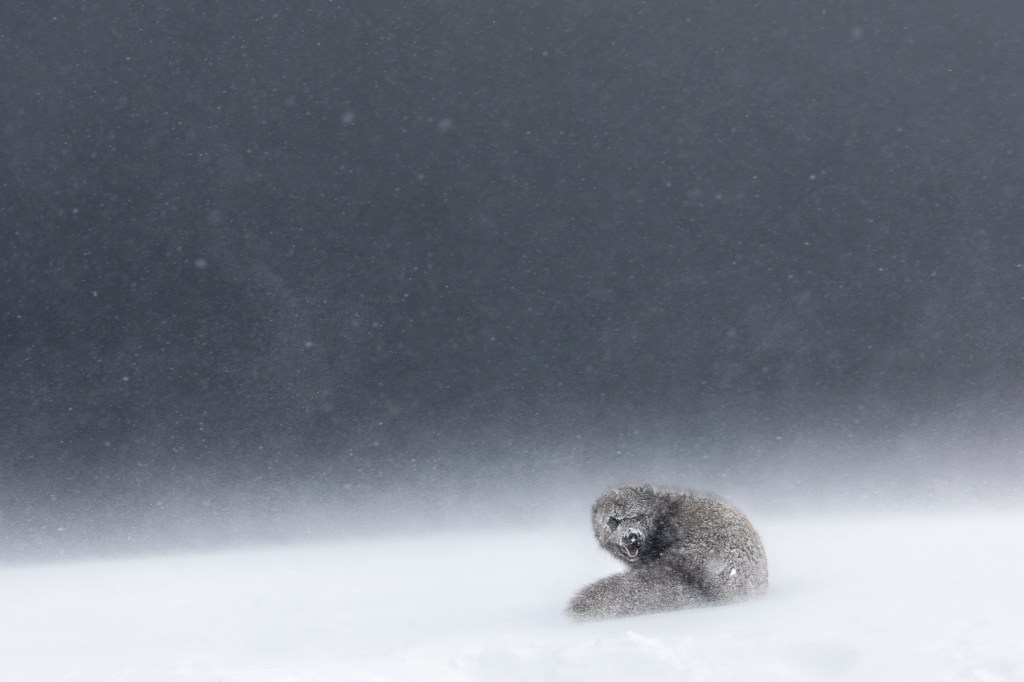
The Pallas’s cat, often called the “ghost of the steppe”, is an animal that seems carved from the very rock and snow it inhabits. In winter, its dense coat thickens into an extraordinary halo of fur, giving it that unmistakable, almost mythical and even somewhat comical presence. Frost gathers on its whiskers, and its warm breath hangs in the air. Photographic frames become a study in subtle tonalities of white, greys, and muted browns. The challenge of separating subject from environment becomes a masterclass in composition. This species does not tolerate carelessness on the photographer’s part.
These workshops are intentionally small, creating an environment where individual attention and collaborative learning can thrive. In remote winter environments, this matters. There is space to ask questions, to review images thoughtfully, to refine technique in real time. The experience becomes less about ticking a species off a list and more about crafting meaningful images that stand the test of time. Every sighting becomes a shared moment of quiet intensity, reinforcing the idea that wildlife photography is as much about observation as it is about pressing the shutter.
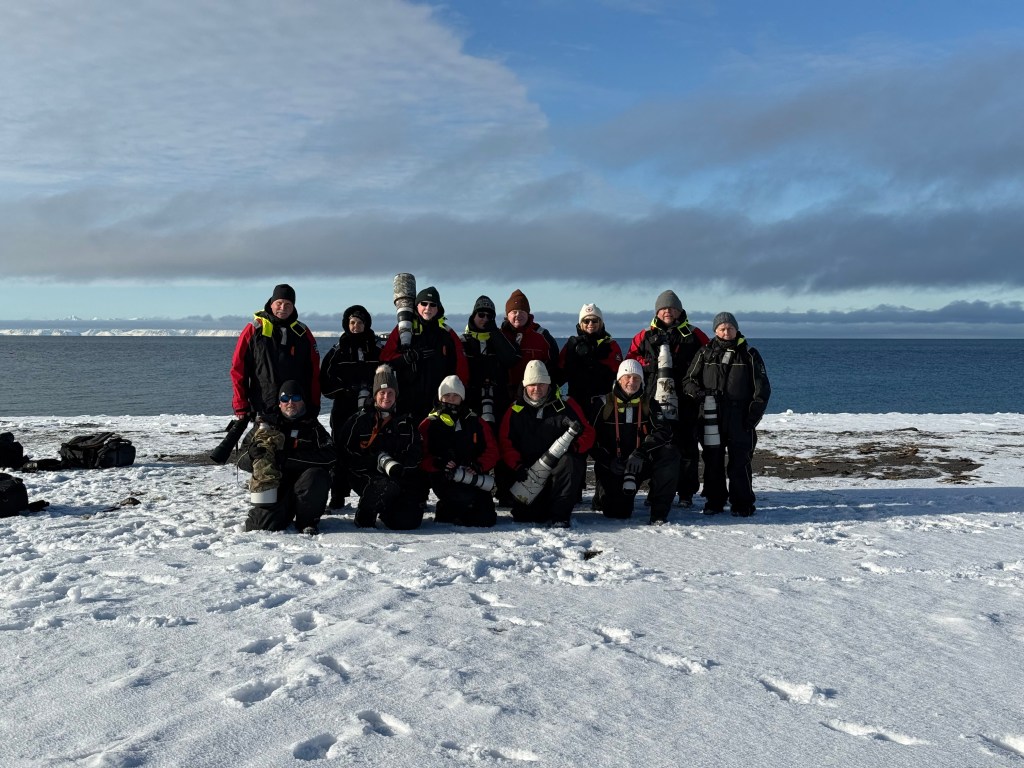
The camaraderie formed in such conditions should not be underestimated either. Small groups working together in remote winter landscapes create a bond rooted in shared anticipation and respect. There is a quiet understanding among participants that what you are attempting is special. Even silence becomes meaningful — the collective stillness as everyone waits for the cat to reappear from behind a ridge. These shared experiences often become as memorable as the photographs themselves.
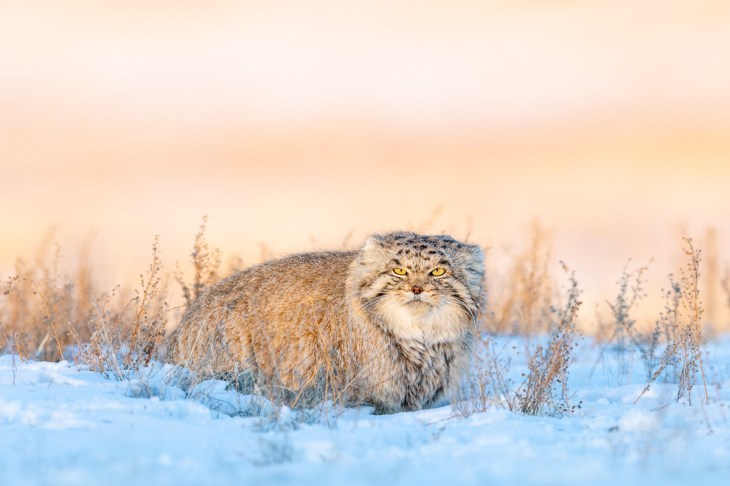
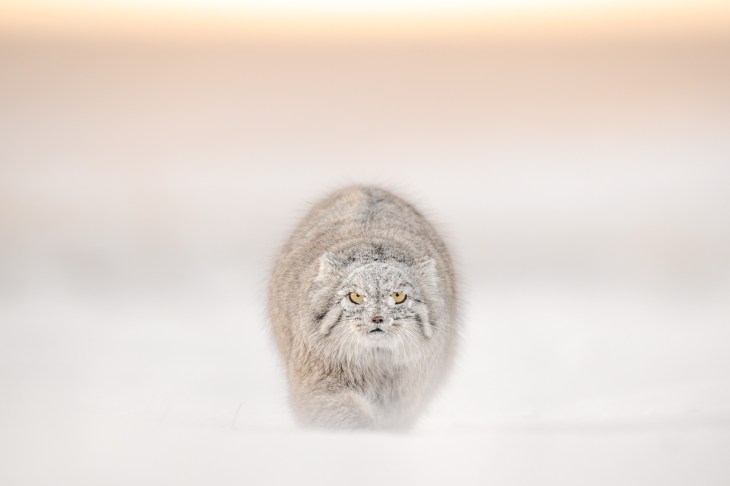
The images you return home with will undoubtedly be powerful — the frosted fur, the piercing gaze, the minimalist winter compositions. But more importantly, you will return with a deeper understanding of fieldcraft, a renewed respect for wildlife, and a heightened sensitivity to light and landscape. In a world where wildlife photography can sometimes feel crowded and predictable, the winter Pallas’s cat offers something rare: authenticity.
And authenticity, in the end, is what separates a good photograph from a lasting one.
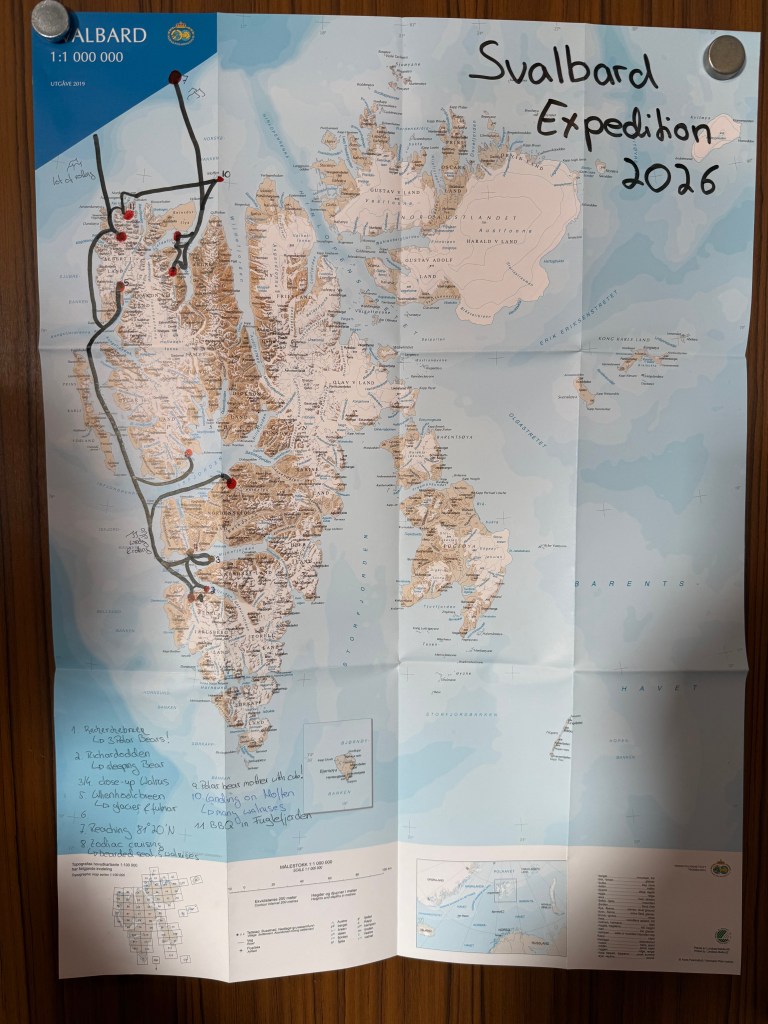
In April of 2026, I ran my annual ship-based Winter / Spring expedition to the Svalbard archipelago. The expedition ran from the 7th of April to the 15th of April and offered outstanding wildlife and landscape opportunities over the nine days. This was an unseasonably warm winter year with average temperatures hovering around 0º Celsius (plus wind chill), a full 15-20 degrees warmer than they should have been. It was also the year that saw it necessary to steam farther north than ever before to reach the pack ice.
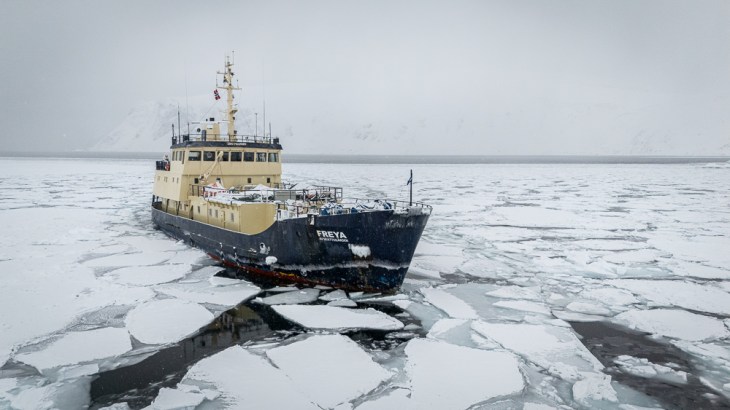
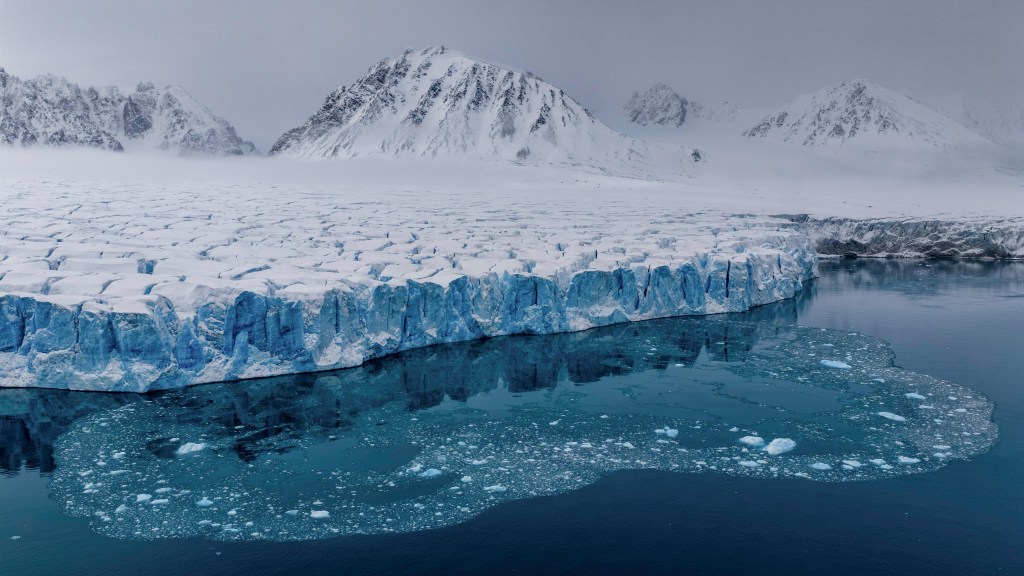
Day One: Departure Day – Once we had all boarded our ship, M.S. Freya, at 16:00 and after consulting the latest ice chart and discussing with the captain, I decided to head south instead of north this year. There were several reasons for this decision, not the least of which was the current bunker fuel price, driven by the ongoing conflict in the Middle East. Heading south would mean using less fuel than heading for the northern edge of the pack ice, but also provide an opportunity to visit and explore other regions of the archipelago. With a large amount of close drift ice off the south-east coast of Spitzbergen and very little toward the north, it made more sense to head south. There was also significant fast ice in the Bellsund area that boded well for Polar Bear encounters. Once our mandatory safety briefings were undertaken, we set sail with a course of 180º. For our first evening, we overnighted at the stunning glacier front in Bellsund under soft, overcast light.
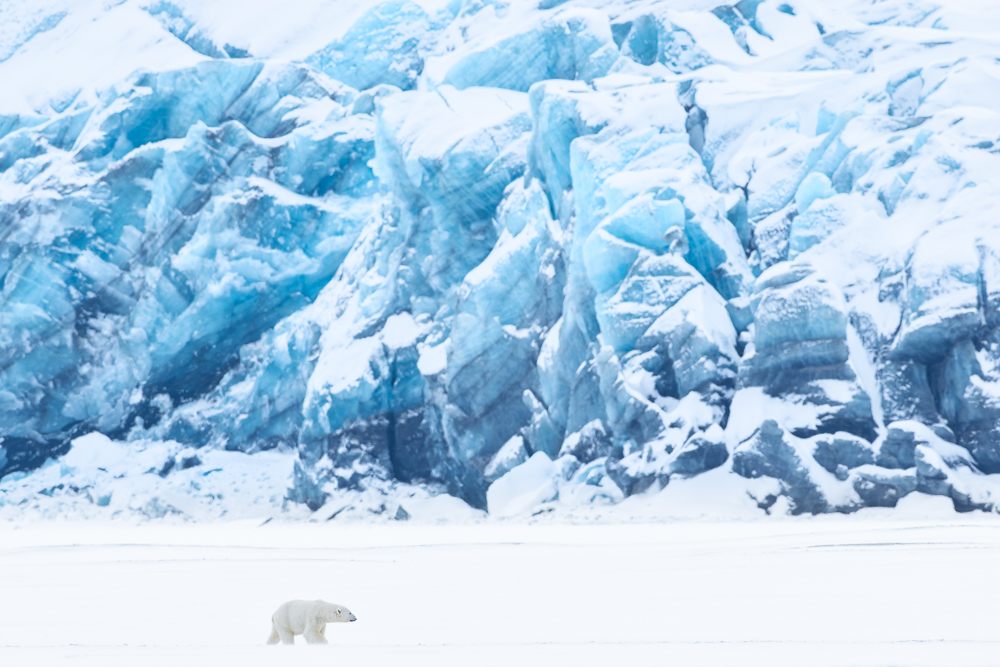
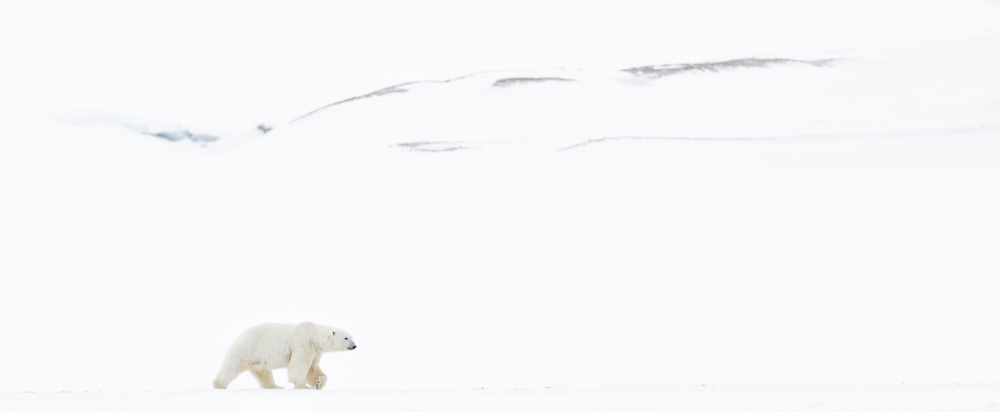
Day Two: Bellsund – Around 7am in the morning, before we had even had breakfast, we spotted our first Polar Bear (a large male in excellent condition) walking the snow-covered shoreline and heading for the glacier front directly in front of our anchorage. Grabbing warm clothes and cameras, we photographed the bear as it walked directly in front of the glacier, slowly making its way around the glacier’s face. We also spotted a second, smaller bear (likely a female that the larger male was following) that disappeared into the moraines and was not seen again. This proved to be an outstanding encounter that offered superb opportunities to capture the bear in the grand landscape, with the glacier as a backdrop.
A polar bear in front of a blue glacier is a rare sight, one I’ve seen only a few times in my career as a polar photographer. This encounter proved truly extraordinary, with all participants coming away with stunning images of the bear in front of the glacier. This type of encounter requires the alignment of a great many elements, including a cooperative bear, good snow and ice conditions, soft light, and the right temperatures to avoid heat haze. Fortuitously, the perfect storm unfolded in front of us on just day two of our expedition!
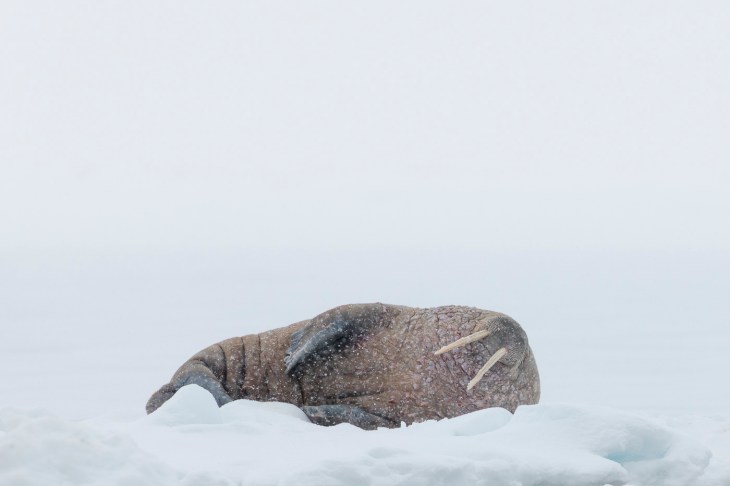
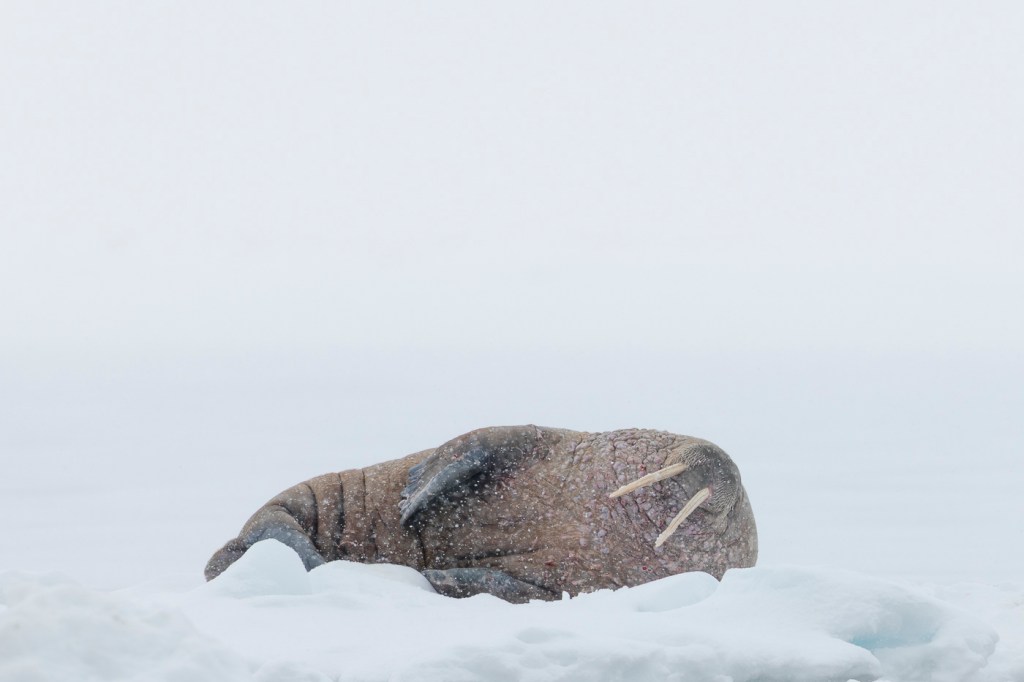
Day Three: Exploration of Bellsund Area – On our third day, we continued our exploration of Bellsund, heading into Van Mijenfjord, where we had our very first encounter with fast ice and Walrus on ice. The walrus on ice also proved to be an exceptional encounter and my first opportunity to use my new polecam system – an upside-down monpod with a cage to mount my iPhone for control of the camera. In the evening, the wind began to reduce, and we turned our attention north for Lili-hook Glacier.
Day Four: Heading North – During the evening of our third day, we steamed out of Bellsund and headed north for the Lilliehook Glacier, arriving shortly after breakfast. We were greeted by soft, overcast light and gentle fog hanging over the glacier’s carved face. After lunch, we continued north up to Smerenberg, where we anchored during dinner to position ourselves to head up to the ice early in the morning. With the new 500m regulations in place, the opportunity to try and find a polar bear outside the 12-mile limit in international waters was a major factor in the decision to head north. The two photographs from Lilihook glacier below are courtesy of guest photographer Bill Hughlett – thank you.
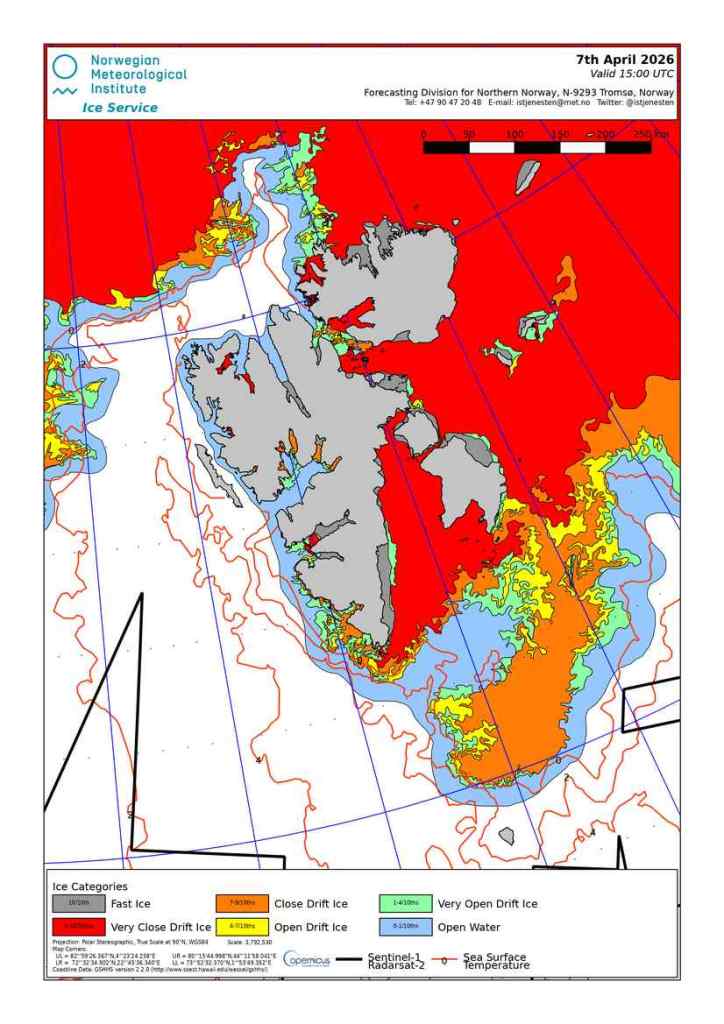
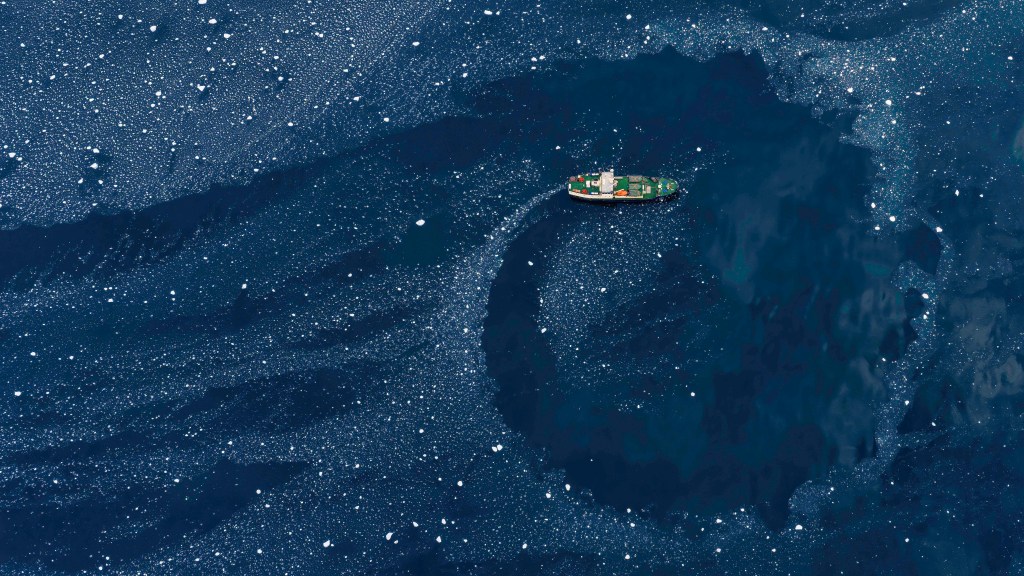
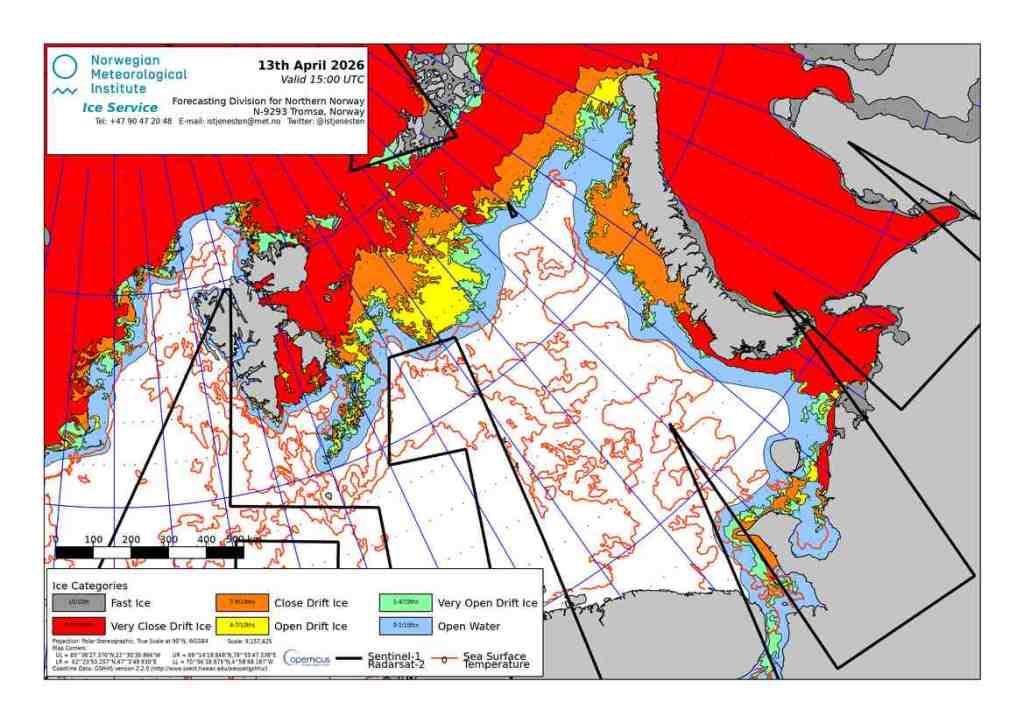
Day Five: Pack Ice – Just after midnight, I had the captain fire up the engines, and we steamed north, hoping to find the edge of the permanent pack ice (which, according to the latest ice chart, should have been around 80º). The further north we steamed, the worse the conditions became, with the swell increasing to roughly 3 metres, making the conditions more than uncomfortable. Crossing 81º North, we had still not encountered pack ice (unheard of this time of the year). At 81.20 degrees North, I made the difficult decision to turn the ship around and head back south. With swells showing no sign of abating and no sign of the pack ice, we retreated south to the northwestern corner of Svalbard, arriving early in the morning before breakfast. We learned later in the day from the coastguard vessel that had been shadowing us but had continued north, that the edge of the ice was already at 82º.6 north, a full 80 nautical miles from our most northerly position and at least another 10 hours steam north! The large storm that preceded our arrival in the north, in combination with the unseasonal warm temperatures, had ripped up and pushed the remaining ice far north – out of our reach on this expedition. For the ice to be already this far north (in excess of 82º) at this time of year is unheard of and does not bode well for the summer pack ice in 2026.
The ice chart below shows the dramatic difference over just three days, as a combination of Arctic Storms, unseasonably warm weather, and the shifting of the polar ice cap ravaged the polar pack ice. In my many years of polar photography, I have never seen the ice this far north at this time of the year.
Day Six: Exploring Woodfjorden – With better weather and calmer waters surrounding us, we explored the Woodfjorden area and surrounding systems by ship and took our first zodiac cruise, encountering a small huddle of walruses and a cooperative bearded seal that provided some wonderful photographic opportunities. In the afternoon, we encountered a mother polar bear and a two-year-old cub high on the mountainside, which we observed as we glided silently along the coastline. Sadly, this bear had been collared by researchers, and although it was wonderful to observe, I felt the photographic opportunities were somewhat limited. Bears that have been collared, otherwise tagged, or otherwise interfered with by researchers are typically extremely shy and virtually impossible to approach even from a distance. Sadly, polar bear research in Svalbard remains invasive, despite there being no real justifiable reasons. Much of the research being conducted has already been done and ultimately is continuing simply so that the Norwegian Polar Institute can maintain its government funding. This night, we anchored in one of the sheltered fjords, positioned for an early-morning steam-up to Moffen Island for a potential winter landing.
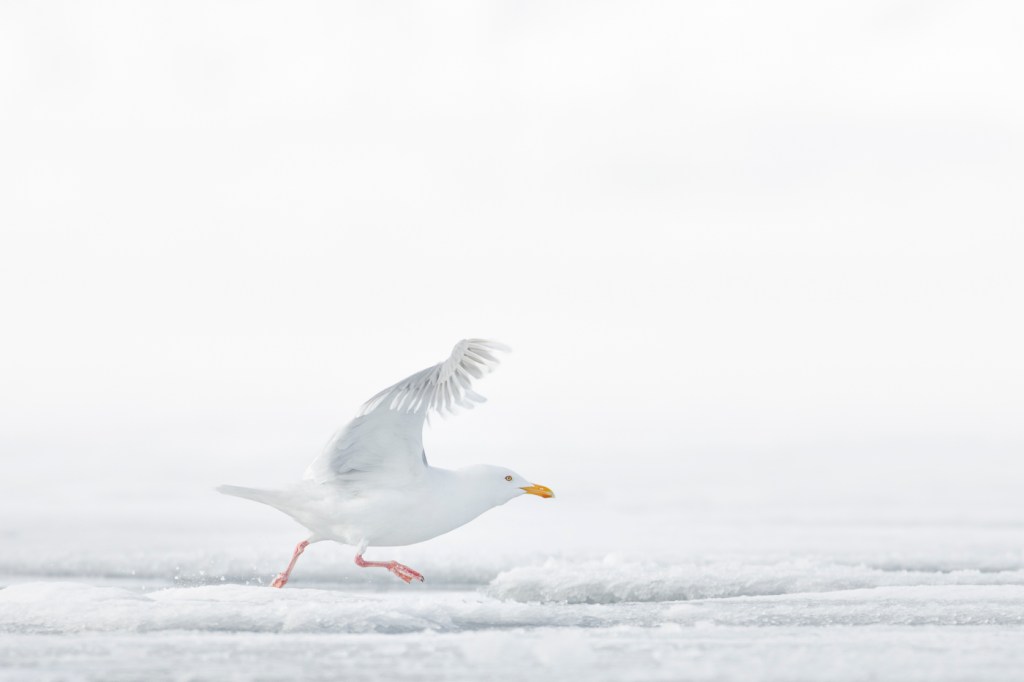
Day Seven: Moffen Island – We arrived just before breakfast at Moffen Island in calm seas and mercifully still waters. After breakfast, we went ashore via zodiac to photograph the large haul out of Walrus and the Glaucos gulls that frequently hang around. Winter landings at Moffen are a rare treat, and we spent a couple of hours ashore here photographing the wildlife. In the evening, we visited Fuglafjorden to photograph the spectacular glacier there and enjoy a BBQ on the back deck of our ship.
Day Eight: Steaming South – After our evening BBQ, we began our steaming south for Isafjorden and Borabukta, arriving around noon, where we took a zodiac cruise for ringed seals on the fast ice edge. This was a zodiac cruise I particularly enjoyed, with the combination of beautiful snow-covered fast ice and soft, ethereal arctic light. It was one of those settings that one dreams of photographing a Polar Bear.
Day Nine: Expedition Conclusion – We returned to harbour as contracted around 18:00 in the evening on the last full day of our expedition. Over the course of the nine-day trip, we travelled 832.5 Nautical miles, encountered and photographed six Polar Bears (including a mother with a two-year-old cub), and had numerous encounters with Walruses, seals and other wildlife. Of course, the landscape at this time of the year is stunning with the mountains wearing their winter armour, and we took every opportunity to photograph the scenery throughout our expedition. My sincere thanks, as always, to all who participated and made this expedition a success.
The 2026 expedition reminded me, as it does each year, that Svalbard in winter is a place of paradox: stark yet tender, harsh yet comforting, desolate yet full of life. It is a place where patience is rewarded, where minimalism sings, and where every track in the snow tells a story worth listening to.
As we completed our 832.5 -nautical-mile journey and began the long voyage back to Longyearbyen, I was struck once again by the importance of returning—not just physically, but mentally and spiritually—to places like this. Places where the wild still rules, and where we are reminded, as always, that the greatest gift of the Arctic is its silence—and how it teaches us to listen.
Wild Nature Photo Travel will return again next year, 2027, to lead another winter expedition aboard M.S Freya in search of miraculous wildlife encounters and ice-covered landscapes. This is a rare opportunity to explore one of the Arctic’s most remote and pristine landscapes at the height of its frozen majesty. Designed specifically for keen nature and wildlife photographers, this small-group expedition offers intimate access to Svalbard’s breathtaking winter wilderness, including encounters with walrus, Arctic foxes, and polar bears, all set against a backdrop of towering snow-covered mountains and sculpted sea ice. With 24-hour twilight and the potential for moody, ethereal light, this is a once-a-year chance to capture the Arctic in its most cinematic and atmospheric state. Guided by Wild Nature Photo Travels extensive field experience and deep knowledge of polar conditions, this trip is not just a photographic expedition—it’s an immersion into the raw soul of the Arctic. Spots are extremely limited. Adventure with purpose—photograph with intention.
The Problem: In recent times, I have both recorded podcasts and blogged about the ongoing difficulties of photographing in heavy snowfall with mirrorless cameras. Mirrorless cameras (regardless of brand) have a tendency to move between the falling snow and the subject, with an inability to lock onto the subject without distraction. This can be incredibly frustrating as the focus bounces between the subject and falling snowflakes, resulting in missed shots. As a polar photographer who frequently shoots in snowfall, I have been continually frustrated by this phenomenon and have witnessed it among other photographers using everything from Canon and Nikon to Sony mirrorless cameras.
The Technology: In Canon cameras, the EOS 1DX MK3 was the king at ignoring falling snow and staying on target. Mirrorless cameras such as the EOS R1 are a different beast, though, and use different AF technologies (phase detect) that are highly tuned by manufacturers to be as sensitive as possible. This results in better AF performance overall. But it also means the focus points are more likely to latch onto extraneous objects or subjects, such as falling snow.
The Customisation: I have tried tweaking the various autofocus settings in both the Canon EOS R1 and EOS R3 to ignore falling snow, with only mixed results. In the EOS R1, there are three AF adjustment options: Auto, Manual, and Special. Most of the time, I just leave the AF set to Auto, and it does a superb job. I have played extensively with the Manual setting in falling snow and tried all the different combinations for sensitivity and tracking, with nothing but mixed results and no combination that reliably ignores falling snow.
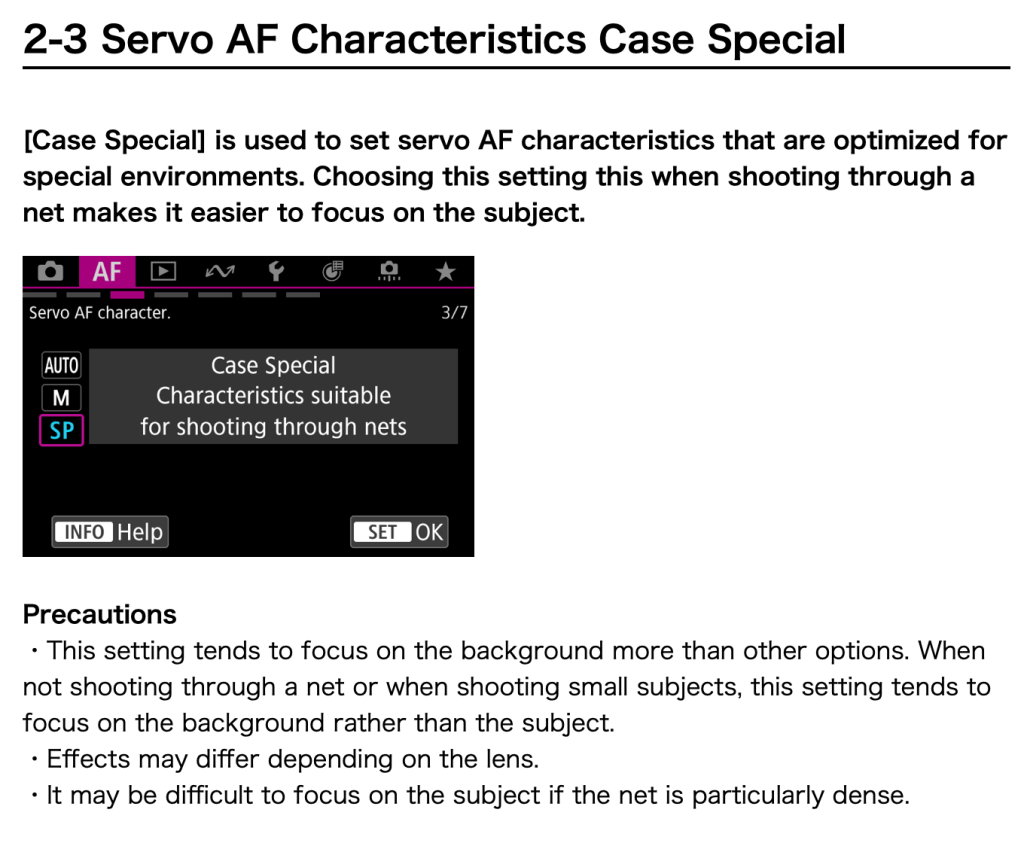
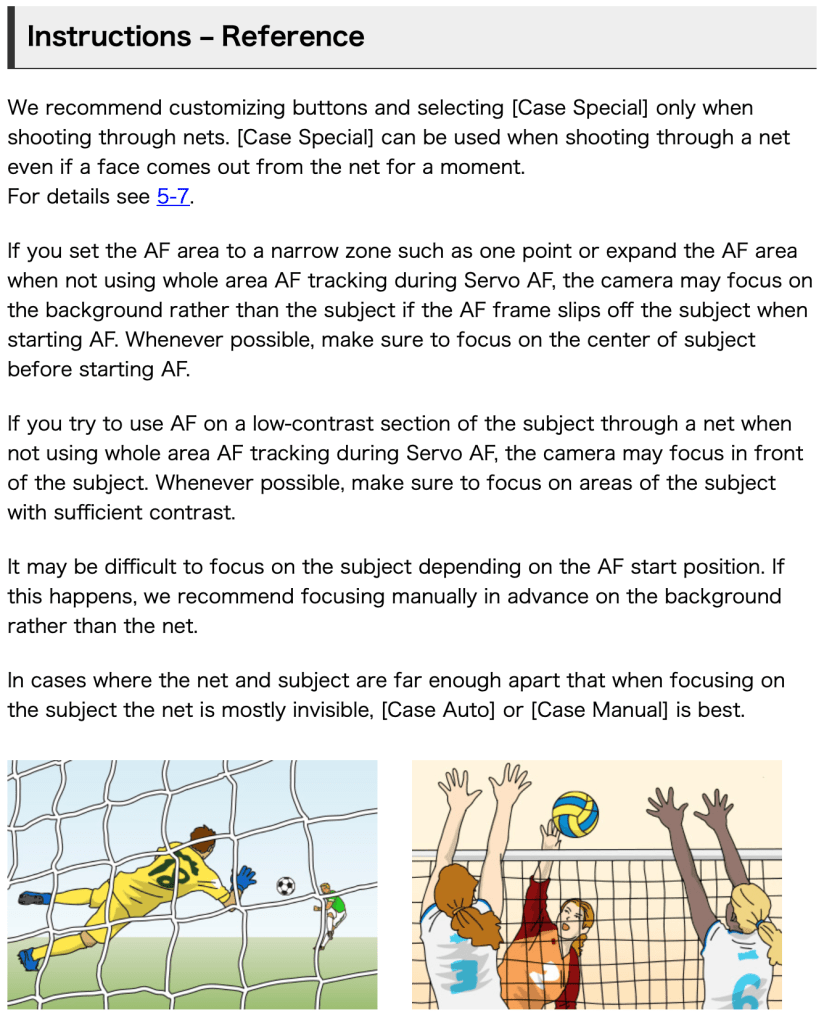
The Solution: During my recent Svalbard ship expedition, I had a bit of a light bulb aha! moment one evening when I was unable to sleep. Laying in bed and pondering the problem (my head is obviously a scary place to be) What about the Special setting? The Special setting is designed specifically for sports photographers shooting through Soccer nets behind the goal, and it had never occurred to me to even try this in falling snow. But the more I pondered it, the more I realised there are a lot of similarities, as both situations require the photographer to shoot ‘through’ something. The following morning, I jumped online and read up on the Special setting in the Canon Auto Focus Guide found HERE.
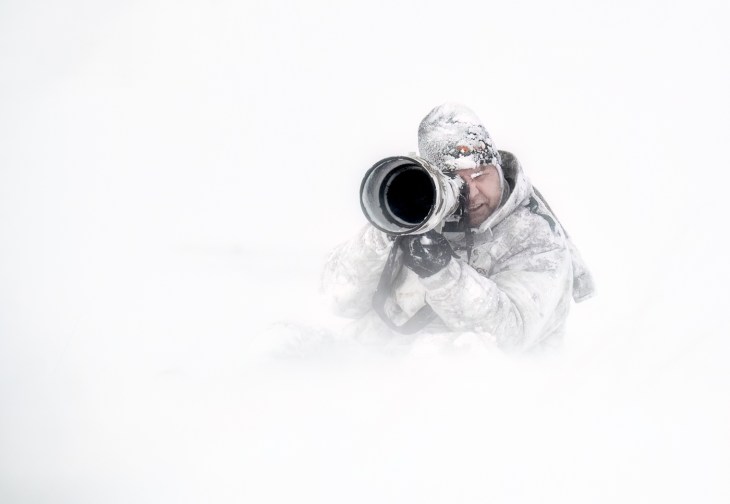
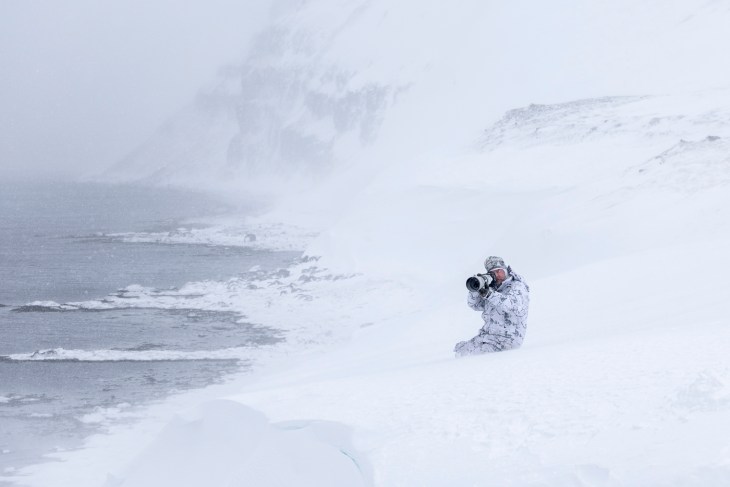
The Special Setting: There is some key wording above that reads: “This setting tends to focus on the background more than other options.” This made me super curious and eager to try how the Special setting performed when photographing wildlife in heavy snow. Fortuitously, a couple of days later, I got my chance and switched my EOS R1 to the Special setting with the RF 600mm f4L IS USM lens and an RF 1.4TC when photographing Walrus in heavy snowfall.
The Results: Fully expecting to encounter the exact same problem of the focus bouncing between the subject and falling snow, I was absolutely ecstatic when the EOS R1 locked onto the Walrus and remained locked on – completely ignoring the falling snow! Over the next ten minutes, I took over 300 photographs of the Walrus, losing focus only when the subject became obscured by ice. Using such a long combination of focal length of the 600mm F4 with the 1.4 TC (effective focal length 840mm) ensured that there was a lot of falling snow between the camera and subject making this an ideal test.
Further Testing Required: The above is an isolated example; further field testing is required to ensure ongoing, predictable, and repeatable results. However, the initial results from using the Special case setting in heavy snowfall are extremely encouraging and give me real hope that this may be the ideal solution for snowfall situations. Unfortunately, I am now headed back to Australia for three months and will not have an opportunity to shoot in the snow until later in the year. If you are shooting an EOS R1 and have a chance to test this yourself in snowfall, please let me know how you find the Special case performs. There may be a strong case for Canon to change the wording of this to “Case Special”. Characteristics suitable for shooting through Nets and Snow.
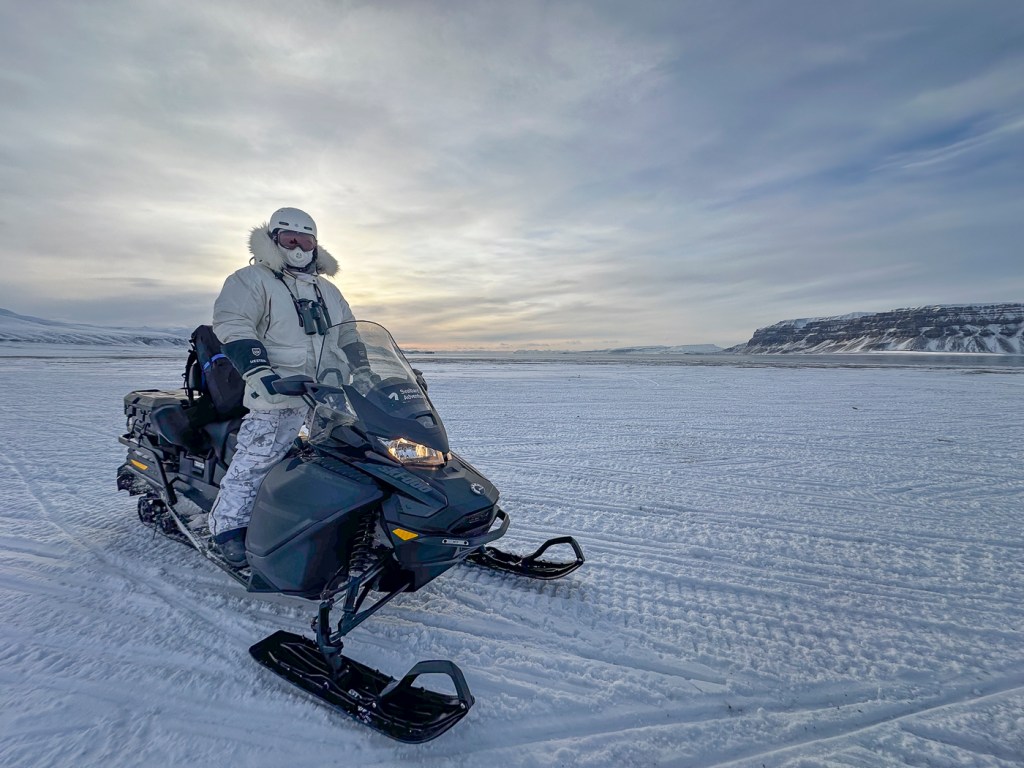
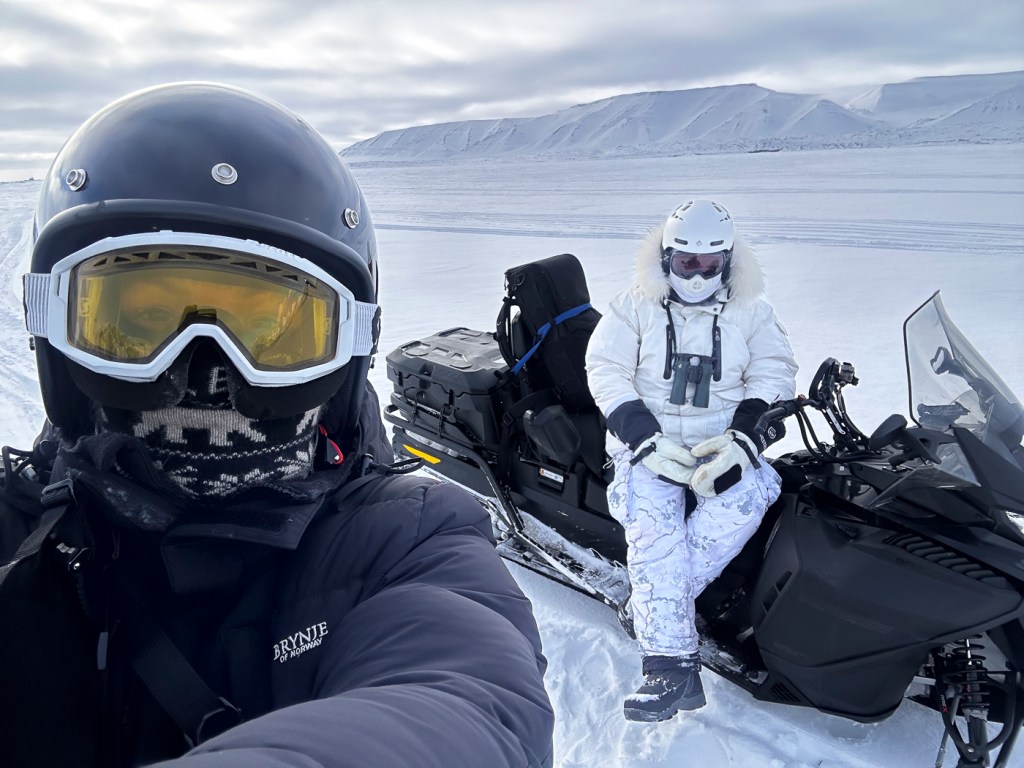
In April of 2026, I led a private 5-day winter snowmobile expedition to Svalbard for wildlife photography. The purpose of this expedition was to explore, on land, the landscape and wildlife within a day’s scooter drive of Longyearbyen. Svalbard is vast, and there is much to discover on land on a winter trip. Exploring by snowmobile on land meant we could stop wherever we wished to photograph wildlife as we found it. Using snowmobiles also means we can get much closer to wildlife than is usually possible on a ship. Staying in Longyearbyen also meant we had a warm base from which to operate, with hot showers and a choice of restaurants in the evenings.
At this time of year, the days are getting longer in Svalbard, with sunrise around 5:30am, sunset around 9:30pm, and last light around 10pm. This provides a huge amount of time for photography, but also means it is early starts and late finishes to catch the best light. During our five-day trip, we experienced temperatures ranging from -30º Celsius on the sea ice along the east coast to just a few degrees below 0º. Temperatures were generally unseasonably warm for this time of year, with most of our days being around -10º Celsius. Snowfall was also sparse compared with recent years, although the coverage was still good outside Longyearbyen. We also had starts as early as 5am departure and finishes as late as 10pm.
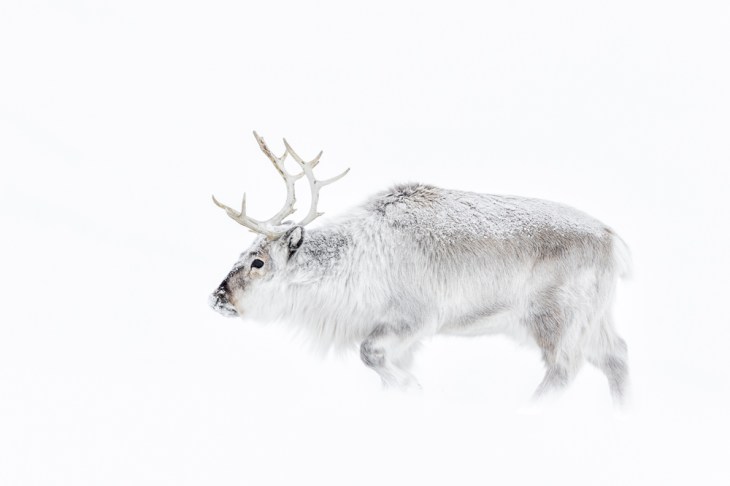
On day one of our expedition, we kitted ourselves out with snow scooters and snow suits, headed toward Svea for a valley (Reindalen) I know is home to a great many Reindeer. Reindalen is situated in Nordenskiöld Land on the main island of Spitsbergen and is roughly a 45-minute scooter ride in good conditions. This is a wide, flat, and open valley that offers excellent opportunities to photograph Reindeer in a clean, white snow environment.
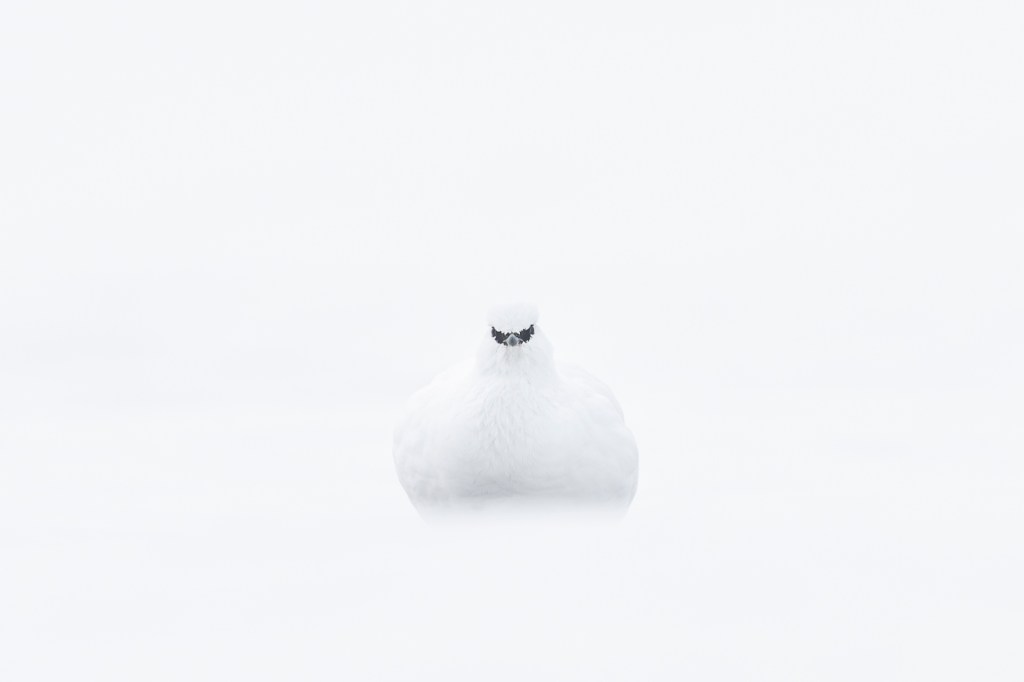
On day two, we left Longyearbyen at 6am for the East Coast in the hopes of finding a polar bear on the sea ice. Although we did not find a bear on this day, we did have some wonderful opportunities with both Ptarmigan and Reindeer en route to Monbukta. This was our biggest day’s drive, covering over 298 kilometres in total and more than fourteen hours in the field. This whole east coast region of Svalbard contains some stunning scenery and is where much of my Ghosts of the Arctic film was shot.
On day three of our expedition, we took a slightly slower morning start and instead had a late afternoon and evening exploration of the Templefjorden area. This proved a boon, giving us our best Reindeer experience during the trip and one of the best I have ever had. With an abundance of fresh, clean snow on the mountains and lower valley in this area and more than a dozen reindeer, the opportunities were ongoing, and we spent several hours photographing them as they curiously approached us and retreated against the mountains.
On day four, we left Longyearbyen super early at 5am and headed for Monbukta on the East coast. On arrival at Monbukta, we headed south and encountered a large male polar bear in superb condition on the sea ice. Photographing a polar bear on the sea ice from a snowmobile is a very special and very different experience from shooting from a ship. On the ice, we are in their environment, with excellent opportunities to photograph the bears at eye level.
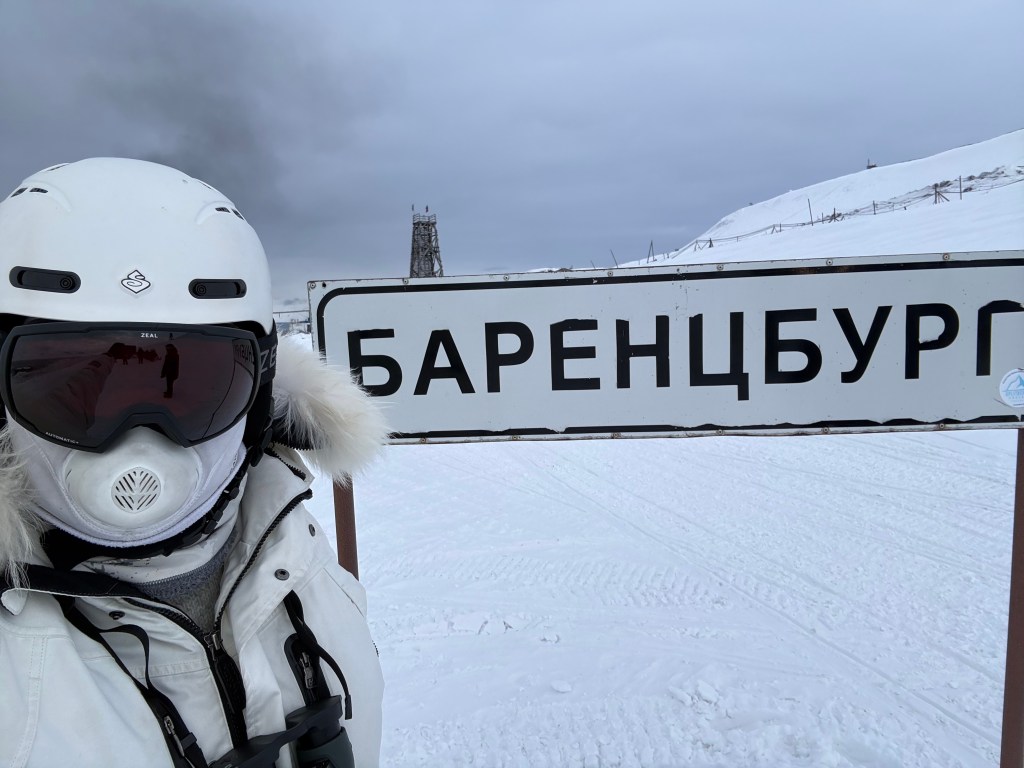
On day five, our last day, we departed Longyearbyen at 5am, at first light, and drove to the Russian settlement of Barentsburg. Barentsburg is approximately sixty-five kilometres from Longyearbyen and is a wonderful scenic drive along the coastline, past the abandoned Coles Bay settlement. This is a region I know is inhabited by many Arctic Fox, as well as Reindeer and Ptarmigan.
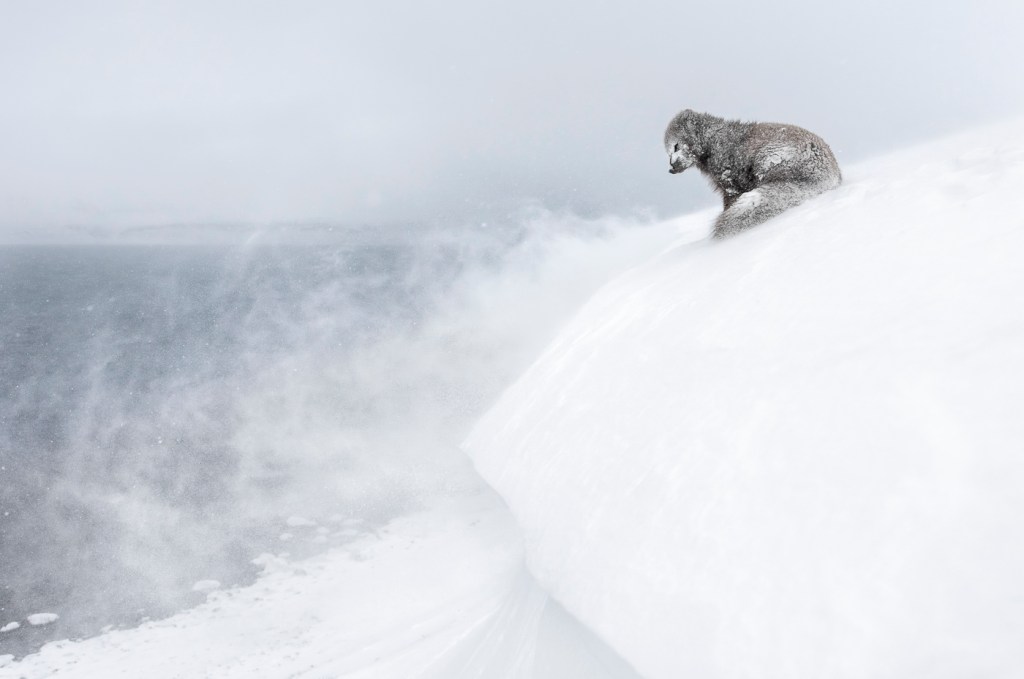
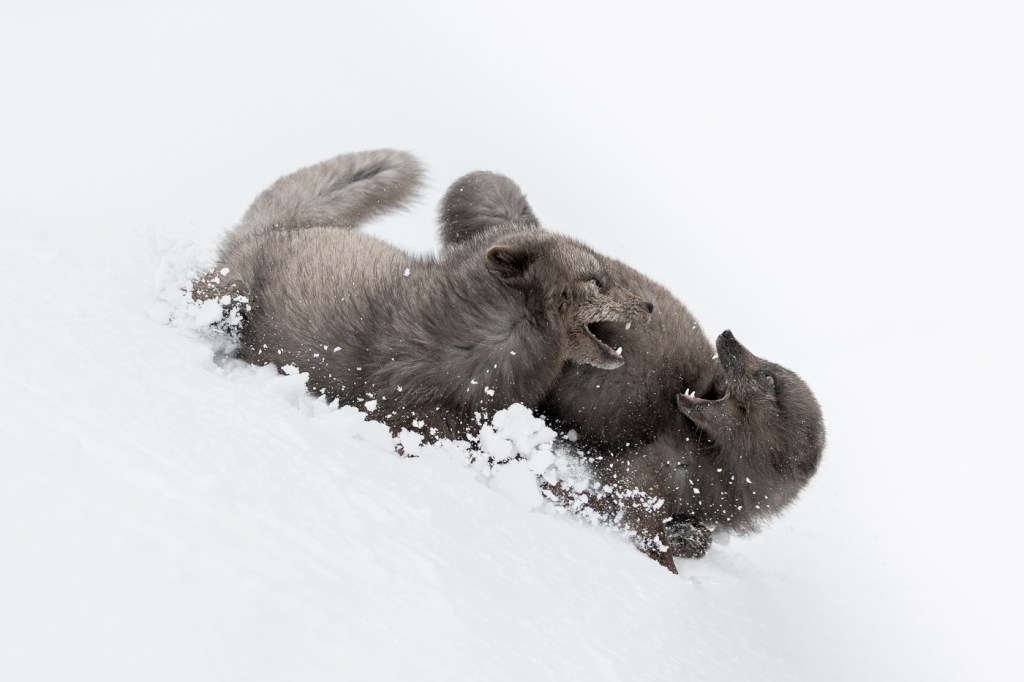
On the way, we had a superb encounter with Ptarmigan before taking breakfast in town. We then spent over an hour photographing Arctic fox on the town outskirts in superb conditions and soft light. With the town of Barentsburg close by, the foxes in this area are more accustomed to humans and easier to approach, making it an ideal location for fox photography.
Over the course of the five-day expedition, we covered more than 1,000 kilometres of driving, including two visits to Monbukta on the East coast, which provided a wonderful and varied portfolio of arctic wildlife photographs. Private workshops such as this, with my company, Wild Nature Photo Travel, are available by request. Please get in touch to discuss your needs, and we can tailor a trip to suit your requirements.
A few days ago, I received some absolutely wonderful feedback and a quite extensive review from a participant from a prior year’s Arctic Fox workshop in northern Iceland. They have told me they are more than happy for me to share their review here on my blog (thank you, Andrew).
Hi Josh, what can I say? The trip with you to the Arctic Fox surpassed all my expectations and then some. I didn’t tell you, but I did a lot of research before I chose to join your trip. It was not just your photographs (which are so much better than anyone else’s from this place, and now I understand why), but also the recommendations and word-of-mouth about your professionalism and approach.
For me, spending time in the field with you defined what the workshop experience should be.I have been on over twenty wildlife workshops around the world in the last ten years with nearly as many different workshop leaders, and what immediately sets you apart is your intimate understanding of the wildlife (in this case, the Arctic fox). I don’t mean just where to find them, but how they behave, how they move through the landscape, and how to position everyone to get the best possible photographs. Your professionalism in positioning and ensuring everyone gets the best images is unmatched. Most leaders care only about their own photographs. I watched you stand back many times after positioning everyone to ensure everyone maximised the moment. That is a testament to your professionalism.
From a technical standpoint, your guidance is exceptional. Whether it’s about exposure in the snow or making the most of conditions, you have a way of simplifying complex decisions in the field so that the camera gets out of the way. More importantly, you teach why, giving participants like me the confidence to adapt when conditions inevitably change.
But what truly elevated the experience was your fieldcraft. Every detail, from approach routes to time spent with a subject, was handled with a level of care that prioritises the welfare of the wildlife above all else. It’s a philosophy that not only leads to better images but also leaves all with a deeper appreciation for the environment we were working in.
I also noticed a quiet intensity to your own workflow. You don’t rush, you don’t force situations, and you don’t rely on luck. Instead, you create the conditions in which luck can occur. I can see that this comes through preparation, knowledge, and an extraordinary level of patience. Being around that mindset is as valuable as any photograph you come away with.
In a place as raw and unpredictable as Iceland, your kind of leadership makes all the difference. You didn’t just guide me to a location. You showed me how to truly see it. Thank you.For anyone serious about photographing Arctic fox in Iceland, it’s hard to imagine a better person to learn from.If anyone is on the fence about joining one of your trips, please have them contact me anytime. In the meantime, please sign me up for next year. I can’t wait to go back! Andrew from Australia