Introduction: Gloves are a constant source of frustration for any photographer who has ever photographed in really cold climates (not just cool climates). In the 25+ years I have been photographing in the world’s polar regions, I have yet to encounter the perfect glove. It is not for lack of trying; my cupboard is full of gloves I have purchased over the years that have subsequently failed the field test and now gather dust while they await their final journey to the great clothing recycle bin in the sky. Like the perfect Cold Weather Boot, the perfect Cold Weather Glove for photography simply does not exist. The ideal glove is therefore a compromise based on user needs, preferences, and environmental considerations. I previously published a podcast (Episode 92 – Cold Weather Photography Gloves) on this topic back in February 2024, but much has changed in the two-plus years since then, and an extensive update is in order, along with a deep dive podcast on this topic (coming soon). My years of glove frustration have finally boiled over, and in this blog post and the deep dive podcast, I am going to dissect and fully analyse the problems and discuss at length how to develop the ideal cold-weather photography glove. I am also going to discuss some of the popular gloves on the market and dissect the many issues and problems with them.
Transparency: For the sake of transparency, you will not find affiliate links here. The internet is awash with websites that tell you, ‘we have reviewed X products, and these are the best‘. Such websites and reviews are nothing more than thinly veiled attempts to advertise products and make money through affiliate links. I have no interest in selling gloves, boots or bags under the table to make extra money. What you will find here are my straightforward recommendations based on my experience – nothing more.
The Problem: Gloves for cold-weather photography are more problematic than boots because photographers have a very specific need to control our cameras whilst staying warm and dry. This requires a glove that provides a high degree of dexterity (at least in the thumb and forefinger) whilst still offering significant warmth and protection from the elements. Over my years in the field, I have been continually frustrated by over-hyped (and over-priced) cold-weather gloves that fail to deliver on their extensive promises. Gloves marketed to photographers as the ‘perfect photography glove’ are, frankly, (and truthfully) rubbish in the vast majority of cases. Fold back fingers that get in the way (who on earth thought that was a good idea?), and allow ingress of water and snow are but a small example. Whoever came up with the concept of the fold-back finger has clearly never tried to work in blizzard or sleet conditions, whilst lying in the snow and trying to photograph wildlife with a long lens. Whilst fold-back fingers are a woeful design decision, the list of poor design choices in so-called ‘photography gloves’ does not stop there. Gloves that don’t fit properly are commonplace; those that are unfit for purpose, are not windproof, not waterproof, lack dexterity and tactility where it is needed, lack insulation where it’s needed, consist of a liner that is too thin have zippers that cannot be operated by gloved fingers, zippers that break, touchscreen liners that dont work, and are otherwise utterly useless, and the list of problems goes on.
The Problems Bottom Line: Ultimately, the problem is that none of the gloves on the market has been designed by a photographer who has significant cold-weather photographic experience. Most are re-purposed hunting gloves or gloves designed by outdoor companies for various ‘outdoor activities’ (hiking, kayaking, mountaineering, ice climbing, etc). None of which are designed and built from the ground up for cold-weather photography. Those gloves that do claim to have been designed by photographers are, in my experience, garbage. They might be fine if it’s +5 degrees and you are on a tripod, but they are utterly useless in real cold-weather environments. Photographers working in cold climates have very specific needs for their gloves, and these needs differ significantly from those of hunters and other outdoor activities. These needs are simply not being adequately addressed by any manufacturer to date. Understanding these needs is key to good design and to creating a glove fit for purpose.
A Call to Arms: If there is any manufacturer out there who wants to collaborate on the ground-up design of a cold-weather glove system for photographers (a huge market opportunity), please reach out to me.
Breaking Down the Problem: If we analyse the problem that photographers who want to operate in cold environments face, we can break down our needs as follows:
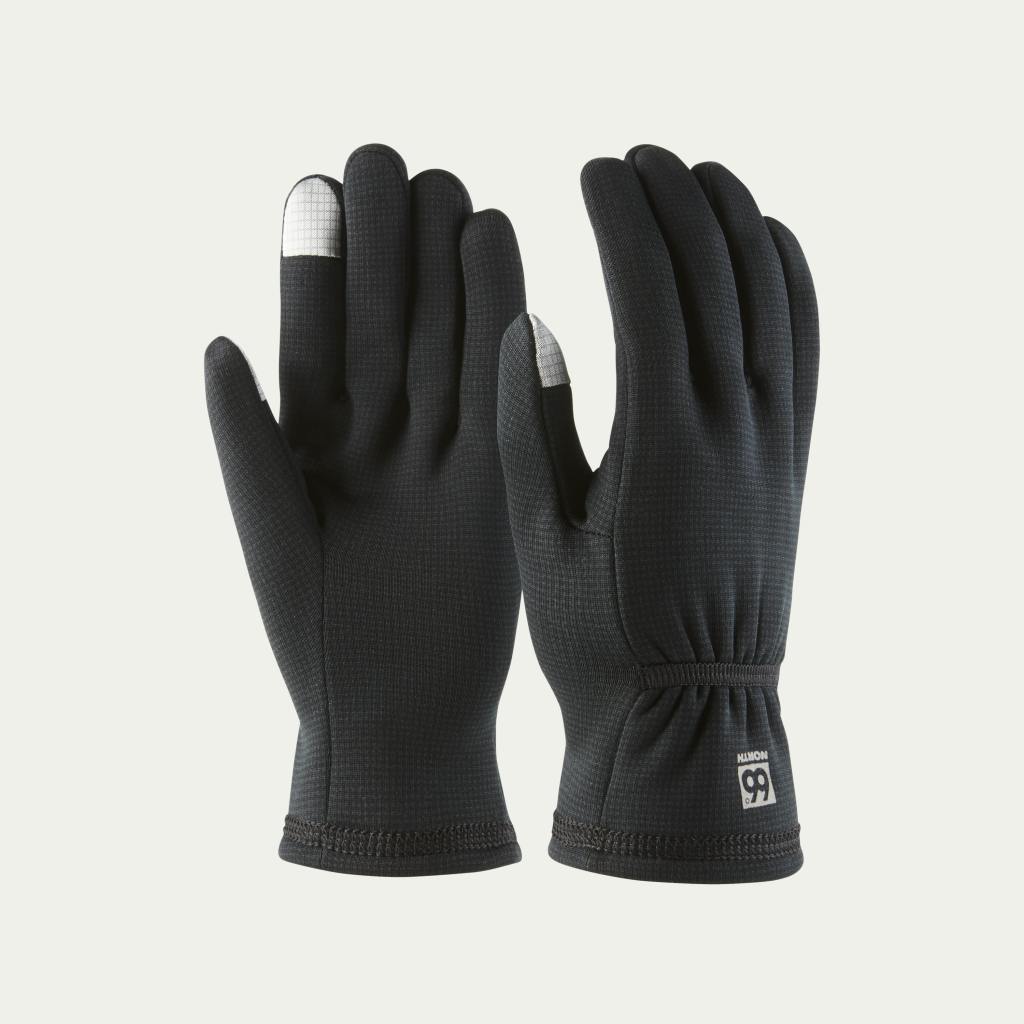
- We require a high degree of touch sensitivity and dexterity in the first pad of our thumb and forefinger (predominantly on our right hand only) so that we can easily and reliably feel the camera controls under our fingers. These two fingers also need touchscreen-support fabric, and for the Canon EOS R1 and EOS R3, a fabric that specifically works with the I.R touch-sensitive Auto Focus button on the back of the camera. To my knowledge and testing, 66º North are the only company that makes a fabric that reliably works with the touch-sensitive Auto-focus button on the EOS R1 and EOS R3. Unfortunately, this fabric is only found on a thin liner that is otherwise useless in snowy environments, as it gets wet within a few minutes. These gloves also have quality control issues with the stitching coming undone. I wrote about these in a previous blog post on the EOS R1 HERE.
- On the other three fingers on each hand, we require a high degree of warmth to protect them from the cold. Ideally, this would also be extended to the thumb and forefinger, leaving just the first pad of each with the thinner material noted above in point 1. This extra warmth is even more important on the left hand, which frequently supports a metal lens (or lens foot or tripod) that will be extremely cold in cold weather.
- The entire glove needs to be windproof and waterproof1. Not wind or water resistant – but windproof and waterproof. Cold-weather wildlife photographers, in particular, spend a lot of time lying on the ground in the snow. As soon as snow sticks to a merino wool liner or other non-waterproof material, it melts in the body’s residual warmth, and the glove gets wet, leaving cold, wet fingers and rendering it useless. Landscape photographers who often shoot in the rain will be familiar with the problem of non-waterproof gloves. These days, I will instantly dismiss a glove if it’s not waterproof (or if it cannot be made at least water resistant with a spray), as it’s unfit for purpose (see footnote below).2
- The seal around the wrist of the glove should be firm, but not tight on the wrist to keep out snow. The seal around the wrist should also be warm. The glove cuff should be designed to fit under an outer jacket, with the cuff against the wrist, not designed to go over the top of the jacket. Gloves with a large snow gaiter-style entry are useless for photographers, as the large opening invariably doesn’t fit over a bulky outer jacket, causing it to bunch up and let snow in.
Battery Heated Gloves: Personally, I find battery-heated gloves a real nuisance. Typically, the batteries are housed in a large snow gaiter around the cuff, which flops annoyingly with the additional battery weight and invariably bunches up against an outer jacket. None of the battery gloves I have tried provides sufficient tactile control for the camera, and if they do, they are not waterproof. In my experience, the batteries rarely last a full day of fieldwork and require daily charging (I have tried a few different brands over the years). At this point, I feel I just don’t need or want anything else in my life that requires daily charging. Nor should it be necessary to use battery heaters if the glove is well designed and fit for purpose.
How We Experience Cold: It is important to note that we all experience cold differently. For me, my hands rarely feel the cold, and my tolerance for cold in my fingers seems unusually high. I frequently go without gloves while others reach for their warmer set. Your tolerance for the cold may very well be different to mine, and you should keep that in mind when making any buying decision. Another important point is that Nature photographers (I include landscape and wildlife in that genre) are typically not all that active in the field. We may hike to a location that requires some degree of activewear, but we often spend a long time waiting outdoors for wildlife or the right light. Thus, the choice of gloves is critical to our comfort level in the field. Many products from active-wear companies are simply inappropriate, in my experience, for cold-weather photography because they do not account for the significant time photographers spend inactive and just sitting or standing around in the field.
The Proposal: I propose that the perfect glove for cold-weather photography should be a two-stage system. That is, it should comprise a base-layer glove and an outer glove (or mitt) that slips over the top of the base layer when temperatures really plummet (let’s say below -10º Celsius, though this temperature will vary by individual).
The Base Layer: The base-layer glove should be designed and constructed around points 1, 2, 3, and 4 above. It should have sufficient insulation in the fingers for temperatures down to at least -10º Celsius. This means it needs to be better insulated than a merino wool layer alone. The first pad of the thumb and forefinger still needs to be thin enough to provide adequate tactile control of the camera, but the rest of the thumb and forefinger can be as insulated as the other three fingers. On the back of the palm, there should be a small pocket with a velcro closure (I prefer velcro to magnets, as it keeps out snow and water better) to optionally house a chemical hand warmer. The back of the palm is the ideal place for a chemical warmer, as it’s over the veins that carry blood to the fingers. This sort of pocket is already found on several base-layer gloves marketed to photographers (which are not waterproof or windproof and thus inappropriate).
The Second Layer: When temperatures really plummet, there needs to be a secondary layer or ‘mitt’ that can be pulled over the top of the base layer. This should not be a fold-back mitt attached to the base layer (as that just gets in the way), but an entirely different mitt pulled over the top of the base layer. This oversized mitt should contain significant insulation and be both windproof and waterproof. This mitt should have a significantly oversized snow gater entry that can be easily pulled over the top of a bulky outer jacket without bunching. Additionally, it should have the ability to slip the thumb and forefinger out through a ‘slit’ so that the photographer can maintain tactile control of the camera, but can put their fingers back inside the mitt if they get too cold. Yes, that means there will be an entrance in the second layer that snow and water can enter, but remember, the base layer is also waterproof in this design.
The Current State of Play: The above glove system, as documented, simply does not exist (as of this blog post), and until a manufacturer takes this feedback on board and builds the ideal glove, photographers will continue to struggle with gloves that are not truly fit for purpose in cold-weather environments.
Additional Design Considerations: Photographers already have a lot of gear to manage. We don’t need to complicate our lives further. Thus, straps and other systems designed to clip gloves to are usually not a good idea. They often get in the way when lying down in the snow and tend to snag on cameras and lenses. A simple clip system to clip a pair of gloves together and to a backpack or jacket is all that is required. Keeping it simple is the key to making the gloves ‘get out of the way’ in the field.
My Current Glove Solution: As noted above, no manufacturer has designed and constructed the ideal glove for cold-weather photography. As such, my current glove system is a compromise based on experience and extensive field testing.
The Base Layer: My current choice for base layers is the 66º North Vik Wind Pro Gloves. These gloves are extremely warm for a reasonably thin liner, but they are not waterproof and need to be treated with a waterproofing spray to make them repel water in the field. They are also extremely expensive for a liner glove (at around $75 USD a pair). However, they are the only gloves I have tested to date that have a touchscreen fabric on the thumb and forefinger, which reliably works with the Canon EOS R1 and EOS R3 I.R Touch Sensitive Autofocus button.
These gloves are thin enough that they provide an extremely high degree of dexterity and tactility for camera control. Once treated with a waterproofing spray, they become sufficiently water-repellent for use in snow, sleet, and rain. In continual or very heavy rain, you may still get wet fingers and hands even with waterproofing treatment. Without a waterproofing treatment, these gloves are not suitable for use in rain, snow or sleet.
In my experience, these 66º North gloves are suitably warm down to about -5 °C without additional glove support. For temperatures below -5º C, I will add a second layer as noted below.
The Mid Layer: My current mid-layer is a pair of modified Hestra Expedition Liner 3-Finger gloves. I use these gloves over the top of the base layer from 66º North when temperatures drop below -5º Celsius. These gloves are incredibly warm and suitable for use (with the liner above) in temperatures down to -35º Celsius, and even colder, depending on your tolerance for the cold. I have modified my pair by making a small 2 cm cut in both the thumb and forefinger on the right hand side so that I can push out my thumb and forefinger to use the I.R touch sensitive pad on the Canon EOS R1.
From the factory, these gloves are not waterproof, but they are quite good at wicking moisture away, and with the addition of a waterproofing treatment, are extremely effective at keeping out snow, sleet and rain in inclement weather. I have not hesitation in using these gloves while lying down in the snow and rain (once treated). They are made from Ripstop polyamide with Primaloft insulation. Reinforced with Chamude in the palm. It has been my experience that Hestra gloves (in general) are extremely well constructed and do not come apart at the seams as many other brands do.
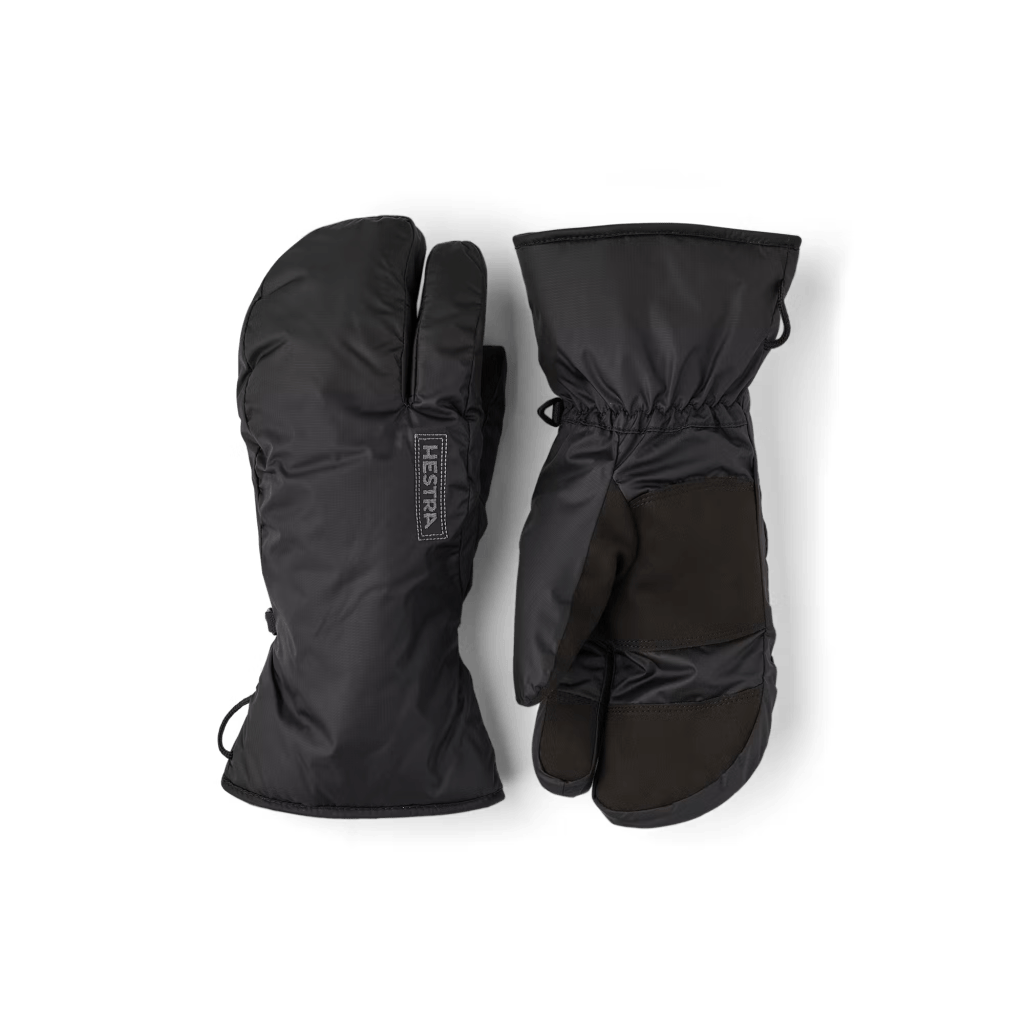
The Outer Layer: My current outer layer is the Hestra Expedition Liner 3-Finger.
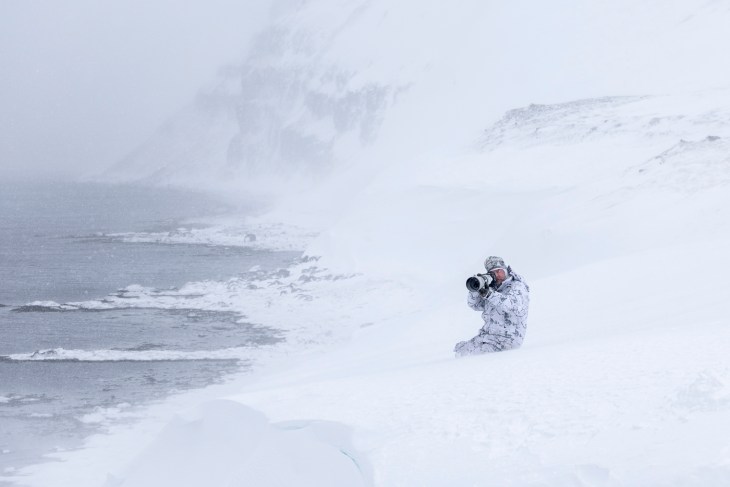
Glove Considerations: When assessing the suitability of a glove for my type of photography, I consider dexterity (the ability to control the camera), comfort and warmth for the intended purpose, ease of getting on and off, and long-term durability amongst the most important factors. The ability to withstand water (depending on the intended use) and to keep out snow also plays a major role in my decision-making. Lastly, manufacturer support also plays a role in addressing potential issues. I do not consider price when assessing the qualities of gloves for cold-weather photography since it’s folly to try to save a few bucks at the expense of cold fingers.
Conclusion: Ultimately, the choice of glove is a personal one based on your needs, preferences, and tolerances for the environment in which you work. There are many more gloves on the market that I have not used or tested, and they may or may not deliver great results, depending on your personal needs. There are other gloves I have tested that I feel fail to live up to their claims, so I won’t review or recommend them. The above are products I will stand behind as offering superb performance in their temperature range for cold-weather photography.
Author: Joshua Holko
- Many gloves and liners on the market are not waterproof from the factory, but this does not necessarily make them unfit for cold-weather photography. It is possible, with waterproofing sprays, to make even Marino wool liners highly water repellent. Such sprays typically require reapplication regularly to maintain the gloves’ water resistance. Waterproofing technology has significantly improved in recent years, with many hydrophobic options now on the market. It is possible to treat various fabrics and not just leather for waterproofing and water repellency. ↩︎
- I want to tell a recent anecdote about a European company that shall remain nameless (for now) that tried to laughably tell me their photographers’ gloves are not waterproof (a glove marketed specifically for cold-weather photography) because they are designed to be used in temperatures below 0º Celsius when water is frozen. I had to point out to them that it doesn’t matter how cold it is outside; if you get snow on a non-waterproof glove, it will melt from the residual body heat passing through the glove, leaving a wet glove and cold, wet fingers. It took less than five minutes of lying and shooting in the snow with these gloves to end up completely wet through. I also pointed out that photographers can often find themselves on zodiacs in sub-zero temperatures with sea spray, resulting in wet gloves. This was a pair of gloves I (and another photographer I know) returned as ‘unfit for purpose’. To the company’s credit, they did take back the gloves and offered store credit toward other items (which I used for socks, not their gloves!). They have, however, continued to market and sell these gloves to unsuspecting photographers who will no doubt experience wet, cold fingers during field use. ↩︎