Last year BenQ shook up the wide gamut monitor world with the release of the BenQ SW2700PT 27” Adobe RGB monitor (Reviewed here on my Blog and also on the Luminous Landscape website). This 27” monitor offers excellent performance for a wide gamut Adobe RGB display at a price point that was (and still is) far lower than the majority of competitor offerings. When I reviewed the SW2700PT last year I actually wrote that it offered exceptional performance at its price point. Having now lived with this monitor in my studio for the better part of a year I can say without doubt that this is still the case. If you are in the market for a wide gamut monitor with accurate colour and excellent uniformity on a tight budget I doubt you could do any better; or could you? BenQ SW320 Preview – In November last year at Photo Plus in New York BenQ showed us a sneak preview of it’s recently announced (but not yet available for sale) 32” SW320 4K UHD Wide Gamut Monitor. As of publication time of this review the SW320 has not yet been officially released to the public for sale, but I have been testing a production sample of this monitor in my studio for the last few weeks and have now had the time to write a complete review of this remarkable new display. To be clear, the SW320 is not designed to replace the previously reviewed SW2700PT, but rather to supplement the BenQ line up with a high quality 4K UHD wide gamut offering at a competitive price point. So has BenQ succeeded?
In a nutshell; Yes, they have. The SW320 builds upon the success of its exceptional smaller brother (the BenQ SW2700PT) whilst unequivocally setting a new performance benchmark for wide gamut monitors at a low price point. In addition to its UHD resolution the SW320 takes image quality to the next level with the addition of HDR capabilities (not found in the much more expensive Eizo CG-318 I also reviewed last year). According to the supplied literature from BenQ, High Dynamic Range (HDR) increases the overall dynamic range between black and white so the resulting image appears closer to what your eyes see in the natural world*.
*To view HDR content from your device, ensure that you use the HDMI cable provided with the SW320 monitor or a High Speed HDMI Cable or Premium High Speed HDMI Certified Cable.
Does this HDR feature make a difference in the real world? Its hard to say in my experience to date without rigorous scientific testing (which I have not had time to do); but in my own user experience thus far I have no hesitation in stating that the SW320 has outstanding contrast and dynamic range.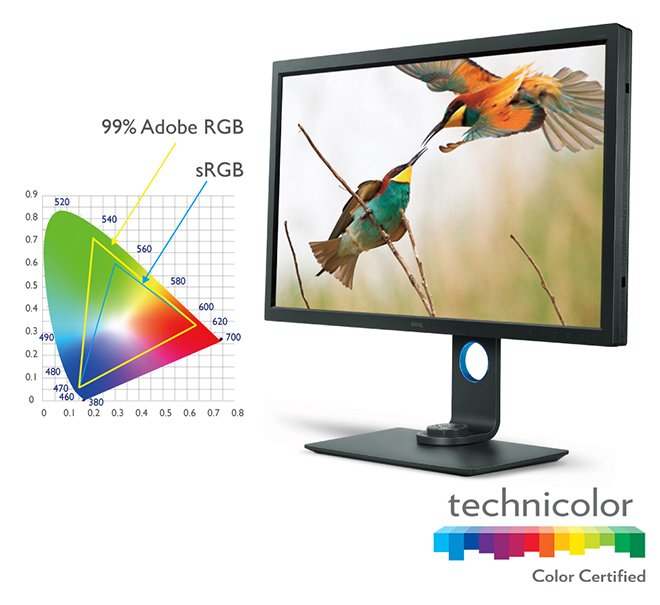 In short, the new 31.5” 4K UHD monitor offers extraordinary performance with a true 10-bit panel with 99% Adobe RGB, 100% sRGB colour space coverage as well as supporting HDR content. The knock out punch is that it does so at a price point previously unheard of for a monitor of this size with these features.
That isn’t the whole story though as the new BenQ SW320 has other improvements over and above monitor size, resolution and image quality. The overall quality of colour reproduction on screen has been further improved from the SW2700PT. In side by side comparisons the SW320 outperforms its smaller brother in colour fidelity and uniformity. Lets examine the features and performance in more detail as well as compare this new screen to other UHD and 4K Displays on offer in the marketplace.
SW320 Key Features
BenQ SW320 Monitor Key Features
- 31.5 inches, 16:9 3840 x 2160 true 10-bit IPS Technology Panel
- 99% Adobe RGB coverage, and 100% SRGB
- Colour accuracy with 14-bit 3D LUT with a Delta E of less than 2
- Palette Master Element Calibration Software with Hardware Calibration with LUT
- High Dynamic Range (HDR) content support ready
- Brightness Uniformity Function
- GamutDuo function to support dual color space on one screen
- Advanced Black and White Mode
- Technicolor Color Certified *
* Technicolor® Color Certified is a designation reserved for devices — PC monitors, laptops, all-in-ones, and tablets — that satisfy the required Technicolor specifications during the device’s manufacturing process to meet the same strict standards for colour accuracy used in Hollywood and throughout the media and entertainment industries. All Technicolor Colour Certified devices display colours accurately, consistently and exactly as the content originators intended. Anyone can enjoy shopping, entertainment and gaming experiences with full confidence that the colour you see onscreen is accurate.
Specifications – There is no need to regurgitate a complete list of the SW320 specifications as those are already available on BenQ’s website. See the SW320 page on BenQ’s website for full details.
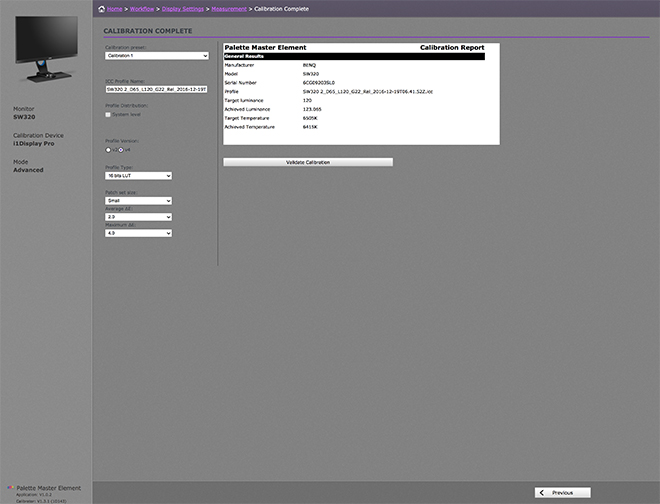
Out of the Box – Every single BenQ SW320 ships with an online factory Calibration Report. This detailed report includes some very useful information including Uniformity Measurements and Dealt E reports that tell you just how your individual SW320 performed when tested before it left the factory. It is worth noting that the report is serial number specific and not batch specific so BenQ are testing each and every monitor. These sort of reports are normally only found in much more expensive displays such as those from the NEC SpectraView Line and the Eizo Colour Edge monitors. The mere fact the BenQ SW320 ships with this sort of individual test report speaks volumes to the sort of high quality display BenQ have produced and the care and attention to detail they have invested in this new display. A copy of the individual calibration report included with the supplied SW320 as tested is included below: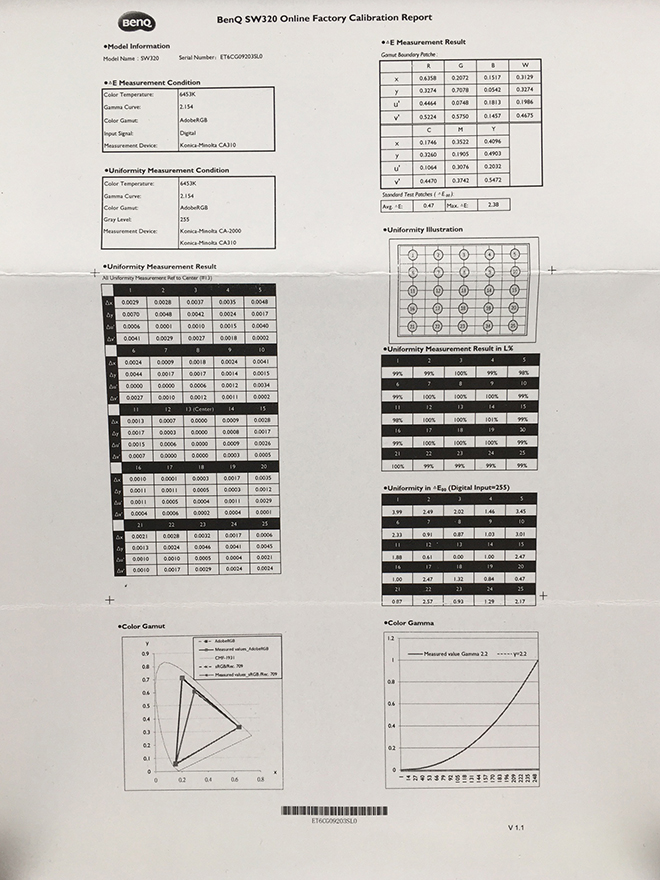 Out of the box the BenQ SW320 is a breeze to set up and in less than ten minutes I had the stand fully assembled, the display plugged in (via HDMI) to my MacBook Pro and the system fully operable. It seems to me that with every new model BenQ have continued to refine and improve their display stand and ease of installation. Other manufacturers would do well to take note.
SW320 Performance – Like many displays the SW320 ships in ‘flame-thrower’ mode and out of the box was far too bright for my viewing environment. I know manufacturers do this to try and impress viewers who will no doubt see the display first in a brightly lit fluorescent showroom but I really wish they wouldn’t. Once calibrated however to a more reasonable 120 Candelas and D6500 Kelvin I was able to properly assess the SW320’s performance and make direct comparisons against other displays.
BenQ Palette Master Software – To get the very best results from the SW320, the profiling software you use needs to access the internal monitor hardware Look up Tables (LUT), and for that you need the supplied Palette Master Element software. For Apple users, the supplied software is installed as an application. I don’t own a Windows machine so did not test the software under a Windows environment.
The SW320 ships with the BenQ Palette Master Software; but it can also be downloaded for free from the BenQ website. By using the Palette Master Element software and a calibrator (X-rite i1 Display in my case), you can tune and maintain the colour performance of the monitor at its most optimal state.
The BenQ SW320 currently supports the X-Rtie i1 Display Pro / i1 Pro /i1 Pro 2 , and Datacolor Spyder 4/5 colorimeters. I tested all of these during my time with the SW320 and all performed without issue.
Palette Master Welcome Screen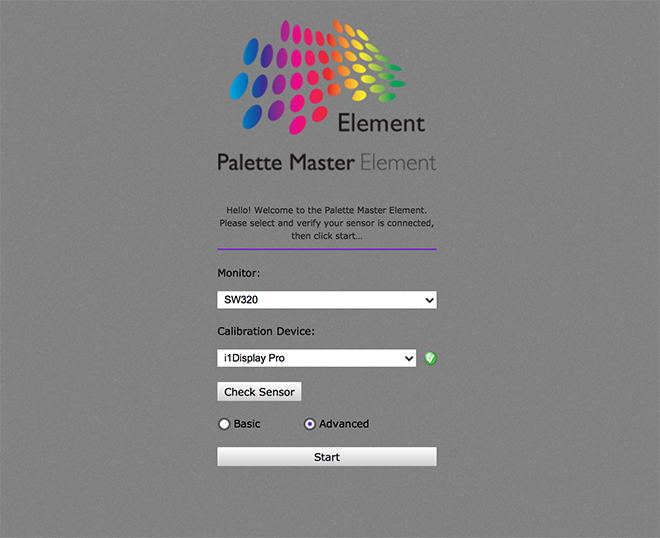 Palette Master Advanced Settings Screen
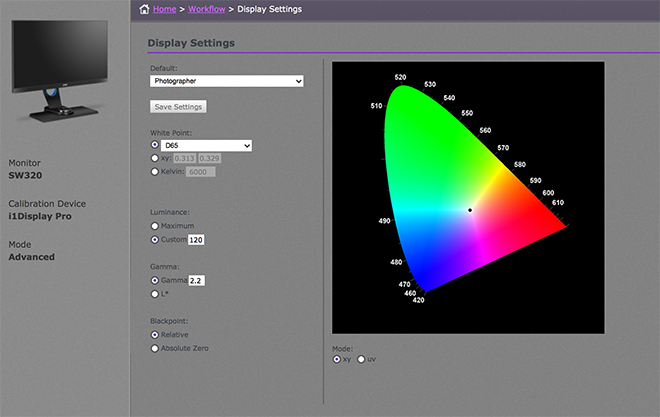 Palette Master Measurement Screen
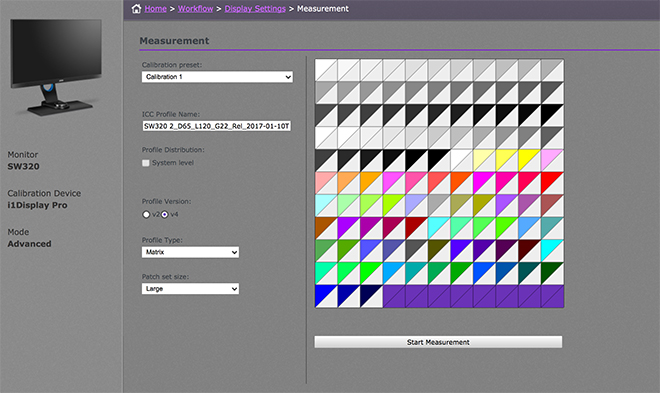 Palette Master Calibration Results
 BenQ provide a user friendly instruction manual with the Palette Master Software that you can download from their website. There is both a basic and advanced mode to choose from. The instructions are clear, concise and easy to follow. Download the PDF Manual HERE.
Driving a 4K UHD Display – Before you rush out and purchase any UHD or DCI 4K display you should make sure your computer can actually drive the display at its native resolution. In my case I tested the SW320 with both a 2013 6-core Mac Pro with 64 gigabytes of RAM and dual AMD FirePro 500 video cards and a late 2013 15” MacBook Pro with an NVIDIA GeForce GT 750M 2048 MBMB and both were able to drive the display at its full native resolution. I did notice the fan kick in more often on the MacBook Pro when driving the SW320 than with the previous SW2700. This is to be expected as the video card is being driven much harder with the higher resolution display. There were however no ill side effects and system performance and speed appears unaffected in general day-to-day use.
Advanced Black and White Mode – The BenQ SW320 also includes an advanced Black and White mode that allows you to view your photos in a black and white film effect. You can choose from three different black and white presets to preview your photographs in before you perform actual adjustments in Lightroom or other image editing applications. I am not a black and white photographer so I didn’t test this feature other than to quickly check it actually functions as advertised; which it does. Black and White photographers should definitely test this feature to see if it fits within their workflow. Gamut Duo – The BenQ SW320 is equiped with a very cool new feature called GamutDuo. GamutDuo enables you to view content simultaneously on the screen in different colour spaces side-by-side for easy comparison. I found this new feature quite useful to soft proof images going from Adobe RGB colour space to SRGB for the web. By viewing the two images side by side it is very easy to see the differences. Users who have to re-purpose their photographs for different colour spaces are likely to find this a very useful feature. To activate the GamutDuo feature you switch to PIP/PBP mode.
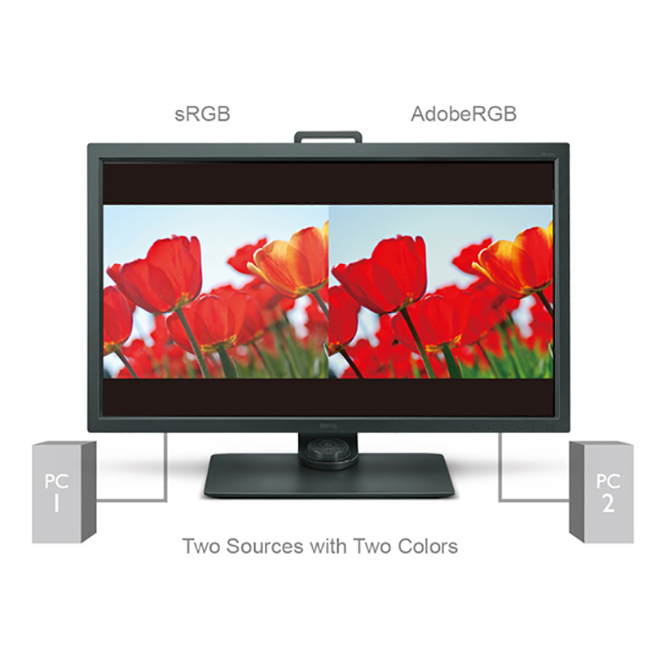 You can learn more about “How to use the GamutDuo function to view contents in different colour spaces side-by-side” by watching this short video:
 Hotkey Puck – Like the BenQSW2700, the BenQ SW320 ships with a The Hotkey Puck that allows the user to switch between Adobe RGB mode, sRGB mode and Black & White modes effortlessly. The hot key buttons can also be customised to map other modes or OSD settings, such as brightness and contrast to bring added convenience to photographers. The Hotkey Puck is a nice addition and it is worth taking a bit of time to properly understand its uses and how it might save you time in your own workflow.
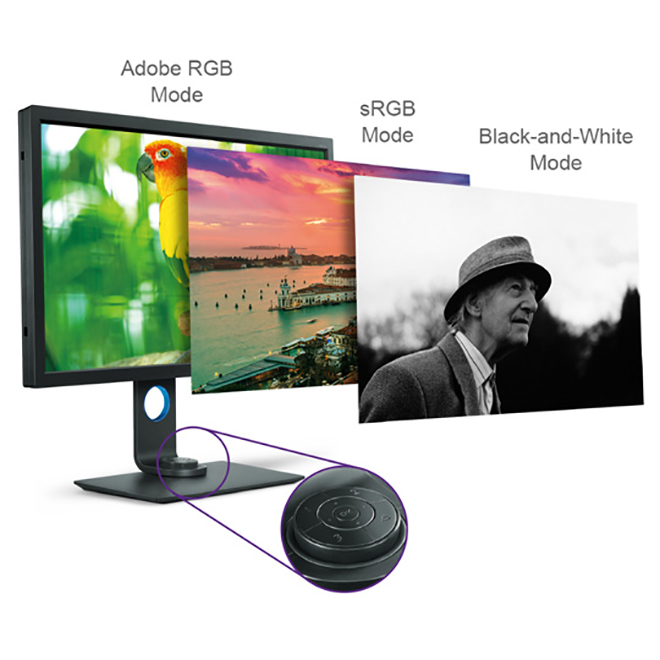 You can learn more about “How to set up the Hotkey Puck to switch between modes rapidly” by watching this short video:
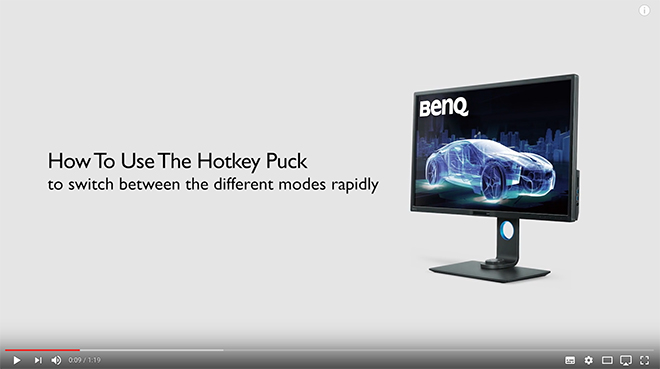 4K Display Comparisons – Comparisons between the BenQ SW320 and the previously reviewed Eizo CG-318 4k DCI display are going to be inevitable so lets get those out of the way (since I have both displays side by side in my studio). Firstly, and perhaps most importantly there is a huge price differential between these two monitors. The Eizo retails for approximately $6000 USD MSRP and the BenQ will likely sell for under $1,500 USD when it goes on sale shortly. That difference alone is going to make the choice a no brainer for most people. There are however some other important differences worth noting. Wether those differences are worth the $4,500+ USD hit to your hip pocket depends on your needs and circumstances.
Firstly the Eizo CG-318 is a true DCI 4K Display with a resolution of 4096 x 2160. The BenQ SW320 is UHD (Ultra high Definition) with a resolution of 3840 x 2160. The DCI 4K standard goes above the UHD resolution of 3840 x 2160 pixels that is often confusingly marketed as being 4K instead of UHD. Perhaps the easiest way of defining the difference between 4K and UHD is: 4K is a professional production and cinema standard, while UHD is a consumer display and broadcast standard. Whilst the difference on paper between 4096 pixels (DCI 4K) and 3840 pixels (UHD) on the horizontal access is only 256 pixels this equates to a not inconsiderable 7% increase in resolution across the entire display that makes for an overall larger workspace. However, unless you have specific need of a DCI 4K Display in your workflow there is frankly little benefit to the additional resolution in real world applications in my own experience. In fact, you may prefer UHD resolution for pixel mapping if you are dealing with 4K consumer video. The Eizo CG-318 also has its own built in calibration device that can be automated and scheduled. The BenQ requires the use of an external colorimeter (like most displays including the NEC Spectraview range). This isn’t a big deal in daily use, although one could argue its awfully convenient to simply schedule the Eizo to calibrate itself once a week. The BenQ SW320 does include thoughtful nag warnings to remind you to calibrate the display on a regular basis. How often you choose to calibrate depends on your circumstances and how neurotic you want to be with your hardware. In general, I find every few weeks to be more than sufficient.
Measuring colour gamut between the Eizo and the BenQ SW320 is a pointless exercise since for all intent and purpose they are identical in real world applications. Both produce 100% of the SRGB colour space and both produce 99% of the Adobe RGB space. Any subtle differences in gamut are a quibble. In terms of brightness uniformity the SW320’s exceptional uniformity is achieved through a delicate process involving the utilisation of high precision apparatus to meticulously fine-tune hundreds of sub-regions on the entire screen. The results of this fine tuning is a noticeable and significant improvement in uniformity over the SW270 and outside of the extreme corners it measures almost as good as the Eizo CG-318. This is remarkable performance, regardless of price and BenQ are to be commended for their efforts in obtaining this exceptional level of uniformity. You can check how your individual BenQ SW320 monitor performed in its uniformity test on the supplied Factory Calibration Report.
Comparing a sub $1,500 USD MRSRP display to one that costs around $6000 USD MSRP might seem a bit unfair but the results illustrate just how good the SW320 really is and just how much bang it offers for the buck. Quite honestly, its ground breaking performance at this price point.
Perhaps a fairer comparison would be to compare the NEC Sepctraview UHD display agains the new BenQ SW320 but unfortunately I did not have access to this display for a direct comparison. Since the NEC Spectraview sits between the Eizo and the BenQ in terms of price it will no doubt perform equally well and I suspect any differences outside of calibration software in real world use to be a quibble.
Comparing the BenQ SW320 UHD display to LG’s 27” Ultrafine 5K display (as sold by Apple) is somewhat of a mute argument since LG do not quote how much of the Adobe RGB gamut their display is capable of producing; other than to say it produces ‘P3 wide color – 99%’. Nor are there any uniformity tests available for the 5K LG display that I could find (I did not have a display available to test uniformity for comparison with the BenQ SW320 at time of this review) and none of the online reviews I could find of this display even mention uniformity in passing. One other key point of difference is the LG has a high gloss screen and such screens are far from ideal for making fine art prints in my experience. I suspect anyone interested in a wide gamut display for making prints will dismiss the LG out of hand just because of its gloss finish.
Screen surface aside, purchasers of wide gamut monitors should be aware of the differences between the DCI-P3 and Adobe RGB98 Colour Spaces. Whilst the overall volume of the two spaces is similar the red and green primaries are shifted in DCI-P3 and as result there are not insignificant differences between the two colour spaces. Technically, the DCI-P3 space isn’t new. It was established in 2007 by Hollywood as a standard for digital projection devices. This Colour Space was designed to best mimic the colour range of motion picture film, as projected. Since still photographers generally don’t digitally project in theaters, we’ve been more or less ignoring DCI-P3.
Here’s the problem though. The old video standard, Rec.709 was for all intents and purposes essentially identical to sRGB. Videographers and still photographers were basically getting the same thing. DCI-P3 is about the same size as AdobeRGB, only it’s skewed differently in the CIE colour model. AdobeRGB extends deeper into the greens and blues, while DCI-P3 extends more into the reds and a different set of greens.
For still photographers that means we’ve now got a mismatch we need to look out for. This mismatch is going to be most troublesome for people who shoot JPEGs in AdobeRGB Color Space or for photographers outputting RAW files into the Adobe RGB color space for print applications. AdobeRGB has colours in it that DCI-P3 can’t display, and vice versa.
Videographers beware that for true digital cinema work, just having a P3 colour space isn’t sufficient. The Digital Cinema Initiative (DCI) standard also specifies a gamma of 2.6 and a luminance of 48 cd/m2 or 100 cd/m2 depending on whether you’re targeting movie theaters or television, and there are also various white point standards. You will still have to use a profiling device to make sure the display is hitting the correct gamma, luminance, and white point numbers for the specific standard you’re targeting. And of course the LG5K Display does not offer the much more powerful Hardware LUT capability of the other Wide gamut displays discussed above
Shade Hood – Knowing that ambient lighting can obstruct colour accuracy, all BenQ SW series photographic monitors include a detachable shading hood to reduce screen glare to deliver the most accurate colours possible. The newly-designed shade hood included with the SW320 can be used in portrait orientation as well as in landscape orientation (a very nice design consideration). What I really appreciated is the solid build quality of the shade hood. It feels like a high quality addition to the display and not a cheap plastic after thought; like it does on the much more expensive Eizo CG-318 display. In fact, the Eizo CG-318 shade hood looks positively cheap and nasty in side by side comparisons. Once secured in place the shade hood feels extremely robust and is nicely finished inside with anti-reflective black flocking. BenQ are to be commended for providing a shade hood with the display of such a high quality. Another nice touch is the addition of a small operable window at the top of the shade hood to pass a colorimeter through for screen calibration. Quite honestly, the shade hood included with the SW320 is the best I have seen regardless of the brand or price of monitor.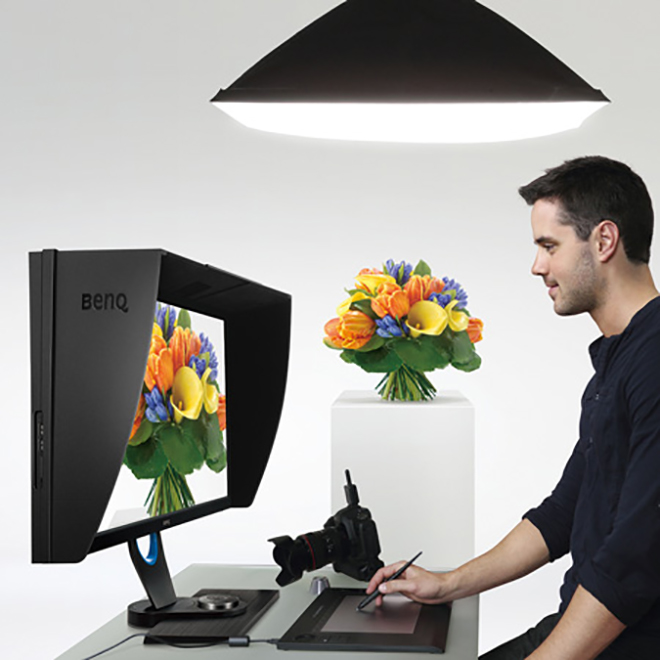
Watch a short video on how to mount the shade hood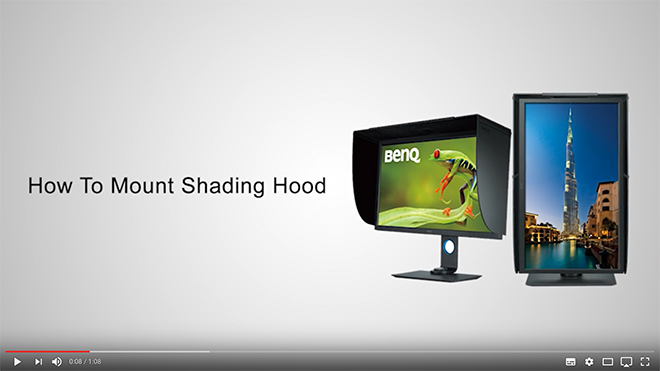 The Bezel and Stand – Attention to small details is very important in high end displays and I was very pleased to see that the bezel of the SW320 is finished in a dark grey matt that minimises any potential bezel reflection. I am told from the factory that extensive testing was done on various bezel surfaces in order to achieve the best result and most optimal viewing experience for photographic professionals. This sort of attention to detail might sound trivial but it ensures an optimal result when you are working for hours at a time in front of the display. In addition to coating changes, the monitor’s stand has been redesigned in a minimalist style, with a sleek L-shaped neck that streamlines with the monitor frame. It looks great on my desk and will likely fit well in most studio spaces. The stand is shipped in two pieces and is easily assembled without tools. There is some facility for cable management and over all the stand feels very solid and well made.
Real World Use – In Real world use the first thing you notice on turning on the SW320 is the incredible resolution that a UHD screen provides and the subsequent desktop real estate that this resolution enables. If you are used to working with a lower resolution display the vast real estate that this sort of display offers will be a revelation to you. Depending on how close you sit to the screen and the quality of your vision you may need to implement some scaling to increase the text size. In my studio I sit quite close to the monitor and have (as of last test 20/20 vision) no problem reading text on screen without the need for any software scaling. Daily life in a UHD environment under MAC OS X just works provided you have good enough eye sight to read the small text. If (like me) you like to work on a single monitor then you recognise the high value of having significant desktop real estate; something the SW320 provides in spades. Colour rendition is excellent on the SW320 and the UHD resolution makes for a powerful and versatile work space.
My daily use for a monitor such as theSW320 involves the editing, post production and printing of digital files in Adobe Lightroom and Adobe Photoshop Creative Cloud. I also use applications such as in-Design, Premiere Pro and other image related programs and plug-ins. On the whole most of my time is in the majority spent in Lightroom and Photoshop and thus this is the area that my comments are most related.
Working in Adobe Lightroom on the BenQ SW320 is a joy and a pleasure. It has always bothered me that the side panels in Lightroom are fixed and not tear away (yes, they can be hidden, but I prefer tear off). The SW320 has so much screen real estate and resolution to play with that the fixed panels are now an absolute non issue for me. I used to have to hide the panels to gain resolution for the actual image on the horizontal axis for a standard 35mm ratio image. On the SW320 however, the extra screen real estate provides sufficient resolution to negate this need and the side panels can now be left open all the time. This might seem like a very small benefit, but in real world use it’s actually extremely beneficial to my workflow. Again, your mileage may vary.
Contrary to what I have read on the internet in various places I experienced absolutely no issues with Lightroom or Photoshop running slowly with a UHD display. I suspect any such issues are almost certainly related to video cards being driven to their limit (and beyond) or because users are not implementing the latest software versions.
The colour rendition of the SW320 is exceptional and when combined with the excellent uniformity the display offers it is extremely easy to judge tone and contrast when processing RAW files. For those of you who place a large emphasis on printing (as I do) you will find the BenQ SW320 to offer very good performance. In fact, it offers performance that far exceeds its modest price tag.
Conclusion – The BenQ SW320 is a superbly constructed high quality UHD wide gamut monitor that offers users exceptional resolution, colour accuracy and uniformity at a price point previously unheard of. The monitor is simple and easy to assemble and operated without issue out of the box with both my laptop and main desktop computers.
Overall picture quality is exceptional with excellent linearity and uniformity across the screen that matches the much more expensive Eizo CG-318 in all but the extreme corners. This is outstanding performance that photographers and other graphic artists will really appreciate in daily use.
The SW320 is also packed with useful new features including GamutDuo and an Advanced Black and White mode that photographers are sure to find beneficial in their workflows.
When I reviewed the Eizo-CG318 Display I niggled that the HDMI ports really should have been version 2.0 and not 1.4 on a display at this price point. I was extremely pleased to see that the BenQ SW320 includes V2 HDMI (again at a price point well below the Eizo). In terms of connectivity it is also worth noting the thoughtful addition a USB hub with 3 USB 3 ports; one port dedicated to the HotKey Puck.
The display hood is extremely well constructed and provides a very solid black around the screen when working. The screen itself exhibits very low reflectance.
A few other nice additions worth noting include VESA mount compatibility and an inbuilt card reader (I prefer external readers but this addition will no doubt prove useful to some). The OSD menus can also be configured in a whopping seventeen different languages.
I am primarily a stills photographer who only occasionally works in video so I confined my testing to predominantly sill images. The video I did pass through the SW320 looked extremely good to my eyes and videographers should be extremely happy with the performance of this display. During the review I tested several 4K video pieces as well as upscaled 1080p video content.
The BenQ SW320 monitor offers the big and accurate colour space I need in my photography and the power of the hardware LUT means there is no banding or posterisation in any of the test images I tried when reviewing the screen. I tested the SW320 with a wide range of my own photographs as well as a large suite of ISF (Image Science Foundation) test images designed specifically to trip up displays (ISF test images are designed to show up weaknesses in displays not often found in general viewing). The SW320 performed without issue on all counts.
I feel it is extremely important that calibration software is intuitive and easy to use. In fact, the simpler the better in most cases as it means there is less chance of users making a mistake during the calibration process. To BenQ’s credit, the supplied Palette Master software is easy and intuitive as well as ensuring accurate calibration of the display. If you purchase an SW320 be sure to use the Palette Master Software to ensure you are accessing the Hardware LUT for the best possible results.
Overall the BenQ SW320 is a superb display that offers a huge UHD resolution workspace in combination with a wide gamut Adobe RGB display at a price point that puts the competition to shame. That is quite a combination that I feel will again see BenQ shake up the marketplace as photographers rush to embrace a display that offers performance and a feature set previously found only in much more expensive displays for those with much deeper pockets.
Full Disclosure – In the spirit of full disclosure I would like to be clear that BenQ provided me with the SW320 test unit at no cost (at least I have received no invoice to date). I also want to be clear that although I am officially an ambassador for BenQ they have in no way tried to influence my review and instead specifically asked me to be thorough and rigorous in my testing of the SW320. I only ever accept products to review on the clear understanding that I will be completely impartial and report anything negative I find as well as anything positive. Since I am using these products in my own workflow being clear, honest and forthright is my number one priority.

 Despite outward appearances, the best photographic opportunities are fleeting and momentary in Antarctica. Therefore the most important thing you should keep in mind when choosing your photographic equipment is the ability to work quickly when shooting from ship, when cruising on zodiacs and when you are ashore. Familiarity with your equipment is absolutely critical if you are going to give yourself the best possible chance to capture stunning images during your expedition experience. I cannot stress the importance of this next point enough. Under no circumstances should you even consider taking a brand new camera that you are unfamiliar with. Such a tool will ensure you miss opportunities as you fumble with unfamiliar controls and settings. Be sure to take camera equipment that you are intimately familiar with and can use with a high degree of confidence. The more familiar you are with your camera the more likely you are to capture amazing photographs. Your knowledge of your cameras controls is going to have far greater bearing on the quality of your photography you produce than what brand and model of camera you might use. I believe this point is so important I am going to restate it in its own paragraph.
 Antarctica is a very demanding place to photograph. It is one of the coldest, windiest and driest places on the planet and as a result it can be very hard on photographic equipment (and photographers!). You will be forced to contend with corrosive salt sea spray during zodiac operations, shore landings and when photographing from the deck of the ship. If you are at all concerned about the ability of your camera to withstand these sort of elements then rain and spray covers for your equipment are a very good idea. You wont need to use them all the time, but there will likely be days when the salt spray is flying and you will want to protect your expensive equipment.
 During zodiac operations it is reasonable to expect some salt spray to get into the boat and onto your equipment. Therefore I absolutely recommend you bring a large dry bag with you that you can work out of when shooting from zodiacs and when travelling to and from the ship for shore landings. A dry bag will give you some much needed protection for your equipment and provide you a place to store equipment when there is spray in the air or to store extra equipment when you go ashore. Personally, I use a large 120 litre dry duffle bag that I can put my whole camera bag inside and find this works extremely well in the field. It might sound obvious but when choosing a dry bag try and find one that is a nice bright colour. A black or blue dry bag is going to be virtually invisible if it were to fall in the water.
 If you are prone to feeling the cold then you might want to consider some chemical hand warmers. I am not really a fan of these use once and dispose warmers as there are some environment issues surrounding them. However, they are very effective and will keep your hands warm on cold days. One in each pocket is usually sufficient and you can then put your hands into warm pockets whenever you feel cold. The alternative is battery headed clothing (which is even more effective) and which is readily available from companies such as Gyde.
  One of the items I really like to travel with for Antarctic expeditions is my own life jacket. It is mandatory to wear a life jacket during all zodiac operations and the expedition ship will provide you with a lifejacket so you don’t have to bring your own. However, the life jackets provided are generally quite bulky and restrictive and I personally find them a hindrance when photographing. Light weight self inflating life jackets are relatively inexpensive and take up little space in checked luggage so I prefer to travel with my own.
 Frankly there is little need for a tripod in Antarctica unless you wish to try some long exposures during shore landings or you wish to use it to support a long / heavy lens. In all the expeditions I have done to Antarctica I can recall only one instance where I used a tripod for a long exposure (although I do use a tripod a lot to support heavy telephoto lenses). Generally tripods slow down the pace at which you can work and although this can be a real positive in contemplative landscape photography it is more often a hindrance in Antarctica where working quickly is one of they keys to success.
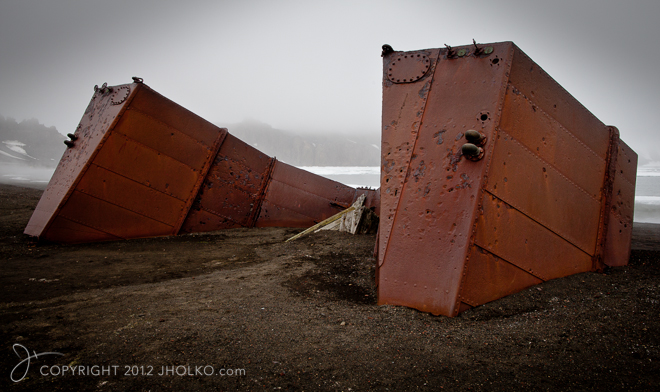 Despite what you might think Antarctica is actually an incredibly dusty environment and you will end up with dust spots on your sensor at some point during the expedition. If you are comfortable cleaning your own sensor then I do recommend you travel with whatever you usually use to clean your sensors. It is not uncommon to have to clean the sensor a few times during an expedition if you change lenses frequently.
 The overall key concepts to keep in mind in terms of equipment for any photographic expedition to Antarctica is flexibility and familiarity. The more flexible you can be with your camera equipment and the more familiar you are with its operation the better your chances for producing an extremely strong body of work from your expedition. The best investment you can make before your expedition is to ensure you become intimately familiar with the operation of all your camera equipment (irrespective of brand or model). If you embark on your expedition with equipment you are intimately familiar and confident with you will absolutely produce your best work. Have a wonderful and prosperous expedition!
 After our Winter Frozen north workshop I am leading a small group of wildlife photographers up to the extreme northwest of Iceland to photograph Arctic Foxes in a winter setting. We are using a private charter boat to access the remote peninsula and will spend a week living with the Arctic Foxes. Having worked extensively in this area over the last three years on my
 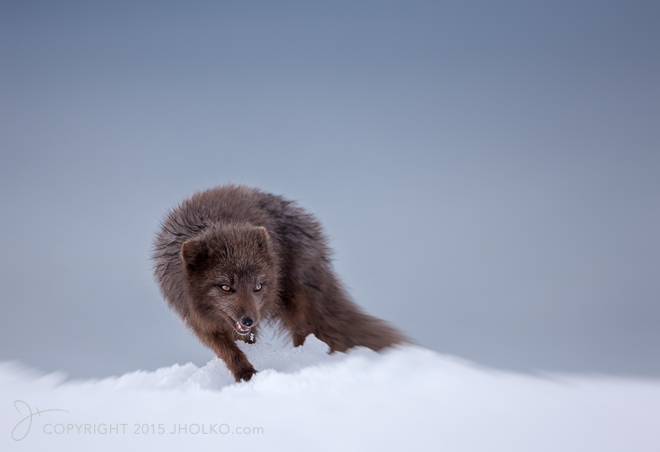 After I finish in Iceland I am travelling to Svalbard for a week long snow mobile expedition for a new short film about Nature photography in winter in the Arctic. It has been a couple of years since I was last in Svalbard on snow mobiles in winter and I am really looking forward to getting back out into the back country and wilderness in a winter setting. With just a two person film crew we will be light and mobile and should be able to cover a lot of ground and hopefully have some wonderful wildlife encounters.
 Packing for these sort of expeditions is always a challenge. In terms of subject matter, there will be both extensive wildlife and landscape opportunities during these expeditions and as such I am packing both wide angle and telephoto lenses. With that in mind I settled on the following as my selection for these trips:
 My gear pick of the year for 2016 is split this year between the outstanding Canon EOS 1DX MKII and the brand new
 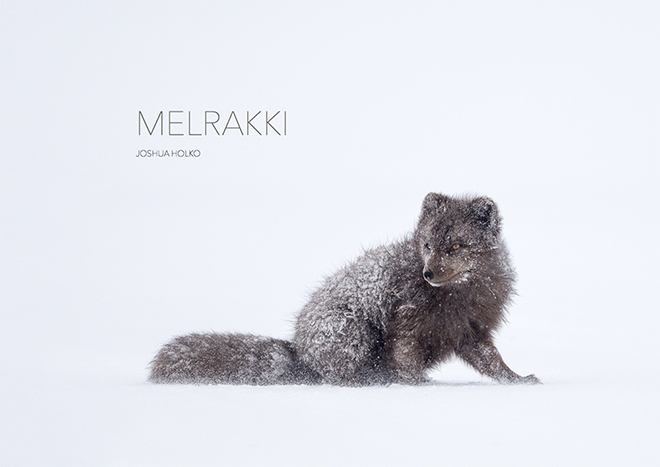 In 2016 I was extremely honoured to be asked to join the
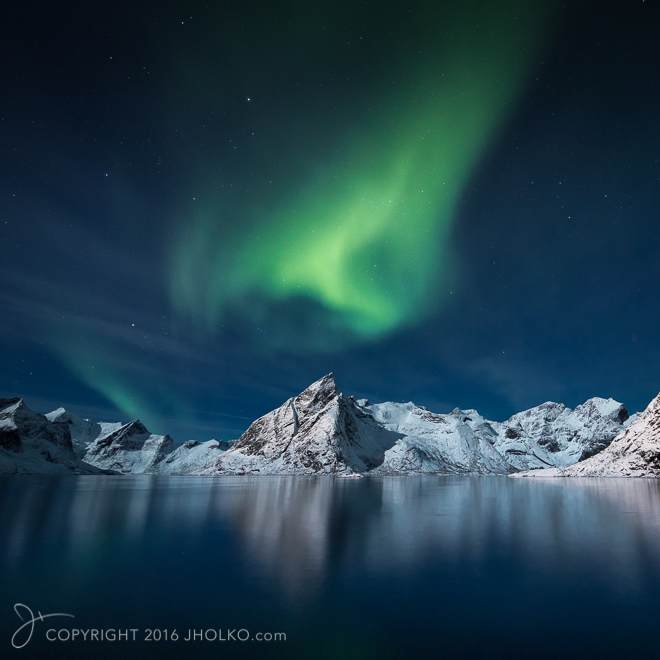
 2016 was also the biggest year yet for me both with destinations visited and sheer number of international miles travelled. 2016 also marked my first visit to the Lofoten Islands in Norway; a location I am very much looking forward to returning to in 2018 (details to be released soon). I have no idea how many actual miles I covered in 2016 in total, how many aeroplanes I boarded, how many times I went through airport security or how many tens of hours I spent waiting around in airports for connecting flights, but it was an awful lot. 2017 is shaping up to be an equally hectic year and I am trying to work through as much office work as possible in the next two weeks before I board the next plane in mid January.
 After Antarctica I returned to the extreme northwest of Iceland and finished the work on my Arctic Fox Project. This personal project spanned three years of winter photography in Iceland and was published as the Limited Edition book
  After Iceland I travelled to Lofoten to lead a brand new winter workshop to these spectacular islands (
 After Lofoten I travelled to Namibia where I lead a
 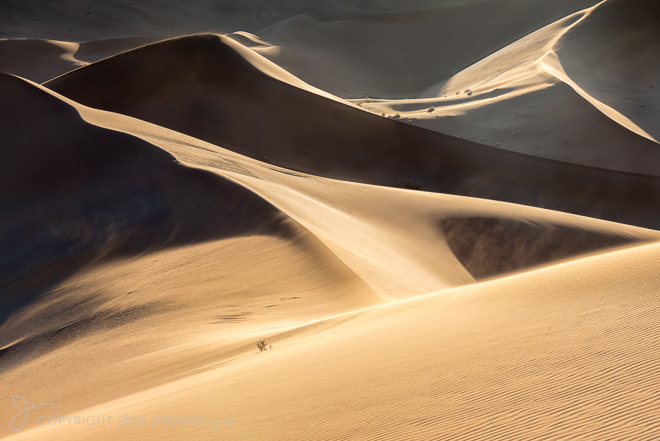 After Namibia, I ran my annual two week New Zealand South Island workshop which saw us circumnavigate the South Island via private 4-wheel drives and that included significant helicopter time over the spectacular southern Alps as well as the Teanu region. We also visited Milford Sound, Queenstown, Fox Glacier, Mount Cook and a great many other off the beaten track locations during the workshop. This year I also included an optional extension to the northern coastline region of the South Island which proved very fruitful for coastal scenery (
 After a short break, I then travelled back to Svalbard for my Wild Polar Bears expedition (
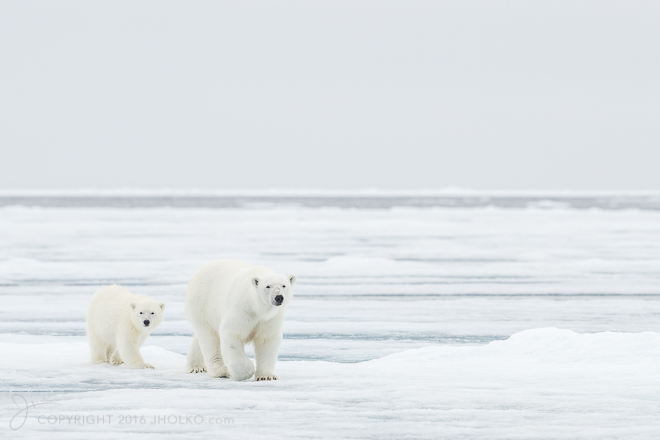

 In November I lead a brand new expedition to a very remote area of Antarctica to camp with Emperor Penguins on the sea ice in Gould Bay (
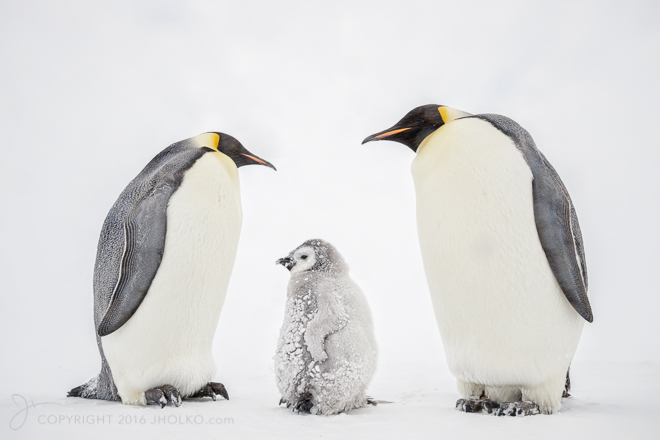 After the expedition to the Emperor Penguins I guided one final trip to South Georgia Island and Antarctica –
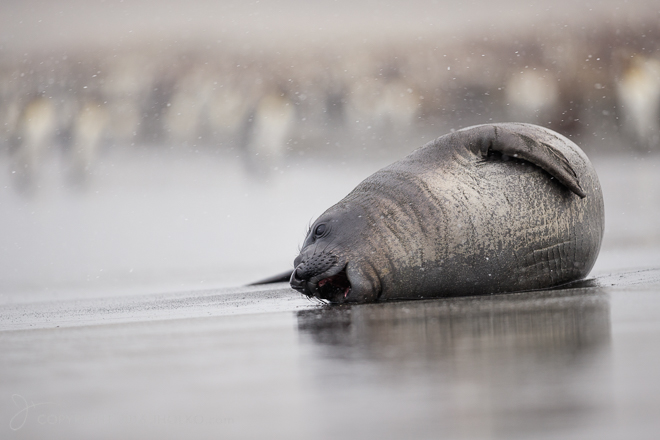
 All up I led a total of eleven separate international workshops and expeditions in 2016 spread across the globe (not including some local private workshops to the Great Ocean Road as well as one-on-one Print workshops). A brief count tallies up around fifty plane segments and just over forty thousand exposures (wish they were all keepers!) and a lot more than forty hours of lost sleep. It was a fantastic year and I just want to thank all of you who I was fortunate to meet, travel and photograph with throughout the year. It was real privilege to share in such remarkable destinations with so many fantastic passionate photographers – thank you.
 2017 is shaping up to be an even bigger year than 2016 in terms of both miles and locations and I am really excited about whats in store. In January I will be heading back to Italy (I was last in Italy back in 2012) to be part of a new television series being filmed about photography that will be screened across Europe next year (more on this later). From Italy I am travelling to Finland on a private project to photograph Great Grey Owls and Hawk Owls (and hopefully Wolverine) in winter. I am really looking forward to this trip as I have not visited Finland before and to be heading there in winter is very exciting. I hope I can also offer this trip as a future workshop at a later date.
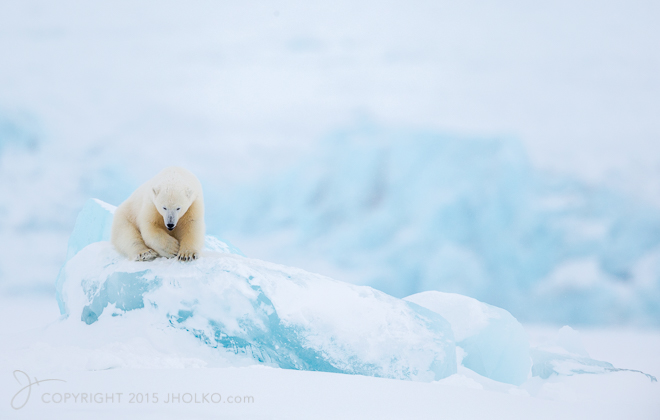 On return to Longyearbyen I am leading a new sold out winter expedition by ship to photograph both the frozen winter landscape of Svalbard as well as Polar Bears, Reindeer, Arctic Fox and Walrus in winter light. I have been looking forward to this expedition for more than two years now, having conducted a scouting trip back in 2013. The opportunities in Svalbard at this time of year for golden winter light are truly superb.
 After New Zealand I will lead a private workshop to the Great Ocean road in Australia and then down to Tasmania for photography down both the east and west coasts. Look for a future photography, food and wine workshop to Tasmania in 2018.
 In July I will head back to Svalbard to lead my Polar Bears of Svalbard Expedition. We will depart from the small town of Longyearbyen and sail up to the edge of the permanent pack ice where we will spend out time searching for and photographing the king of the Arctic.
 In September I am travelling to the east coast of Greenland with Daniel Bergmann for two new back-back expeditions into the spectacular Scoresby Sund fjord system. Home to some of the most extraordinary geology to be found on earth, the red and orange glacial scarred landscape of Greenland stands in stark contrast to the electric blue icebergs that carve off its many glaciers and drift slowly down its precipitous fjords. It is a remote land of untamed and unbridled beauty that is rarely visited and even less rarely photographed. It is an incredible place to inspire the imagination and fuel your photographic desires.
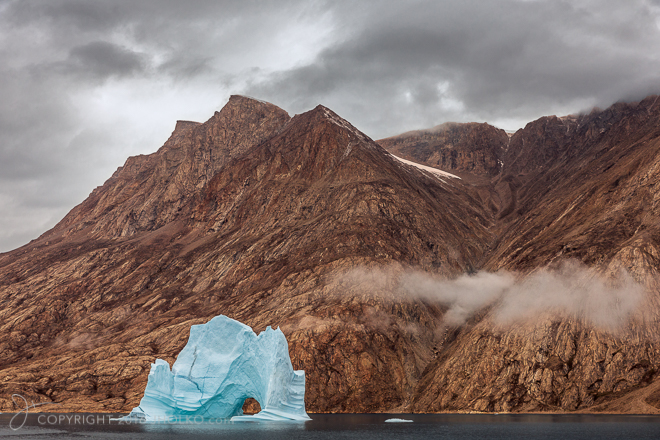 Finally in November I am heading back to
  Amongst all of the above I hope to get back to Greenland in Winter after my Svalbard expeditions (we will see if time permits) to photograph with the Arctic Arts group.